Epson PowerLite 7350 driver and firmware

Related Epson PowerLite 7350 Manual Pages
Download the free PDF manual for Epson PowerLite 7350 and other Epson manuals at ManualOwl.com
Technical Brief (Multimedia Projectors) - Page 1
...controls M ELP Link IV software M Flexible installation M EasyMP and EasyMP.net
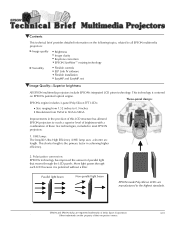
Image Quality-Superior brightness
All EPSON multimedia projectors include EPSON's integrated LCD prism technology. This technology is centered
on EPSON's patented optical engine.
Three-panel design:
EPSON's engine includes 3-panel Poly-Silicon TFT LCD's:
LL
Size ranging from 1.32 inches to 0.9 inches Resolutions...
Technical Brief (Multimedia Projectors) - Page 5
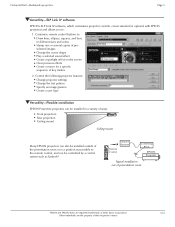
... copies of preselected images Change the cursor shape Play a selected sound effect Create a spotlight effect on the screen Clear previous effects Create a macro for a specific sequence of key strokes
2. Control the following projector features: Change projector settings Change the test pattern Specify an image gamma Create a user logo
Versatility-Flexible installation
EPSON PowerLite projectors...
Technical Brief (Multimedia Projectors) - Page 6
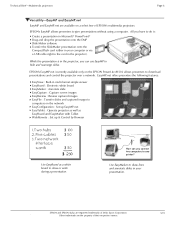
... presentation onto the CompactFlash card (either in your computer or via a USB cable right to the card in the projector.)
While the presentation is in the projector, you can use EasyMP to hide and rearrange slides.
EPSON's EasyMP.net (currently available only on the EPSON PowerLite 8150i) allows presenters to download presentations and control the projector over a network. EasyMP.net offers...
User Manual - Page 7

...
Connecting Needed Cables 102
Installing the Software for Windows 102
Installing the Software for a Macintosh 104
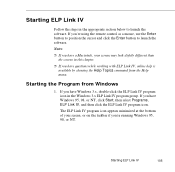
Starting ELP Link IV 105
Starting the Program from Windows 105
Starting the Program on a Macintosh 106
Changing the COM Port Assignment 106
Customizing the Remote Control Effects Buttons 107
Function Description and Usage 107
Assigning Functions 111
Setting Effects...
User Manual - Page 10

... as a wireless mouse to control operations on your computer screen during presentations. Additionally, you can install the projector's ELP Link IV software to control the projector's settings from your computer and enhance your presentations with special effects.
Your projector features a new patented SizeWise™ chip for support of SVGA, UGA, XGA, and SXGA (PowerLite 5350), and XGA, VGA, SXGA...
User Manual - Page 15

... and Index are provided at the end of the manual.
Where to Get Help
If you are having trouble setting up or running your projector, first see Chapter 6, "Troubleshooting." If you cannot resolve the problem, EPSON provides technical assistance through electronic support services and automated telephone services 24 hours a day. The following tables list the contact information.
Electronic...
User Manual - Page 109
... your desktop
or laptop computer to control projector features and draw special graphics on your screen. You can also use the software to reconfigure the special effects buttons on the remote control. This chapter describes how to: ❐ Install the software ❐ Start ELP Link IV ❐ Customize the remote control Effects buttons ❐ Control standard and special projector features...
User Manual - Page 110
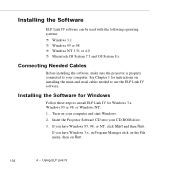
... to your computer. See Chapter 1 for instructions on installing the main and serial cables needed to use the ELP Link IV software.
Installing the Software for Windows
Follow these steps to install ELP Link IV for Windows 3.x, Windows 95 or 98, or Windows NT: 1. Turn on your computer and start Windows. 2. Insert the Projector Software CD into your CD-ROM drive. 3. If you have Windows 95, 98...
User Manual - Page 111
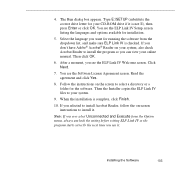
... a folder for the software. Then the Installer copies the ELP Link IV files to your system.
9. When the installation is complete, click Finish.
10. If you selected to install Acrobat Reader, follow the on-screen instructions to install it.
Note: If you ever select Unconnected and Execute from the Option menu, always uncheck the setting before exiting ELP Link...
User Manual - Page 112
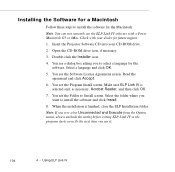
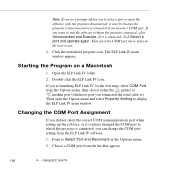
... the Macintosh:
Note: You can not currently use the ELP Link IV software with a Power Macintosh G3 or iMac. Check with your dealer for future support.
1. Insert the Projector Software CD into your CD-ROM drive.
2. Open the CD-ROM drive icon, if necessary.
3. Double-click the Installer icon.
4. You see a dialog box asking you to select a language for the...
User Manual - Page 113
... you're using the remote control as a mouse, use the Enter button to position the cursor and click the Enter button to launch the software.
Notes:
❐ If you have a Macintosh, your screens may look slightly different than the screens in this chapter.
❐ If you have questions while working with ELP Link IV...
User Manual - Page 114
... the Option menu, then choose either the printer or
modem port (whichever port you connected the serial cable to). Then open the Option menu and select Property Setting to display the ELP Link IV main window.
Changing the COM Port Assignment
If you did not select the correct COM (communication) port when setting up the software, or if you have changed the COM...
User Manual - Page 137
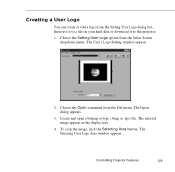
.... The User's Logo Setting window appears.
2. Choose the Open command from the File menu. The Open dialog appears.
3. Locate and open a bitmap or logo (.bmp or .lgo) file. The selected image appears in the display area.
4. To crop the image, click the Selecting Area button. The Selecting User Logo Area window appears.
Controlling Projector Features
129
User Manual - Page 138
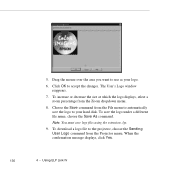
... the logo to your hard disk. To save the logo under a different file name, choose the Save As command.
Note: You must save logo files using the extension .lgo.
9. To download a logo file to the projector, choose the Sending User Logo command from the Projector menu. When the confirmation message displays, click Yes.
130
4 •...
User Manual - Page 140
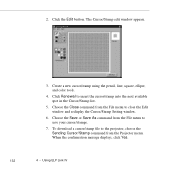
... menu to close the Edit window and redisplay the Cursor/Stamp Setting window.
6. Choose the Save or Save As command from the File menu to save your cursor/stamps.
7. To download a cursor/stamp file to the projector, choose the Sending Cursor/Stamp command from the Projector menu. When the confirmation message displays, click Yes.
132
4 • Using...
User Manual - Page 141
... Cursor/Stamp Setting window displays allowing you to create a new set of cursors/stamps.
Opening a File
To open a cursor/stamp file: 1. Choose the Open command from the File menu. A standard
Windows Open dialog displays. 2. Select the .csp file and click Open. 3. To edit a cursor/stamp, click on it and then click Edit.
Exiting the Software
To exit...
User Manual - Page 156
... may not be selected. Press the Computer button on the control panel or the Comp1, Video, or BNC button on the remote control to choose another image source.
◗ Only part of the computer image is displayed.
If the computer's output resolution setting is higher than 1024 × 768 on the PowerLite 7250 or 7350, or higher than 800 × 600...
User Manual - Page 174

..., 91, 119 menu option, 89 saturation, 91, 119 COM port, changing, 106 CompuServe, 7 Computer connector pin assignments, 160 Computer, adjusting projected image for, 88 to 91 Connecting projector to a desktop Macintosh, 34 to 42 to a desktop PC, 22 to 28 to a high-end workstation, 52 to a laptop PC, 29 to 33 to a PA system, 56 to 57...
User Manual - Page 175
..., 88, 90, 119 adjusting quality, 88 to 91 leaving a copy on the screen, 109 problems, 148 to 151 resizing, 70 size range, 154
Image Gamma, 126 to 127 Infrared receivers, location, 62 Installing batteries, 18 to 19
Installing the ELP Link IV software, 102 to 104
Internet, 7
K
Key Macro function, 110, 115 Keystone, 64, 69...
User Manual - Page 177
... tone, 92, 121 adjusting the volume, 92, 121 connecting projector to, 56 to 57 Specifications electrical, 155 environmental, 155 general, 153 to 154 lamp, 154 mechanical, 155 remote control, 155 safety, 156 Stamp function, 109, 114 Status lights, 80 to 81, 144 to 146 Support, technical, 8 S-Video signal, 16, 162
Sync, 88, 119, 120...