HP Pavilion ze4600 - Notebook PC driver and firmware
Drivers and firmware downloads for this Hewlett-Packard item

Related HP Pavilion ze4600 Manual Pages
Download the free PDF manual for HP Pavilion ze4600 and other HP manuals at ManualOwl.com
End User License Agreement - Page 1
... the HP Product.
RIGHTS IN THE SOFTWARE
the right to distribute the Software
PRODUCT ARE OFFERED ONLY Product. You may load the Software
ON THE CONDITION THAT YOU Product into Your Computer's
AGREE TO ALL TERMS AND
temporary memory (RAM) for
CONDITIONS OF THIS EULA. BY purposes of using the Software
INSTALLING, COPYING,
Product.
DOWNLOADING, OR
b. Storage. You may copy the
OTHERWISE...
End User License Agreement - Page 2
entirely by the terms and conditions of such license.
f. Recovery Solution. Any software recovery solution provided with/for your HP Product, whether in the form of a hard disk drive-based solution, an external media-based recovery solution (e.g. floppy disk, CD or DVD) or an equivalent solution delivered in any other form, may only be used for restoring the hard...
Maintenance and Service Guide - Page 6
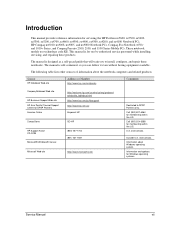
...other sources of information about the notebook computers and related products.
Source
HP Notebook Web site
Address or Number
http://www.hp.com/notebooks
Comments
Compaq Notebook Web site
HP Business Support Web site HP Asia Pacific Channel Support Centre for DPSP Partners America Online
CompuServe
HP Support Assist CD-ROM
Microsoft® Windows® manual
Microsoft Web site
http://welcome...
Maintenance and Service Guide - Page 23
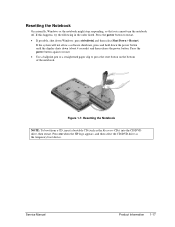
... to press the reset button on the bottom of the notebook.
Figure 1-7. Resetting the Notebook
NOTE: To boot from a CD, insert a bootable CD (such as the Recovery CDs) into the CD/DVD drive, then restart. Press esc when the HP logo appears, and then select the CD/DVD drive as the temporary boot device.
Service Manual
Product Information 1-17
Maintenance and Service Guide - Page 39
...
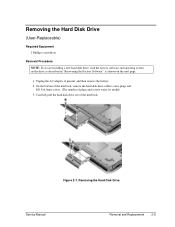
Removal Procedure NOTE: If you are installing a new hard disk drive, load the factory software and operating system on the drive as described in "Recovering the Factory Software", as shown on the next page.
1. Unplug the AC adapter, if present, and then remove the battery. 2. On the bottom of the notebook, remove the hard disk drive rubber screw plugs and
M2.5×...
Maintenance and Service Guide - Page 41

...while Windows is running, replace the OS CD with the Driver Recovery CD. If autorun is not enabled, select Start > Run. Then type D:\SWSETUP\APPINSTL\SETUP.EXE (assuming "D:" is your drive designation), and then press enter. 9. Follow the on-screen instructions for installing the drivers. 10. After the drivers have been installed, the application software may be installed.
Service Manual
Removal...
Maintenance and Service Guide - Page 53
... file. 2. Plug in an AC adapter. 3. Insert the Service Utilities floppy disk in the floppy drive. If the unit has no internal floppy drive,
connect a USB floppy drive. 4. Turn on the notebook. 5. When you see the HP logo, press esc to display the boot menu, then boot from the floppy drive. 6. Select the option to update the display/LCD identification stored on the...
Maintenance and Service Guide - Page 79
... using the Service Utility floppy disk. 1. Download the notebook service package from the Partnership Web site (see page vii), and
create a Service Utilities floppy disk as described in the package's Readme file. 2. Plug in an AC adapter. 3. Insert the Service Utilities floppy disk in the floppy drive. 4. Turn on the notebook. When the HP logo appears (on either the built-in display or the...
Maintenance and Service Guide - Page 81
... using the Service Utility floppy disk. 1. Download the notebook service package from the Partnership Web site (see page vii), and
create a Service Utilities floppy disk as described in the package's Readme file. 2. Plug in an AC adapter. 3. Insert the Service Utilities floppy disk in the floppy drive. 4. Turn on the notebook. When the HP logo appears (on either the built-in display or the...
Maintenance and Service Guide - Page 85
... display. 1. Download the notebook Series service package from the Partnership Web site (see page vii),
and create a Service Utilities floppy disk as described in the package's Readme file. 2. Plug in an AC adapter. 3. Insert the Service Utilities floppy disk in the floppy drive. If the unit has no internal floppy
drive, connect a USB floppy drive. 4. Turn on the notebook. 5. When you see the HP...
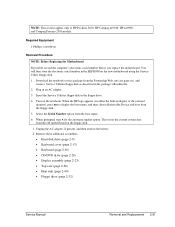
Maintenance and Service Guide - Page 86

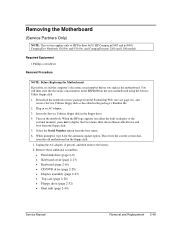
... IC contains only enough basic programming to enable the notebook to boot. After installing a new motherboard, you must reprogram the BIOS IC, preferably with the latest BIOS-(see page 2-60.)
1. Remove the following components from the old motherboard, and then install onto the new motherboard: • CPU module • Wireless LAN Mini PCI card (if present) • SDRAM modules
2. Follow the...
Maintenance and Service Guide - Page 87
... 2-52.
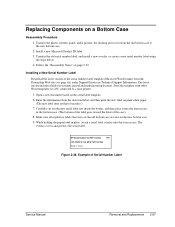
Installing a New Serial Number Label
Download the latest version of the serial number label template (Microsoft Word format) from the Partnership Web site (see page vii) under Support/Service in Technical Support Information. The latest version includes fields for warranty period and manufacturing location. Store the template with other Word templates on a PC connected to a laser printer...
Maintenance and Service Guide - Page 89
... select Change Settings in the Connect window to define your connection settings. 7. When the process completes, press the power button to reset the notebook.
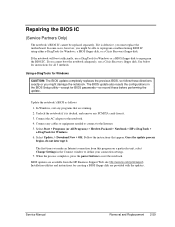
BIOS updates are available from the HP Business Support Web site http://www.hp.com/go/bizsupport. Installation utilities and instructions for creating a BIOS floppy disk are provided with the updates.
Service Manual
Removal and Replacement...
Maintenance and Service Guide - Page 103
... new software (including drivers), uninstall that software. Contact software vendor for additional support.
Notebook can take a minute or longer to resume if network card is installed. Blinking cursor appears while system is loading and checking hardware and network connections. When hardware is reinitialized, Windows desktop appears.
Notebook won't suspend if connection to another computer is...
Maintenance and Service Guide - Page 105
... Control Panel, Administrative Tools, and Computer Management under Storage.
Use Recovery CDs to reformat hard disk and reinstall factory software.
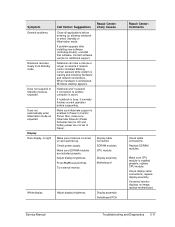
Hard disk allocates approximately 20 MB to diagnostic software. This space is unavailable for other uses, and not included in hard disk capacity reported by Windows.
Repair Center: Likely Causes
Hard drive
No response from floppy drive.
Floppy drive...
Maintenance and Service Guide - Page 107
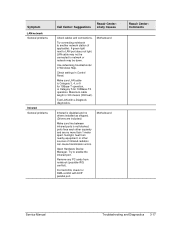
...In Mouse Properties, select Synaptics PS/2 TouchPad driver. (Driver is installed from \hp\drivers\TouchPad.)
Top case Motherboard
Top case Motherboard Top case Motherboard
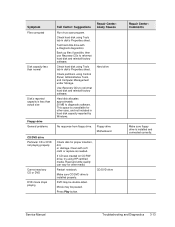
Make sure C drive has adequate free space. Delete temporary and unneeded files.
Use memory troubleshooter in Windows Help.
Not all third-party memory cards have been tested for use with notebook.
Use only DDR-266 SDRAM modules...
Maintenance and Service Guide - Page 109
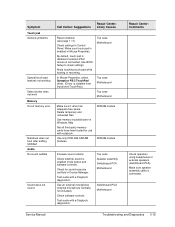
... 1 meter apart. Sunlight, heat from nearby equipment, or other sources of infrared radiation can cause transmission errors.
Open Hardware Device Manager. Try to enable the infrared port.
Remove any PC cards from notebook (possible IRQ conflict).
For fast-IrDA, check for DMA conflict with ECP parallel port.
Motherboard
Repair Center: Comments
Service Manual
Troubleshooting and Diagnostics 3-17
Maintenance and Service Guide - Page 112
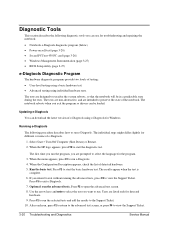
.... The notebook reboots when you exit the program so drivers can be loaded.
Updating e-Diagtools
You can download the latest version of e-Diagtools using e-Diagtools for Windows.
Running e-Diagtools
The following procedure describes how to run e-Diagtools. The individual steps might differ slightly for different versions of e-Diagtools.
1. Select Start > Turn Off Computer (Shut Down) or Restart...
Maintenance and Service Guide - Page 124
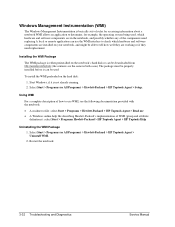
... notebook's hard disk or can be downloaded from http://wwwhpcom/toptools (the contents are the same in both cases) The package must be properly installed before it can be used
To install the WMI preloaded on the hard disk:
1. Start Windows, if it is not already running. 2. Select Start > Programs (or All Programs) > Hewlett-Packard > HP Toptools Agent > Setup...
Maintenance and Service Guide - Page 127
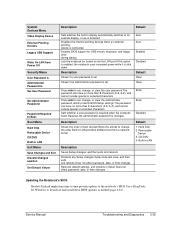
... an external display, if one is detected Disables the internal pointing devices when an external pointing device is connected Enables BIOS support for USB mouse, keyboard, and floppy drive during startup Lets the notebook be turned on via the LAN port If this option is enabled, the notebook uses increased power while it is shut down
Description
Shows if a user password is set
Shows...