MSI K8N driver and firmware


Related MSI K8N Manual Pages
Download the free PDF manual for MSI K8N and other MSI manuals at ManualOwl.com
User Guide - Page 4
... for further guidance. h Visit the MSI homepage & FAQ site for technical guide, BIOS updates, driver
updates, and other information: http://www.msi.com.tw & http://www.msi. com.tw/program/service/faq/faq/esc_faq_list.php h Contact our technical staff at: support@msi.com.tw
Safety Instructions
1. Always read the safety instructions carefully. 2. Keep this User's Manual for future reference. 3. Keep...
User Guide - Page 6
... the First Boot Device 3-2 Control Keys 3-3 Getting Help 3-3 The Main Menu 3-4 Standard CMOS Features 3-6 Advanced BIOS Features 3-8 Advanced Chipset Features 3-11 Integrated Peripherals 3-12 Power Management Setup 3-17 PNP/PCI Configurations 3-20 H/W Monitor ...3-22 Cell Menu ...3-23 Load Fail-Safe/Optimized Defaults 3-27 Set Supervisor/User Password 3-28 Chapter 4. Introduction...
User Guide - Page 7
... Instructions 5-3 Setting Up the NVRAID BIOS 5-3 NVIDIA RAID Untility Installation 5-7 Installing the RAID Driver (for bootable RAID Array 5-7 Installing the NVIDIA RAID Software Under Windows (for Non-bootable RAID Array 5-8 Initializing and Using the Disk Array 5-9 RAID Drives Management 5-11 Viewing RAID Array Configurations 5-11 Setting Up a Spare RAID Disk 5-13 Rebuilding a RAID...
User Guide - Page 11
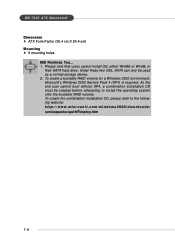
... Factor (30.4 cm X 24.4 cm) Mounting h 9 mounting holes
MSI Reminds You... 1. Please note that users cannot install OS, either WinME or Win98, in
their SATA hard drive. Under these two OSs, SATA can only be used as a normal storage device. 2. To create a bootable RAID volume for a Windows 2000 environment, Microsoft's Windows 2000 Service Pack 4 (SP4) is required. As the end user...
User Guide - Page 20
Hardware Setup
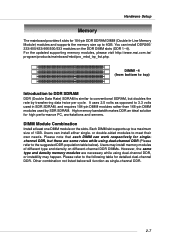
Memory
The mainboard provides 4 slots for 184-pin DDR SDRAM DIMM (Double In-Line Memory Module) modules and supports the memory size up to 4GB. You can install DDR266/ 333/400/433/466/500/533 modules on the DDR DIMM slots (DDR 1~4). For the updated supporting memory modules, please visit http://www.msi.com.tw/ program/products/mainboard/mbd...
User Guide - Page 24
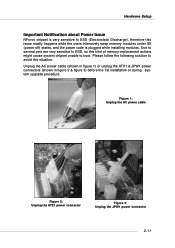
... of memory-replacement actions might cause system chipset unable to boot. Please follow the following solution to avoid this situation. Unplug the AC power cable (shown in figure 1) or unplug the ATX1 & JPW1 power connectors (shown in figure 2 & figure 3) before the 1st installation or during system upgrade procedure.
Figure 1: Unplug the AC power cable
Figure 2: Unplug the ATX1 power connector...
User Guide - Page 31
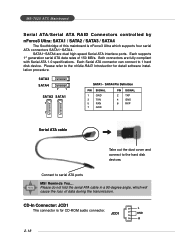
... which supports four serial ATA connectors SATA1~SATA4.
SATA1~SATA4 are dual high-speed Serial ATA interface ports. Each supports 1st generation serial ATA data rates of 150 MB/s. Both connectors are fully compliant with Serial ATA 1.0 specifications. Each Serial ATA connector can connect to 1 hard disk device. Please refer to the nVidia RAID Introduction for detail software installation procedure...
User Guide - Page 50
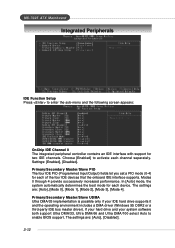
... DMA/33 implementation is possible only if your IDE hard drive supports it and the operating environment includes a DMA driver (Windows 95 OSR2 or a third-party IDE bus master driver). If your hard drive and your system software both support Ultra DMA/33, Ultra DMA/66 and Ultra DMA/100 select Auto to enable BIOS support. The settings are: [Auto], [Disabled]. 3-12
User Guide - Page 67
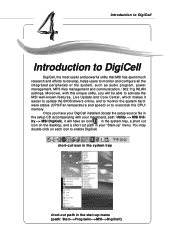
... WLAN
settings. Moreover, with this unique utility, you will be able to activate the
MSI well-known features, Live Update and Core Center, which makes it
easier to update the BIOS/drivers online, and to monitor the system hard-
ware status (CPU/Fan temperature and speed) or to overclock the CPU/
memory.
Once you have your DigiCell installed (locate the setup...
User Guide - Page 68
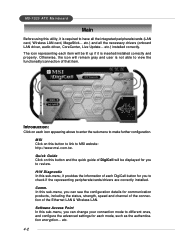
... representing peripherals/cards/drivers are correctly installed. Comm. In this sub-menu, you can see the configuration details for communication products, including the status, strength, speed and channel of the connection of the Ethernet LAN & Wireless LAN. Software Access Point In this sub-menu, you can change your connection mode to different ones, and configure the advanced settings for...
User Guide - Page 69
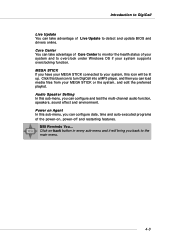
... icon to turn DigiCell into a MP3 player, and then you can load media files from your MEGA STICK or the system, and edit the preferred playlist. Audio Speaker Setting In this sub-menu, you can configure and test the multi-channel audio function, speakers, sound effect and environment. Power on Agent In this sub-menu, you...
User Guide - Page 71
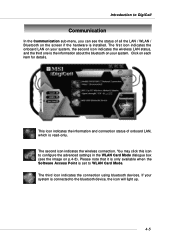
... second icon indicates the wireless connection. You may click this icon to configure the advanced settings in the WLAN Card Mode dialogue box (see the image on p.4-8). Please note that it is only available when the Software Access Point is set to WLAN Card Mode. The third icon indicates the connection using bluetooth devices. If your system...
User Guide - Page 75
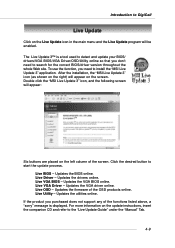
... Live VGA Driver - Updates the VGA driver online. Live OSD - Updates the firmware of the OSD products online. Live Utility - Updates the utilities online. If the product you purchased does not support any of the functions listed above, a "sorry" message is displayed. For more information on the update instructions, insert the companion CD and refer to the "Live Update Guide" under the "Manual" Tab...
User Guide - Page 89
...the Windows CD, use the floppy disk that has the RAID driver to copy
and install the nForce RAID software. (Check Chapter 5, NVidia RAID Utility Installation, for details.) 4. Initialize the NVRAID Array Disks.
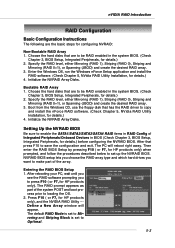
Setting Up the NVRAID BIOS
Be sure to enable the SATA1/SATA2/SATA3/SATA4 RAID items in RAID Config of Integrated Peripherals/Onboard Devices in BIOS (Check Chapter 3, BIOS Setup, Integrated...
User Guide - Page 92
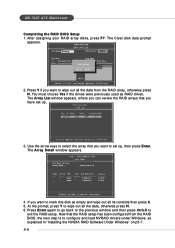
..., press Y to wipe out all the data, otherwise press N. 6. Press Enter again to go back to the previous window and then press Ctrl+X to
exit the RAID setup. Now that the RAID setup has been configured from the RAID BIOS, the next step is to configure and load NVRAID drivers under Windows, as explained in "Installing the NVIDIA RAID Software Under Windows" on p5-7. 5-6
User Guide - Page 93
... the instruction below to make an NVIDIA Serial ATA RAID driver for yourself.
1. Insert the MSI CD into the CD-ROM drive. 2. Ignore the Setup screen and use "Explorer" to browse the CD. 3. Copy all the contents (including the sub-folders) in the
\\nVidia\System\CK8S\Win2k-XP\IDE\WinXP to a formatted floppy disk. 4. The driver disk for nVIDIA Serial ATA driver is done. (2) Select "NVIDIA RAID CLASS...
User Guide - Page 94
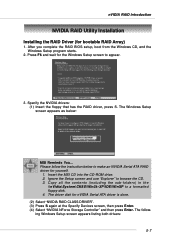
... time you add a new hard drive to a RAID array, the RAID driver will have to be installed under Windows once for that hard drive. After that, the driver will not have to be installed
Installing the NVIDIA RAID Software Under Windows (for Non-bootable RAID Array)
The existing Windows IDE Parallel ATA driver (as well as the Serial ATA driver if SATA is enabled) must be upgraded to use the NVIDIA IDE...
User Guide - Page 109

...-7025 ATX Mainboard
Driver Installation
Click on the Driver tab and the screen below will display. Click on the driver you like to install, and follow the proceeding instructions.
NVIDIA nForce3 System Driver
This driver is only available for Windows 2000 and Windows XP operating system. Please follow the following step to install the driver correctly. 1. Click on this button to install the NVIDIA...
User Guide - Page 111
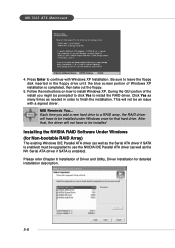
... displays the installation of NVIDIA IDE SW Driver. Click
Yes to continue.
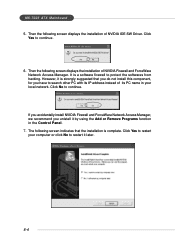
6. Then the following screen displays the installation of NVIDIA Firewall and ForceWare Network Access Manager. It is a software firewall to protect the softwares from hacking. However, it is strongly suggested that you do not install this component, for you have to search other PC with its IP address...
User Guide - Page 112
Installation of Driver and Utility
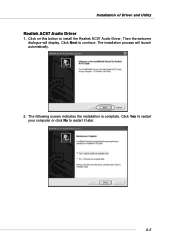
Realtek AC97 Audio Driver
1. Click on this button to install the Realtek AC97 Audio Driver. Then the welcome dialogue will display. Click Next to continue. The installation process will launch automatically.
2. The following screen indicates the installation is complete. Click Yes to restart your computer or click No to restart it later.
6-5