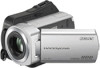
Sony DCR-SR46 - Hdd Handycam Camcorder driver and firmware
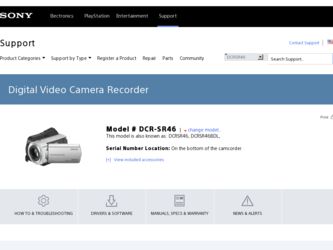
Related Sony DCR-SR46 Manual Pages
Download the free PDF manual for Sony DCR-SR46 and other Sony manuals at ManualOwl.com
Operating Guide - Page 2
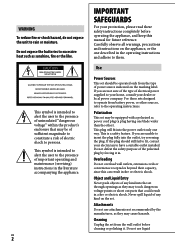
... SAFEGUARDS
For your protection, please read these safety instructions completely before operating the appliance, and keep this manual for future reference. Carefully observe all warnings, precautions and instructions on the appliance, or the one described in the operating instructions and adhere to them.
Use
Power Sources
This set should be operated only from the type of...
Operating Guide - Page 3
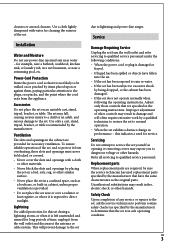
... from the wall outlet and disconnect the antenna or cable system. This will prevent damage to the set
due to lightning and power-line surges.
Service
Damage Requiring Service
Unplug the set from the wall outlet and refer servicing to qualified service personnel under the following conditions: When the power cord or plug is damaged or
frayed. ...
Operating Guide - Page 5
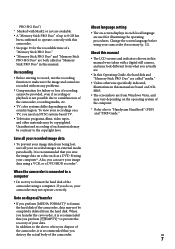
...; Wireless Remote Commander (1) (DCR-SR65/ SR85) A button-type lithium battery is already installed.
Rechargeable battery pack NP-FH40 (1)
CD-ROM "Handycam Application Software" (1) (p. 26)
Picture Motion Browser (Software)
PMB Guide
Handycam Handbook (PDF)
"Operating Guide" (This manual) (1)
Using the camcorder...
Operating Guide - Page 7
... procedures. Change the screen language before using your camcorder if necessary (p. 12).
About this manual
The LCD screens and indicators shown in this manual were taken with a digital still camera, and may look different from what you actually see.
In this Operating Guide, the hard disk and "Memory Stick PRO Duo" are called "media."
Unless...
Operating Guide - Page 8
...Started
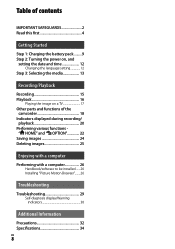
Step 1: Charging the battery pack..........9 Step 2: Turning the power on, and
setting the date and time 12 Changing the language setting 12
Step 3: Selecting the media 13
Recording/Playback
Recording 15 Playback 16
Playing the image on a TV 17 Other parts and functions of the
camcorder 18 Indicators displayed during recording/
playback 20 Performing various functions -
" HOME" and...
Operating Guide - Page 22
... or activate simultaneously the
grayed items in the current recording/playback situation.
US
22
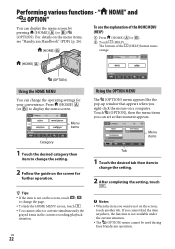
Using the OPTION MENU
The (OPTION) menu appears like the pop-up window that appears when you right-click the mouse on a computer. Touch (OPTION), then the menu items you can set at that moment appears.
Menu items
Tab
1 Touch...
Operating Guide - Page 26
...The supplied software "Picture Motion
Browser" is not supported by Macintosh computers. To use a Macintosh computer connected to your camcorder, see the following website for details. http://guide.d-imaging.sony.co.jp/mac/ms/us/
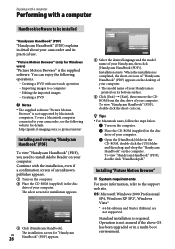
Installing and viewing "Handycam Handbook" (PDF)
To view "Handycam Handbook" (PDF), you need to install Adobe Reader on your computer. Continue with the installation, even...
Operating Guide - Page 27
...creating DVD-Videos.)
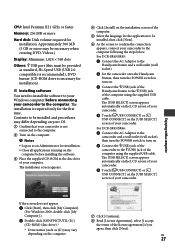
Display: Minimum 1,024 × 768 dots
Others: USB port (this must be provided as standard, Hi-Speed USB (USB 2.0 compatible) is recommended), DVD burner (CD-ROM drive is necessary for installation)
Installing software
You need to install the software to your Windows computer before connecting your camcorder to the computer. The installation is required only...
Operating Guide - Page 28
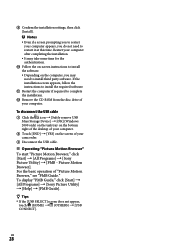
...the instructions to install the required software.
Restart the computer if required to complete the installation.
Remove the CD-ROM from the disc drive of your computer.
To disconnect the USB cable
Click the icon [Safely remove USB Mass Storage Device] [OK] (Windows 2000 only) on the task tray on the bottom right of the desktop of your computer.
...
Operating Guide - Page 29
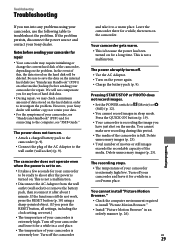
... check a minimum amount of data stored on the hard disk in order to investigate the problem. However, your Sony dealer will neither copy nor retain your data.
For the symptoms of your camcorder, see "Handycam Handbook" (PDF) and for connecting to the computer, see "PMB Guide."
The power does not turn on.
Attach a charged battery pack...
Operating Guide - Page 32
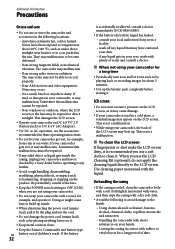
... inside the casing, unplug your camcorder and have it checked by a Sony dealer before operating it any further.
Avoid rough handling, disassembling, modifying, physical shock, or impact such as hammering, dropping or stepping on the product. Be particularly careful of the lens.
Keep the POWER switch setting to OFF (CHG) when you...
Operating Guide - Page 33
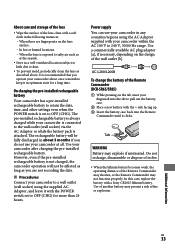
... battery. However, even if the pre-installed rechargeable battery is not charged, the camcorder operation will not be affected as long as you are not recording the date.
Procedures
Connect your camcorder to a wall outlet (wall socket) using the supplied AC Adaptor, and leave it with the POWER switch set to OFF (CHG) for more...
Operating Guide - Page 35
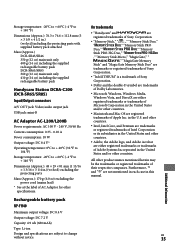
... only 410 g (14 oz) including the supplied rechargeable battery pack
Handycam Station DCRA-C200 (DCR-SR65/SR85)
Input/Output connectors
A/V OUT jack: Video/audio output jack
USB jack: mini-B
AC Adaptor AC-L200/L200B
Power requirements: AC 100 V - 240 V, 50/60 Hz
Current consumption: 0.35 - 0.18 A
Power consumption: 18 W
Output voltage: DC 8.4 V*
Operating temperature: 0°C to...
Handycam® Handbook - Page 12
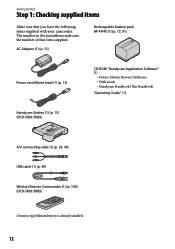
...-FH40 (1) (p. 13, 91)
Power cord (Mains lead) (1) (p. 13)
CD-ROM "Handycam Application Software" (1)
Picture Motion Browser (Software) PMB Guide Handycam Handbook (This Handbook)
"Operating Guide" (1)
Handycam Station (1) (p. 13) (DCR-SR65/SR85)
A/V connecting cable (1) (p. 34, 46) USB cable (1) (p. 49) Wireless Remote Commander (1) (p. 100) (DCR-SR65/SR85)
A button...
Handycam® Handbook - Page 36
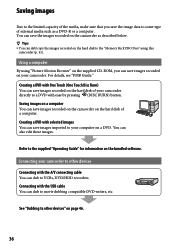
... hard disk of a computer. Creating a DVD with selected images You can save images imported to your computer on a DVD. You can also edit those images.
Refer to the supplied "Operating Guide" for information on the bundled software.
Connecting your camcorder to other devices
Connecting with the A/V connecting cable You can dub to VCRs, DVD/HDD recorders. Connecting with the USB cable You...
Handycam® Handbook - Page 44
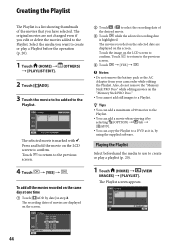
...recorded on the selected date are displayed on the screen. Touch the image on the LCD screen to confirm. Touch to return to the previous screen.
Touch [YES] .
Notes Do not remove the battery pack or the AC
Adaptor from your camcorder...]. You can copy the Playlist to a DVD as it is, by using the supplied software.
Playing the Playlist
Select ...
Handycam® Handbook - Page 69
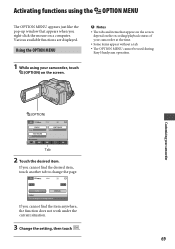
... the pop-up window that appears when you right-click the mouse on a computer. Various available functions are displayed.
Using the OPTION MENU
1 While using your camcorder, touch
(OPTION) on the screen.
Notes
The tabs and items that appear on the screen depend on the recording/playback status of your camcorder at the time...
Handycam® Handbook - Page 73
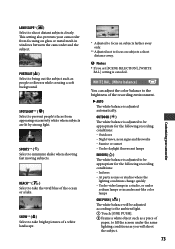
... Select to shoot distant subjects clearly. This setting also prevents your camcorder from focusing on glass or metal mesh in windows between the camcorder and the subject.
PORTRAIT ( ) Select to...fluorescent lamps
INDOOR () The white balance is adjusted to be appropriate for the following recording conditions: Indoors At party scenes or studios where the
lighting conditions...
Handycam® Handbook - Page 85

... work, copy the image using the supplied software.
Buffer overflow You cannot record because the drop sensor senses a drop of the camcorder repeatedly. If you may be at risk of dropping the camcorder constantly, set [DROP SENSOR] to [OFF], and you may be able to record the image again (p. 67).
Recovering data. Your camcorder tries to recover data...
Handycam® Handbook - Page 95
... source code. Read "license2.pdf" in the "License" folder on the CD-ROM. You will find licenses (in English) of "GPL," and "LGPL" software.
To view the PDF, Adobe Reader is needed. If it is not installed on your computer, you can download it from the Adobe Systems web page: http://www.adobe.com/
95
Additional...