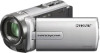
Sony DCR-SX45 driver and firmware
Drivers and firmware downloads for this Sony item
Related Sony DCR-SX45 Manual Pages
Download the free PDF manual for Sony DCR-SX45 and other Sony manuals at ManualOwl.com
Handycam® Handbook - Page 2
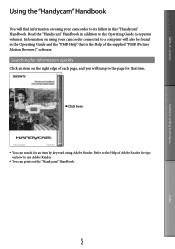
.... Read the "Handycam" Handbook in addition to the Operating Guide (a separate volume). Information on using your camcorder connected to a computer will also be found in the Operating Guide and the "PMB Help" that is the Help of the supplied "PMB (Picture Motion Browser)" software.
Searching for information quickly
Click an item on the right...
Handycam® Handbook - Page 3

...-in USB Cable (p. 13), if the Built-in USB Cable is not long enough.
Rechargeable battery pack NP-FV30 (1) CD-ROM "Handycam" Application Software (1)
"PMB" (software, including "PMB Help") "Handycam" Handbook (PDF) "Operating Guide" (1)
"PMB Portable" software is pre-loaded on the camcorder (p. 47).
See page 18 for the memory card you...
Handycam® Handbook - Page 38
... .
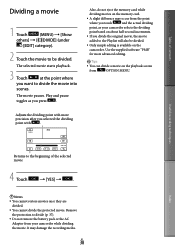
Also, do not eject the memory card while
dividing movies on the memory card.
A slight difference may occur...simple editing is available on the
camcorder. Use the supplied software "PMB"
for more advanced editing.
Tips
&#... more
precision after you selected the dividing
point with
.
Useful recording techniques
Index
Returns to the beginning of the selected movie
4 ...
Handycam® Handbook - Page 44
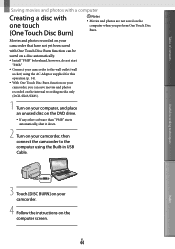
... (DCR-SX65/SX85).
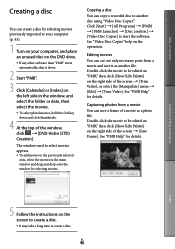
1 Turn on your computer, and place an unused disc on the DVD drive.
If any other software than "PMB" starts automatically, shut it down.
2 Turn on your camcorder, then connect the camcorder to the computer using the Built-in USB Cable.
Useful recording techniques
Index
3 Touch [DISC BURN] on your camcorder.
4 Follow the instructions on...
Handycam® Handbook - Page 45
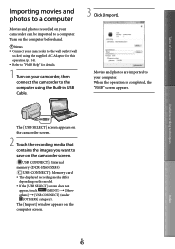
...want to save on the camcorder screen.
[ USB CONNECT]: Internal
memory (DCR-SX65/SX85)
[ USB CONNECT]: Memory card
The displayed recording media differ
depending on the model.
If the [USB SELECT] screen does not
appear, touch
(MENU) [Show
others] [USB CONNECT] (under
[OTHERS] category).
The [Import] window appears on the
computer screen.
US
45
Index
Handycam® Handbook - Page 46
... drag and drop onto the window for selecting movies.
Copying a disc
You can copy a recorded disc to another disc using "Video Disc Copier." Click [Start] [All Programs] [PMB] [PMB Launcher] [Disc creation] [Video Disc Copier] to start the software. See "Video Disc Copier" help on the operation.
Editing movies
You...
Handycam® Handbook - Page 47
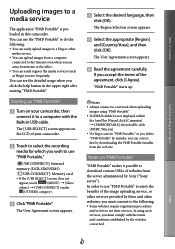
... on your camcorder, then connect it to a computer with the Built-in USB cable.
The [USB SELECT] screen appears on the LCD of your camcorder.
Touch to select the recording
media for which you wish to use "PMB Portable."
[ USB CONNECT]: Internal
memory (DCR-SX65/SX85)
[ USB CONNECT]: Memory card
If the [USB SELECT] screen does not
appear, touch
(MENU...
Handycam® Handbook - Page 49
...).
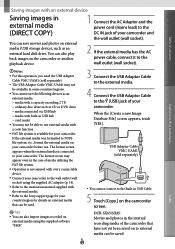
You can save movies and photos on external media (USB storage device), such as an external hard disk drive. You can also play back images on the camcorder or another playback device.
2 If the external media has the AC power cable, connect it to the wall outlet (wall socket).
Useful recording techniques
Notes
For this operation, you...
Handycam® Handbook - Page 59
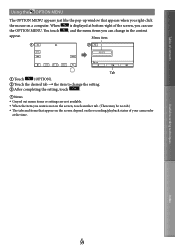
... OPTION MENU
The OPTION MENU appears just like the pop-up window that appears when you right-click
the mouse on a computer. When
is displayed at bottom-right of the screen, you can use
the OPTION...settings are not available. When the item you want is not on the screen, touch another tab. (There may be no tab.) The tabs and items that appear on the screen depend on the recording...
Handycam® Handbook - Page 62
...recording techniques
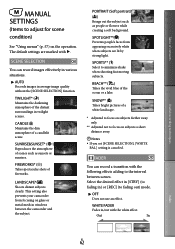
MANUAL SETTINGS
(Items to adjust for scene
condition)
See "Using menus" (p. 57) on the operation. The default settings are marked with .
SCENE SELECTION
You can record images effectively in various situations.
AUTO Records... subjects clearly. This setting also prevents your camcorder from focusing on glass or metal mesh in windows between the camcorder and...
Handycam® Handbook - Page 79
...
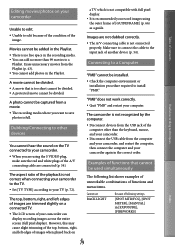
a TV which is not compatible with full pixel display. It is recommended you record images using the outer frame of [GUIDEFRAME] (p. 66) as a guide.
Images are not dubbed correctly. The A/V connecting cable is not connected
properly. Make sure to connect the cable to the input jack of another device (p. 54).
Connecting to a Computer
"PMB" cannot be installed...
Handycam® Handbook - Page 81
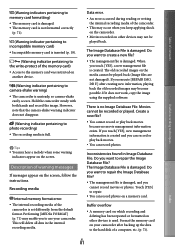
... damaged, and you cannot record movies or photos. Touch [YES] to repair.
You can record photos on a memory card.
Buffer overflow
A memory card on which recording and deleting has been repeated or formatted on other devices is used. Format the memory card on your camcorder after backing up the data to the hard disk of a computer, etc. (p. 71).
Index
US...
Handycam® Handbook - Page 91
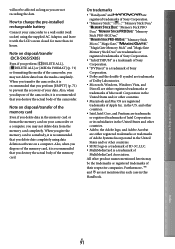
... using data deletion software on a computer. Also, when you dispose of the memory card, it is recommended that you destroy the actual body of the memory card.
On trademarks
"Handycam" and
are
registered trademarks of Sony Corporation.
"Memory Stick," " ," "Memory Stick Duo,"
"
," "Memory Stick PRO
Duo," "
," "Memory
Stick PRO-HG Duo,"
"
," "Memory Stick
Micro...
Handycam® Handbook - Page 92

... source code. Read "license2.pdf " in the "License" folder on the CD-ROM. You will find licenses (in English) of "GPL," and "LGPL" software.
To view the PDF, Adobe Reader is needed. If it is not installed on your computer, you can download it from the Adobe Systems web page: http://www.adobe.com/
US
92...
Operating Guide - Page 33
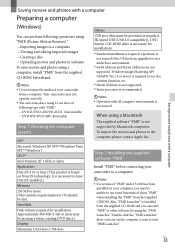
... DVD discs.) Display
Minimum 1,024 dots × 768 dots
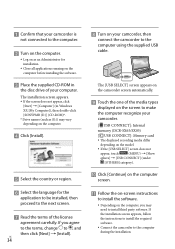
Others USB port (this must be provided as standard, Hi-Speed USB (USB 2.0 compatible)), DVD burner (CD-ROM drive is necessary for installation) *1 Standard installation is required. Operation is
not assured if the OS has been upgraded or in a multi-boot environment. *2 64-bit editions and Starter (Edition) are not supported. Windows Image...
Operating Guide - Page 34
...
memory (DCR-SX65/SX85)
[ USB CONNECT]: Memory card
The displayed recording media differ
depending on the model.
If the [USB SELECT] screen does not
appear, touch
(MENU) [Show
others] [USB CONNECT] (under
[OTHERS] category).
Click [Continue] on the computer
screen.
Follow the on-screen instructions
to install the software...
Operating Guide - Page 35
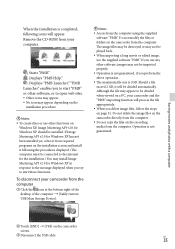
... displayed. (The computer must be connected to the internet for the installation.) You may install Image Mastering API v2.0 for Windows XP in response to the message displayed when you try to start those functions.
To disconnect your camcorder from the computer
Click the icon at the bottom right of the desktop of the computer [Safely remove USB Mass Storage Device...
Operating Guide - Page 51
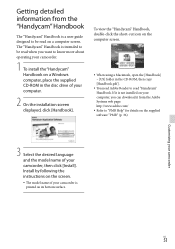
... on a Windows computer, place the supplied CD-ROM in the disc drive of your computer.
2 On the installation screen displayed, click [Handbook].
To view the "Handycam" Handbook, double-click the short-cut icon on the computer screen.
When using a Macintosh, open the [Handbook] - [US] folder in the CD-ROM, then copy [Handbook.pdf ].
You need Adobe Reader to read...
Operating Guide - Page 58
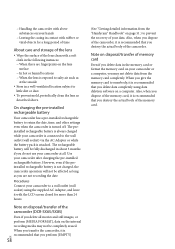
.../transfer of memory card
Even if you delete data in the memory card or format the memory card on your camcorder or a computer, you may not delete data from the memory card completely. When you give the memory card to somebody, it is recommended that you delete data completely using data deletion software on a computer. Also, when you dispose of the memory card, it is...
Operating Guide - Page 64
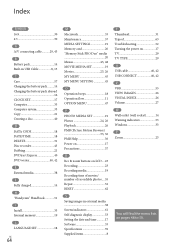
...23 Recording 23 Recording media 19 Recording time of movies/ number of recordable photos....55 Repair 52 RESET 62
S
Saving images in external media 38 Screen indicators 61 Self-diagnosis display 53 Setting the date and time...........17 Software 33 Specifications 59 Supplied items 8
T Thumbnail 31 Tripod 63 Troubleshooting 52 Turning the power on 17 TV 29 TV TYPE 29 U USB cable...