Sony DSLR-A380L - Dslr-a380 + Sal-1855 driver and firmware
Drivers and firmware downloads for this Sony item
Related Sony DSLR-A380L Manual Pages
Download the free PDF manual for Sony DSLR-A380L and other Sony manuals at ManualOwl.com
Instruction Manual - Page 4
...Conformity Trade Name: SONY Model No.: DSLR-A380 Responsible Party: Sony Electronics Inc. Address:16530 Via Esprillo,
San Diego, CA 92127 U.S.A. Telephone No.: 858-942-2230
This device complies with Part 15...dealer or an experienced radio/TV technician for help.
The supplied interface cable must be used with the equipment in order to comply with the limits for a digital device pursuant to Subpart B ...
Instruction Manual - Page 11
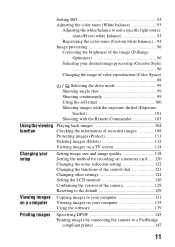
... for recording on a memory card ..... 120 Changing the noise reduction setting 122 Changing the functions of the control dial 123 Changing other settings 124 Setting the LCD monitor 126 Confirming the version of the camera 128 Resetting to the default 129
Viewing images Copying images to your computer 131 on a computer Viewing images on your computer 135
Using the software 139
Printing...
Instruction Manual - Page 13
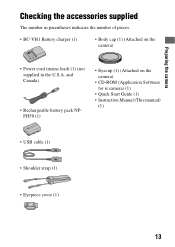
...; Body cap (1) (Attached on the camera)
• Power cord (mains lead) (1) (not supplied in the U.S.A. and Canada)
• Rechargeable battery pack NPFH50 (1)
• Eyecup (1) (Attached on the camera)
• CD-ROM (Application Software for α camera) (1)
• Quick Start Guide (1) • Instruction Manual (This manual)
(1)
• USB cable (1)
• Shoulder strap (1)
•...
Instruction Manual - Page 105
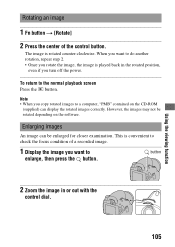
... • When you copy rotated images to a computer, "PMB" contained on the CD-ROM
(supplied) can display the rotated images correctly. However, the images may not be rotated depending on the software.
Enlarging images
An image can be enlarged for closer examination. This is convenient to check the focus condition of a recorded image.
1 Display the image you...
Instruction Manual - Page 119
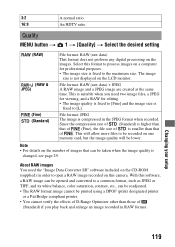
... CD-ROM (supplied) in order to open a RAW image recorded on this camera. With this software, a RAW image can be opened and converted to a common format, such as JPEG or TIFF, and its white balance, color saturation, contrast, etc., can be readjusted. • The RAW format image cannot be printed using a DPOF (print) designated printer...
Instruction Manual - Page 128
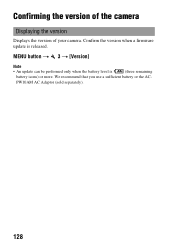
Confirming the version of the camera
Displaying the version
Displays the version of your camera. Confirm the version when a firmware update is released.
MENU button t 3 t [Version]
Note
• An update can be performed only when the battery level is
(three remaining
battery icons) or more. We recommend that you use a sufficient battery or the AC-
PW10AM AC Adaptor (sold separately).
128
Instruction Manual - Page 131
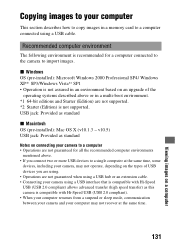
... how to copy images in a memory card to a computer connected using a USB cable.
Recommended computer environment
The following environment is recommended for a computer connected to the camera to import images.
x Windows OS (pre-installed): Microsoft Windows 2000 Professional SP4/ Windows XP*1 SP3/Windows Vista*2 SP1 • Operation is not assured in an environment based on an upgrade of the...
Instruction Manual - Page 133
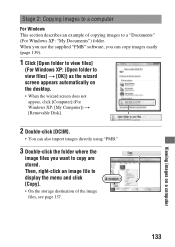
... you use the supplied "PMB" software, you can copy images easily (page 139).
1 Click [Open folder to view files]
(For Windows XP: [Open folder to view files] t [OK]) as the wizard screen appears automatically on the desktop.
• When the wizard screen does not appear, click [Computer] (For Windows XP: [My Computer]) t [Removable Disk].
2 Double-click [DCIM].
•...
Instruction Manual - Page 134
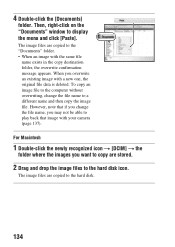
...on the "Documents" window to display the menu and click [Paste].
The image files are copied to the "Documents" folder. • When an image with the same file
name exists in the copy destination folder, the ...camera (page 137).
For Macintosh
1 Double-click the newly recognized icon t [DCIM] t the
folder where the images you want to copy are stored.
2 Drag and drop the image files to the hard disk...
Instruction Manual - Page 135
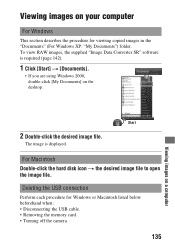
... the desktop.
2 Double-click the desired image file.
The image is displayed.
For Macintosh Double-click the hard disk icon t the desired image file to open the image file.
Deleting the USB connection
Perform each procedure for Windows or Macintosh listed below beforehand when: • Disconnecting the USB cable. • Removing the memory card. • Turning off the camera.
135...
Instruction Manual - Page 136
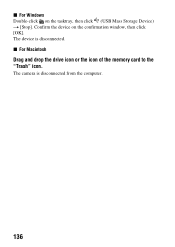
x For Windows Double-click on the tasktray, then click (USB Mass Storage Device) t [Stop]. Confirm the device on the confirmation window, then click [OK]. The device is disconnected. x For Macintosh
Drag and drop the drive icon or the icon of the memory card to the "Trash" icon.
The camera is disconnected from the computer.
136
Instruction Manual - Page 137
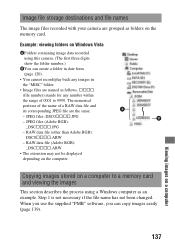
Image file storage destinations and file names
The image files recorded with your camera are grouped as folders on the memory card.
Example: viewing folders on Windows Vista
AFolders containing image data recorded using this camera. (The first three digits show the folder number.)
BYou can create a folder in date form (page 120).
• You cannot record/play back any images...
Instruction Manual - Page 138
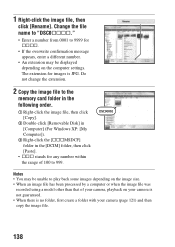
... number.
• An extension may be displayed depending on the computer settings. The extension for images is JPG. Do not change the extension.
2 Copy the image file to the
memory card folder in the following order.
1 Right-click the image file, then click [Copy].
2 Double-click [Removable Disk] in [Computer] (For Windows XP: [My Computer]).
3 Right-click the [sssMSDCF] folder in...
Instruction Manual - Page 139
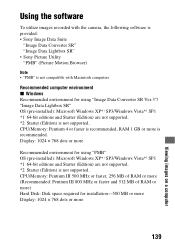
..." OS (pre-installed): Microsoft Windows XP*1 SP3/Windows Vista*2 SP1 *1 64-bit editions and Starter (Edition) are not supported. *2 Starter (Edition) is not supported. CPU/Memory: Pentium III 500 MHz or faster, 256 MB of RAM or more (Recommended: Pentium III 800 MHz or faster and 512 MB of RAM or more) Hard Disk: Disk space required for installation-500 MB or...
Instruction Manual - Page 140
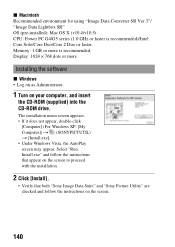
...-installed): Mac OS X (v10.4/v10.5) CPU: Power PC G4/G5 series (1.0 GHz or faster is recommended)/Intel Core Solo/Core Duo/Core 2 Duo or faster Memory: 1 GB or more is recommended. Display: 1024 × 768 dots or more
Installing the software
x Windows • Log on as Administrator.
1 Turn on your computer, and insert
the CD-ROM (supplied) into the CD-ROM drive.
The installation...
Instruction Manual - Page 141
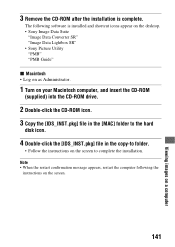
....
The following software is installed and shortcut icons appear on the desktop. • Sony Image Data Suite
"Image Data Converter SR" "Image Data Lightbox SR" • Sony Picture Utility "PMB" "PMB Guide"
x Macintosh • Log on as Administrator.
1 Turn on your Macintosh computer, and insert the CD-ROM
(supplied) into the CD-ROM drive.
2 Double-click the CD-ROM icon. 3 Copy the...
Instruction Manual - Page 142

... the [Sony Image Data Suite] folder from the [Applications] folder. To exit, click a quit item from the [IDC SR] menu.
Using "Image Data Lightbox SR"
With "Image Data Lightbox SR" you can: • Display and compare RAW/JPEG images recorded with this camera. • Rate the images on a scale of five. • Set color labels...
Instruction Manual - Page 144
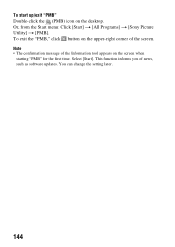
To start up/exit "PMB" Double-click the (PMB) icon on the desktop. Or, from the Start menu: Click [Start] t [All Programs] t [Sony Picture Utility] t [PMB]. To exit the "PMB," click button on the upper-right corner of the screen. Note
&#... screen when starting "PMB" for the first time. Select [Start]. This function informs you of news, such as software updates. You can change the setting later.
144
Instruction Manual - Page 159
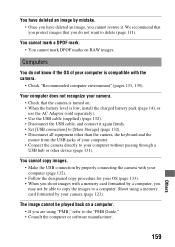
...). • Disconnect the USB cable, and connect it again firmly. • Set [USB connection] to [Mass Storage] (page 132). • Disconnect all equipment other than the camera, the keyboard and the mouse from the USB jacks of your computer. • Connect the camera directly to your computer without passing through a USB hub or other device (page 131).
You cannot copy images. • Make...
Marketing Specifications (DSLR-A380L Kit) - Page 2
DSLR-A380L
Specifications
General
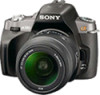
Camera Type: Sony α Digital SLR camera with built-in flash and inter-changeable lenses
Color Filter System: RGB primary color filters
Effective Picture Resolution: Approx. 14.2 megapixels
Imaging Sensor: APS-C size CCD sensor (23.6x15.8mm)
Lens Mount Type: Sony α lens, Minolta and Konica Minolta AF lens
Pixel Gross: Approx. 14.9 megapixels
Processor: ...