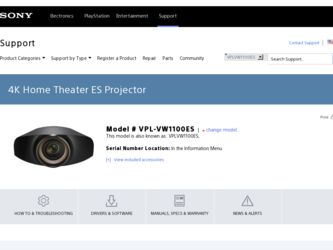
Sony VPL-VW1100ES driver and firmware
Related Sony VPL-VW1100ES Manual Pages
Download the free PDF manual for Sony VPL-VW1100ES and other Sony manuals at ManualOwl.com
Operating Instructions - Page 2

... 40 Function Menu 42 Installation Menu 46 Information Menu 49
About the Preset Memory No. ....49
Using Network Features
Displaying the Control Window of the Unit with a Web Browser 51 Operating the Control Window ........52
Switching the Page 52 Setting the Access Limitation .....52 Confirming the Information Regarding the Unit 52 Operating the Unit from a Computer 52 Using the E-mail...
Operating Instructions - Page 7

...on the size of the screen or whether or not you use the lens shift features. Install this unit so that it fits the size of your screen. For details on the distance...of the unit.
When installing the unit on the ceiling
To dealers Use the Sony PSS-H10 Projector Suspension Support, and take measures to prevent falling using wire, etc. For details, refer to the installation manual for dealers of the PSS...
Operating Instructions - Page 8

Preparation 2: Adjusting the Picture Position
Project an image on the screen and then adjust the picture position.
1 ON/STANDBY indicator
Remote control detector
3, 4, 5
LENS ADJUSTMENT buttons
2 ?/1 (ON/
STANDBY)
button
Tips • The ?/1 (ON/STANDBY), INPUT, MENU, and M/m/
Operating Instructions - Page 9

....
The lens protector will open. The ON/STANDBY indicator flashes in green, and then lights in green.
Flashes in green for tens of seconds and then lights in green.
3 Adjust the focus.
Press the LENS ADJUSTMENT (FOCUS) button to display the Lens Focus adjustment window (test pattern). Then adjust the focus of the picture...
Operating Instructions - Page 10

5 Adjust the picture position.
Press the LENS ADJUSTMENT (SHIFT) button to display the Lens Shift adjustment window (test pattern). Then adjust to the proper position of the picture by pressing the M/m/
Operating Instructions - Page 12

... of the projected picture V: Height of the projected picture
To adjust the tilt of the installation surface
If the unit is installed on an uneven surface, use the front feet (adjustable) to keep the unit level.
... to catch your finger when turning the front feet (adjustable).
Lens adjustment window (test pattern)
1.78:1 (16:9) 1.33:1 (4:3)
The dashed lines show the screen sizes of each aspect ratio...
Operating Instructions - Page 16

... 3D Sync Transmitter. Do not connect
computers or other network devices, to avoid malfunction. • You can use a 3D Sync Transmitter separate from this unit, using an optional LAN cable (straight-
type). If the usage environment.... • Be sure to use cable of up to 15 m, and do not use an extension cord. Also, keep the LAN cable away from any AC power cords as much as possible. •...
Operating Instructions - Page 20

..., the 3D glasses may not be able to display the images properly. Also, the viable angles and distance vary depending on the screen type, environment of the room, and installation environment of the unit.
Figure A: 3D sync signal communication distance (Shift Range: 0.5 V)
Side view
a
Projector
Screen
b a + b = 13 m (Maximum)
3D glasses
Figure B: 3D glasses...
Operating Instructions - Page 21

... are being charged. (After charging finishes, the LED indicator turns off.)
Precautions about USB charging AC power adaptor
Installation Do not place the USB charging AC power adaptor in a location where it is: • Subject to extreme high temperature (E.g.,
in a car with its windows closed) • Subject to direct sunlight or near a heat
source • Subject...
Operating Instructions - Page 22

... be damaged.
Using the Picture Position
You can store up to five combinations of lens settings (focus, window size, window position) and aspect ratio, and you can recall those settings.
1 Press the POSITION button.
The Picture Position selecting palette is displayed.
2 Press the POSITION button
repeatedly, or press the M/m/ buttons to select the position.
The...
Operating Instructions - Page 23

... this case, select the lens position again or adjust the lens manually. • The Picture Position function is not guaranteed to reproduce the lens settings precisely. • When you use the subtended screen angle of two or more aspects using lens zoom, install the unit within the specified parameters referring to "Projection distance...
Operating Instructions - Page 28

..."ImageDirector3."
Notes • You need to install the "ImageDirector3" on a computer beforehand. "ImageDirector3" can be
downloaded from the Sony website. http://esupport.sony.com/US/p/select-system.pl http://www.pro.sony.eu/pro/article/projectors-home-cinema-article • When connecting the REMOTE or LAN connector to a computer, connect with both the computer and unit turned off. • You...
Operating Instructions - Page 29

... appears.
1 Press MENU.
3 Press M/m to select an item you
want to set or adjust and press , or .
The menu window appears.
The setting items are displayed in a popup menu, in a setting menu, in an adjustment menu or in the next menu window.
Pop-up menu
Setting items
2 Press M/m to select a menu item,
and press , or .
The items...
Operating Instructions - Page 30

Setting menu
To reset the picture that has been adjusted
Select "Reset" from the Picture menu.
Adjustment menu
Next menu window Setting items
4 Make the setting or adjustment
of an item. When changing the adjustment level To increase the value, press M/,. To decrease the value, press m/
Operating Instructions - Page 37

... represent those printed on the remote control.
Picture Position [POSITION]
You can store up to five combinations of lens settings (focus, window size, window position) and aspect ratio. After setting the lens and aspect, select...adjust the lens manually.
• When you use a 2.35:1 or a 16:9 subtended screen angle with the Picture Position function, make sure that the installation position is ...
Operating Instructions - Page 38

... "Trigger Select 1/2" on the Installation menu, a 12 V signal is output from the TRIGGER 1 or TRIGGER 2 connector (1 page 46). Normal: Input video is displayed in its original aspect ratio, ...computer, or
when preset memory number 76, 77, 78, 79 or 96 signal is input.
You can select whether or not to display the outline of the picture. On: Hides the outline of the input picture. Select this setting...
Operating Instructions - Page 46

... function of the TRIGGER 1/TRIGGER 2 connector. Off: Turns off the TRIGGER connector function. Power: Outputs 12 V signals from the TRIGGER 1/TRIGGER 2
connectors when the unit is on.... 2.35:1 Zoom: Works with the "Aspect" setting's "2.35:1 Zoom" (1 page 38) and outputs a 12 V signal from the TRIGGER 1 or TRIGGER 2 connector.
Selects the remote control detectors (IR Receiver) on the front and rear...
Operating Instructions - Page 51

...Connect the LAN cable.
LAN cable (straight type) (not supplied)
LAN Connector
Once you make the network settings, you can open the Control window only by performing step 3 of this procedure.
Hub, router, etc.
2 Set the network settings for the
unit using "Network Setting" on the Installation menu (1 page 48).
3 Start a web browser on the
computer, enter the following in the address field, then...
Quick Reference Manual - Page 36

... a computer with Adobe Reader installed. You can download Adobe Reader free from the Adobe website.
1 Open the index.html file in the CD-
ROM.
2 Select and click on the manual that
you want to read.
Note If you have lost or damaged the CD-ROM, you can purchase a new one from your Sony dealer or Sony service counter.
Connecting the AC Power...
Quick Reference Manual - Page 37

... power cord into a wall outlet.
Front of the unit
Lights in red.
3 Press the ?/1 (ON/STANDBY) button
to turn on the unit.
Front of the unit
Flashes in green for tens of seconds and then lights in green.
a Adjust the focus. Press the LENS ADJUSTMENT (FOCUS) button to display the Lens Focus adjustment window...