ASRock 4CoreN73PV-HD720p R1.0 driver and firmware
Drivers and firmware downloads for this ASRock item
Related ASRock 4CoreN73PV-HD720p R1.0 Manual Pages
Download the free PDF manual for ASRock 4CoreN73PV-HD720p R1.0 and other ASRock manuals at ManualOwl.com
RAID Installation Guide - Page 2
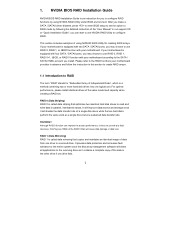
... driver diskette, press to enter BIOS setup to set the option to RAID mode by following the detailed instruction of the "User Manual" in our support CD or "Quick Installation Guide", you can start to use NVIDIA RAID Utility to configure RAID.
This section includes examples of using NVRAID RAID Utility for creating RAID arrays. If your motherboard is equipped with two SATA / SATAII ports, you...
RAID Installation Guide - Page 5
...If you want to install Windows® XP / Windows® XP 64-bit on your SATA / SATAII HDDs
with RAID functions, please follow below steps.
STEP 1: Set Up BIOS.
A.
Enter BIOS SETUP UTILITY Advanced screen IDE Configuration.
B.
Set the "SATA Operation Mode" option to [RAID].
STEP 2: Make a SATA / SATAII driver diskette.
A.
Insert the ASRock Support CD into your optical drive to boot your...
User Manual - Page 4

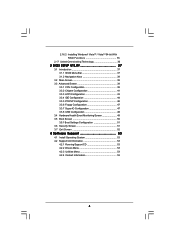
... Floppy Configuration 47 3.3.7 Super IO Configuration 47 3.3.8 USB Configuration 49 3.4 Hardware Health Event Monitoring Screen 49 3.5 Boot Screen 50 3.5.1 Boot Settings Configuration 51 3.6 Security Screen 51 3.7 Exit Screen 52
4 Software Support 53
4.1 Install Operating System 53 4.2 Support CD Information 53
4.2.1 Running Support CD 53 4.2.2 Drivers Menu 53 4.2.3 Utilities Menu...
User Manual - Page 21
... to page 19
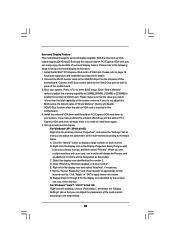
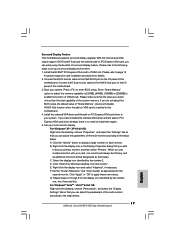
for proper expansion card installation procedures for details. 2. Connect the DVI-D monitor cable to the VGA/DVI-D port on the I/O panel of this
motherboard. Connect the D-Sub monitor cable to the VGA/D-Sub port on the I/O panel of this motherboard. 3. Boot your system. Press to enter BIOS setup. Enter "Share Memory" option to adjust the memory capability to [32MB], [64MB], [128MB] or...
User Manual - Page 33

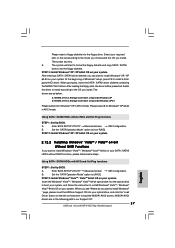
...to the OS you install. The
drivers are as below:
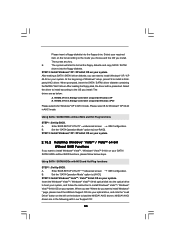
A. NVIDIA nForce Storage Controller (required) Windows XP B. NVIDIA nForce Storage Controller (required) Windows XP64
Please select A for Windows® XP in AHCI mode. Please select B for Windows® XP 64-bit in AHCI mode.
Using SATA / SATAII HDDs without NCQ and Hot Plug functions
STEP 1: Set Up BIOS.
A.
Enter BIOS SETUP UTILITY Advanced...
User Manual - Page 37

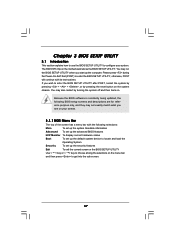
... the system time/date information
Advanced To set up the advanced BIOS features
H/W Monitor To display current hardware status
Boot
To set up the default system device to locate and load the
Operating System
Security
To set up the security features
Exit
To exit the current screen or the BIOS SETUP UTILITY
Use < > key or < > key to choose among...
User Manual - Page 53

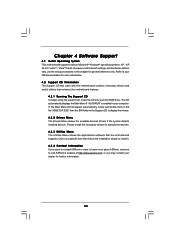
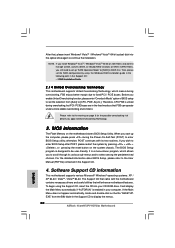
...-ROM drive. The CD automatically displays the Main Menu if "AUTORUN" is enabled in your computer. If the Main Menu did not appear automatically, locate and double click on the file "ASSETUP.EXE" from the BIN folder in the Support CD to display the menus. 4.2.2 Drivers Menu The Drivers Menu shows the available devices drivers if the system detects installed devices. Please install...
User Manual - Page 58

... Floppy Configuration 47 3.3.7 Super IO Configuration 47 3.3.8 USB Configuration 49 3.4 Hardware Health Event Monitoring Screen 49 3.5 Boot Screen 50 3.5.1 Boot Settings Configuration 51 3.6 Security Screen 51 3.7 Exit Screen 52
4 Software Support 53
4.1 Install Operating System 53 4.2 Support CD Information 53
4.2.1 Running Support CD 53 4.2.2 Drivers Menu 53 4.2.3 Utilities Menu...
User Manual - Page 75

... to page 19
for proper expansion card installation procedures for details. 2. Connect the DVI-D monitor cable to the VGA/DVI-D port on the I/O panel of this
motherboard. Connect the D-Sub monitor cable to the VGA/D-Sub port on the I/O panel of this motherboard. 3. Boot your system. Press to enter BIOS setup. Enter "Share Memory" option to adjust the memory capability to [32MB], [64MB], [128MB] or...
User Manual - Page 87

...to the OS you install. The
drivers are as below:
A. NVIDIA nForce Storage Controller (required) Windows XP B. NVIDIA nForce Storage Controller (required) Windows XP64
Please select A for Windows® XP in AHCI mode. Please select B for Windows® XP 64-bit in AHCI mode.
Using SATA / SATAII HDDs without NCQ and Hot Plug functions
STEP 1: Set Up BIOS.
A.
Enter BIOS SETUP UTILITY Advanced...
User Manual - Page 91

... the system time/date information
Advanced To set up the advanced BIOS features
H/W Monitor To display current hardware status
Boot
To set up the default system device to locate and load the
Operating System
Security
To set up the security features
Exit
To exit the current screen or the BIOS SETUP UTILITY
Use < > key or < > key to choose among...
User Manual - Page 107
...-ROM drive. The CD automatically displays the Main Menu if "AUTORUN" is enabled in your computer. If the Main Menu did not appear automatically, locate and double click on the file "ASSETUP.EXE" from the BIN folder in the Support CD to display the menus. 4.2.2 Drivers Menu The Drivers Menu shows the available devices drivers if the system detects installed devices. Please install...
User Manual - Page 112
... Floppy Configuration 47 3.3.7 Super IO Configuration 47 3.3.8 USB Configuration 49 3.4 Hardware Health Event Monitoring Screen 49 3.5 Boot Screen 50 3.5.1 Boot Settings Configuration 51 3.6 Security Screen 51 3.7 Exit Screen 52
4 Software Support 53
4.1 Install Operating System 53 4.2 Support CD Information 53
4.2.1 Running Support CD 53 4.2.2 Drivers Menu 53 4.2.3 Utilities Menu...
User Manual - Page 129

... to page 19
for proper expansion card installation procedures for details. 2. Connect the DVI-D monitor cable to the VGA/DVI-D port on the I/O panel of this
motherboard. Connect the D-Sub monitor cable to the VGA/D-Sub port on the I/O panel of this motherboard. 3. Boot your system. Press to enter BIOS setup. Enter "Share Memory" option to adjust the memory capability to [32MB], [64MB], [128MB] or...
User Manual - Page 141
...to the OS you install. The
drivers are as below:
A. NVIDIA nForce Storage Controller (required) Windows XP B. NVIDIA nForce Storage Controller (required) Windows XP64
Please select A for Windows® XP in AHCI mode. Please select B for Windows® XP 64-bit in AHCI mode.
Using SATA / SATAII HDDs without NCQ and Hot Plug functions
STEP 1: Set Up BIOS.
A.
Enter BIOS SETUP UTILITY Advanced...
User Manual - Page 145
... the system time/date information
Advanced To set up the advanced BIOS features
H/W Monitor To display current hardware status
Boot
To set up the default system device to locate and load the
Operating System
Security
To set up the security features
Exit
To exit the current screen or the BIOS SETUP UTILITY
Use < > key or < > key to choose among...
User Manual - Page 161

...-ROM drive. The CD automatically displays the Main Menu if "AUTORUN" is enabled in your computer. If the Main Menu did not appear automatically, locate and double click on the file "ASSETUP.EXE" from the BIN folder in the Support CD to display the menus. 4.2.2 Drivers Menu The Drivers Menu shows the available devices drivers if the system detects installed devices. Please install...
Quick Installation Guide - Page 17
... to page 15
for proper expansion card installation procedures for details. 2. Connect the DVI-D monitor cable to the VGA/DVI-D port on the I/O panel of this
motherboard. Connect the D-Sub monitor cable to the VGA/D-Sub port on the I/O panel of this motherboard. 3. Boot your system. Press to enter BIOS setup. Enter "Share Memory" option to adjust the memory capability to [32MB], [64MB], [128MB] or...
Quick Installation Guide - Page 27
...to the OS you install. The
drivers are as below:
A. NVIDIA nForce Storage Controller (required) Windows XP B. NVIDIA nForce Storage Controller (required) Windows XP64
Please select A for Windows® XP in AHCI mode. Please select B for Windows® XP 64-bit in AHCI mode.
Using SATA / SATAII HDDs without NCQ and Hot Plug functions
STEP 1: Set Up BIOS.
A.
Enter BIOS SETUP UTILITY Advanced...
Quick Installation Guide - Page 30
... using the Support CD, insert the CD into your CD-ROM drive. It will display the Main Menu automatically if "AUTORUN" is enabled in your computer. If the Main Menu does not appear automatically, locate and double-click on the file "ASSETUP. EXE" from the BIN folder in the Support CD to display the menus.
30 ASRock 4CoreN73PV-HD720p Motherboard
English