Acer P246HL driver and firmware

Related Acer P246HL Manual Pages
Download the free PDF manual for Acer P246HL and other Acer manuals at ManualOwl.com
User Manual - Page 1
TABLE OF CONTENTS
SPECIAL NOTES ON LCD MONITORS 1 INFORMATION FOR YOUR SAFETY AND COMFORT 2 UNPACKING 5 ATTACHING / REMOVING THE BASE 6 SCREEN POSITION ADJUSTMENT 6 CONNECTING THE POWER CORD 7 SAFETY PRECAUTION 7 CLEANING YOUR MONITOR 7 POWER SAVING 8 DDC...8 CONNECTOR PIN ASSIGNMENT 9 STANDARD TIMING TABLE 11 INSTALLATION 12 USER CONTROLS 13 TROUBLESHOOTING 19
User Manual - Page 3
... When you need to disconnect power to the equipment, be sure to unplug the power cord from the electrical outlet.... a radiator or heat register, or in a built-in installation unless proper ventilation is provided.
•
Never push objects ...or damage rotor devices, HDD, Optical drive, and even
exposure risk from lithium battery pack.
Safe listening
Follow these instructions, suggested by ...
User Manual - Page 4
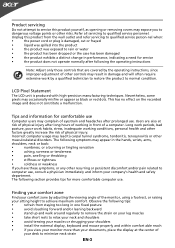
...service
•
the product does not operate normally after following the operating instructions
Note: Adjust only those controls that are covered by the operating instructions, since improper adjustment of other controls...long hours of working in front of a computer. Long work periods, bad
posture, poor... your shoulders
•
install the external display, keyboard and mouse properly and within...
User Manual - Page 5
... a piece of cardboard extended from the display's top front
edge
•
Avoid adjusting your display to an awkward viewing angle.
•
Avoid looking at bright light sources, such as open windows, for extended periods of
time.
Developing good work habits
Develop the following work habits to make your computer use more relaxing and productive...
User Manual - Page 7
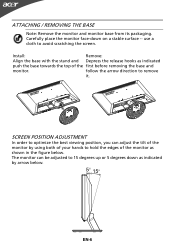
...: Remove the monitor and monitor base from its packaging. Carefully place the monitor face-down on a stable surface -- use a cloth to avoid scratching the screen.
Install:
Remove:
Align the base with the stand and Depress the release hooks as indicated
push the base towards the top of the first before removing...
User Manual - Page 8
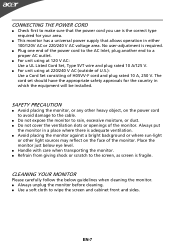
... and plug rated 10 A, 250 V. The cord set should have the appropriate safety approvals for the country in which the equipment will be installed.
SAFETY PRECAUTION
Avoid placing the monitor, or any other heavy object, on the power cord to avoid damage to the cable.
Do not expose the monitor to rain...
User Manual - Page 9
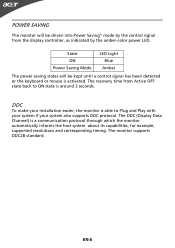
... display controller, as indicated by the amber-color power LED.
State ON Power Saving Mode
LED Light Blue
Amber
The power saving states will be kept until a control signal has been detected or the keyboard or mouse is activated. The recovery time from Active OFF state back to ON state is around 3 seconds.
DDC
To make your installation...
User Manual - Page 12
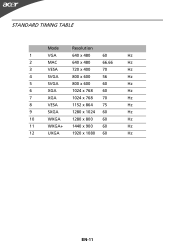
STANDARD TIMING TABLE
Mode
Resolution
1
VGA
640 x 480
60
Hz
2
MAC
640 x 480
66.66
Hz
3
VESA
720 x 400
70
Hz
4
SVGA
800 x 600
56
Hz
5
SVGA
800 x 600
60
Hz
6
XGA
1024 x 768 60
Hz
7
XGA
1024 x 768 70
Hz
8
VESA
1152 x 864 75
Hz
9
SXGA
1280 x 1024 60
Hz
10
WXGA
1280 x 800 60
Hz
11
WXGA+ 1440 x 900 60
Hz
12
UXGA
1920 x 1080 60
Hz
EN-11
User Manual - Page 13
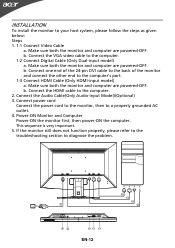
... Digital Cable (Only Dual-input model) a. Make sure both the monitor and computer are powered-OFF. b. Connect one end of the 24-pin DVI cable to the back of the monitor and connect the other end to the computer's port. 1-3 Connect HDMI Cable (Only HDMI-input model) a. Make sure both the monitor and computer are powered-OFF. b. Connect the HDMI cable to the computer. 2. Connect the Audio Cable...