Dell Inspiron M511R driver and firmware

Related Dell Inspiron M511R Manual Pages
Download the free PDF manual for Dell Inspiron M511R and other Dell manuals at ManualOwl.com
Service Manual - Page 2
... information that helps you make better use of your computer. CAUTION: A CAUTION indicates potential damage to hardware or loss of data if instructions are not followed. WARNING: A WARNING indicates a ... Dell Inc. is strictly forbidden.
Trademarks used in this text: Dell™, the DELL logo, and Inspiron™ are trademarks of Dell Inc..; Microsoft®, Windows®, and the Windows start...
Service Manual - Page 9
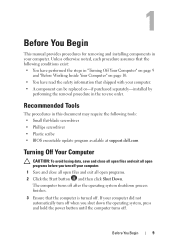
... replaced or-if purchased separately-installed by
performing the removal procedure in the reverse order.
Recommended Tools
The procedures in this document may require the following tools: • Small flat-blade screwdriver • Phillips screwdriver • Plastic scribe • BIOS executable update program available at support.dell.com
Turning Off Your Computer
CAUTION: To avoid losing...
Service Manual - Page 10
...
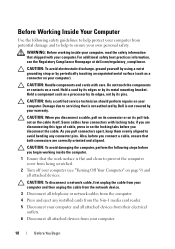
2 Turn off your computer (see "Turning Off Your Computer" on page 9) and all attached devices.
CAUTION: To disconnect a network cable, first unplug the cable from your computer and then unplug the cable from the network device.
3 Disconnect all telephone or network cables from the computer. 4 Press and eject any installed cards from the 8-in-1 media card reader.
5 Disconnect your computer and all...
Service Manual - Page 19
..." on page 15) before working inside the computer. You can increase your computer memory by installing memory modules on the system board. See "Specifications" in your Setup Guide for information on the type of memory supported by your computer. NOTE: Memory modules purchased from Dell are covered under your computer warranty. Your computer has two user-accessible SODIMM sockets, labeled DIMM...
Service Manual - Page 20
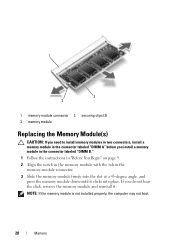
...-module connector 2 securing clips (2) 3 memory module
Replacing the Memory Module(s)
CAUTION: If you need to install memory modules in two connectors, install a memory module in the connector labeled "DIMM A" before you install a memory module in the connector labeled "DIMM B." 1 Follow the instructions in "Before You Begin" on page 9. 2 Align the notch in the memory module with the tab in the...
Service Manual - Page 21
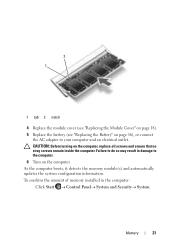
... that no stray screws remain inside the computer. Failure to do so may result in damage to the computer. 6 Turn on the computer. As the computer boots, it detects the memory module(s) and automatically updates the system configuration information. To confirm the amount of memory installed in the computer:
Click Start Control PanelSystem and Security...
Service Manual - Page 37
... the system board, remove the main battery (see "Removing the Battery" on page 15) before working inside the computer. NOTE: Dell does not guarantee compatibility or provide support for Mini-Cards from sources other than Dell. If you ordered a wireless Mini-Card with your computer, the card is already installed. Your computer has one full Mini-Card slot for Wireless Wide Area Network (WWAN) and...
Service Manual - Page 39
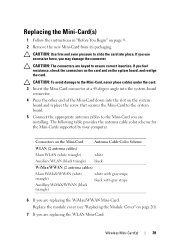
... replace the screw that secures the Mini-Card to the system board. 5 Connect the appropriate antenna cables to the Mini-Card you are installing. The following table provides the antenna cable color scheme for the Mini-Cards supported by your computer.
Connectors on the Mini-Card
Antenna Cable Color Scheme
WLAN (2 antenna cables)
Main WLAN (white triangle)
white
Auxiliary WLAN (black triangle...
Service Manual - Page 40
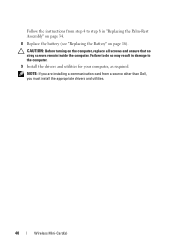
...: Before turning on the computer, replace all screws and ensure that no stray screws remain inside the computer. Failure to do so may result in damage to the computer. 9 Install the drivers and utilities for your computer, as required.
NOTE: If you are installing a communication card from a source other than Dell, you must install the appropriate drivers and utilities.
40
Wireless Mini-Card(s)
Service Manual - Page 65
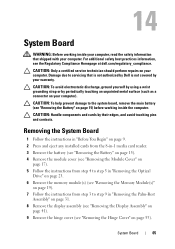
... and eject any installed cards from the 8-in-1 media card reader. 3 Remove the battery (see "Removing the Battery" on page 15). 4 Remove the module cover (see "Removing the Module Cover" on
page 17). 5 Follow the instructions from step 4 to step 5 in "Removing the Optical
Drive" on page 23. 6 Remove the memory module(s) (see "Removing the Memory Module(s)"
on page...
Service Manual - Page 68
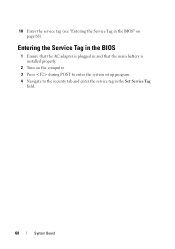
18 Enter the service tag (see "Entering the Service Tag in the BIOS" on page 68).
Entering the Service Tag in the BIOS
1 Ensure that the AC adapter is plugged in and that the main battery is installed properly.
2 Turn on the computer. 3 Press during POST to enter the system setup program. 4 Navigate to the security tab and enter the service tag in the Set Service Tag
field.
68
System Board
Service Manual - Page 71
... provide support for hard drives from sources other than Dell.
NOTE: If you are installing a hard drive from a source other than Dell, you need to install an operating system, drivers, and utilities on the new hard drive.
Removing the Hard Drive
1 Follow the instructions in "Before You Begin" on page 9. 2 Follow the instructions from step 2 to step 13 in "Removing the System
Board...
Service Manual - Page 80
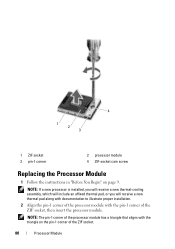
...-socket cam screw
Replacing the Processor Module
1 Follow the instructions in "Before You Begin" on page 9. NOTE: If a new processor is installed, you will receive a new thermal-cooling assembly, which will include an affixed thermal pad, or you will receive a new thermal pad along with documentation to illustrate proper installation.
2 Align the pin-1 corner of...
Service Manual - Page 89
21
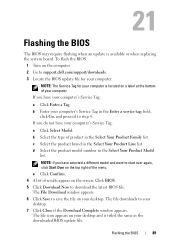
Flashing the BIOS
The BIOS may require flashing when an update is available or when replacing the system board. To flash the BIOS:
1 Turn on the computer. 2 Go to support.dell.com/support/downloads. 3 Locate the BIOS update file for your computer:
NOTE: The Service Tag for your computer is located on a label at the bottom of your computer. If you have your computer's Service Tag:
a Click Enter...