Dell Latitude ST driver and firmware
Related Dell Latitude ST Manual Pages
Download the free PDF manual for Dell Latitude ST and other Dell manuals at ManualOwl.com
Owner's Manual - Page 2

... of Dell Inc. Intel®, Pentium®, Xeon®, Core® and Celeron® are registered trademarks of Intel Corporation in the U.S. and other countries. AMD® is a registered trademark and AMD Opteron™, AMD Phenom™ and AMD Sempron™ are trademarks of Advanced Micro Devices, Inc. Microsoft®, Windows®, Windows Server...
Owner's Manual - Page 3
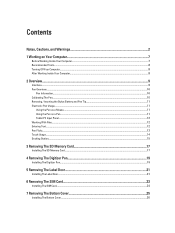
... on Your Computer...7
Before Working Inside Your Computer...7 Recommended Tools...8 Turning Off Your Computer...8 After Working Inside Your Computer...8
2 Overview...Memory Card 17
Installing The SD Memory Card...17
4 Removing The Digitizer Pen...19
Installing The Digitizer Pen...19
5 Removing The Label Door...21
Installing The Label Door...21
6 Removing The SIM Card...23
Installing The SIM Card...
Owner's Manual - Page 4
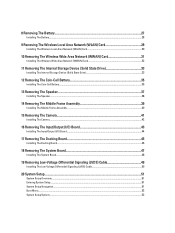
... The Battery...28
9 Removing The Wireless Local Area Network (WLAN) Card 29
Installing The Wireless Local Area Network (WLAN) Card 30
10 Removing The Wireless Wide Area Network (WWAN) Card 31
Installing The Wireless Wide Area Network (WWAN) Card 32
11 Removing The Internal Storage Device (Solid State Drive 33
Installing The Internal Storage Device (Solid State Drive 33
12 Removing The Coin...
Owner's Manual - Page 5
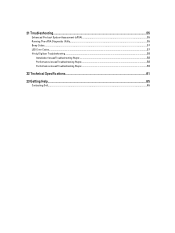
21 Troubleshooting...55
Enhanced Pre-boot System Assessment (ePSA 55 Running The ePSA Diagnostic Utility...55 Beep Codes...57 LED Error Codes...57 N-trig Digitizer Troubleshooting ...58
Installation IssuesTroubleshooting Steps:...58 Performance issuesTroubleshooting Steps:...58 Performance issuesTroubleshooting Steps:...59
22 Technical Specifications...61
23 Getting Help...65
Contacting Dell...65
Owner's Manual - Page 7
....
2. Turn off your computer (see Turning Off Your Computer).
3. If the computer is connected to a docking device (docked) such as the optional Media Base or Battery Slice, undock it. CAUTION: To disconnect a network cable, first unplug the cable from your computer and then unplug the cable from the network device.
4. Disconnect your computer and all attached devices from their electrical outlets...
Owner's Manual - Page 8
..., press and hold the power button for about 4 seconds to turn them off.
After Working Inside Your Computer
After you complete any replacement procedure, ensure you connect any external devices, cards, and cables before turning on your computer.
CAUTION: To avoid damage to the computer, use only the battery designed for this particular Dell computer. Do not use batteries...
Owner's Manual - Page 9
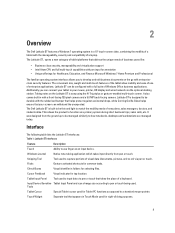
...The Dell Latitude ST features a Windows 7 operating system in a 10" touch-screen slate, combining the mobility of a tablet with the manageability, security and compatibility of a laptop.
The Latitude ST , opens a new category of tablet platforms that address the unique needs of business users like:
• Business class security, manageability and virtualization support • Intel Atom CPU and...
Owner's Manual - Page 11
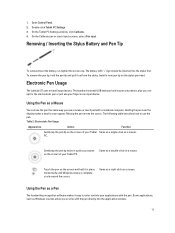
... Control Panel. 2. Double-click Tablet PC Settings. 3. On the Tablet PC Settings window...stylus. Install a new pen tip on the stylus pen head.
Electronic Pen Usage
The Latitude ST uses several input devices. The standard external USB keyboard and... Windows draws a complete circle around the cursor.
Same as a right-click on a mouse.
Using the Pen as a Pen
The handwriting recognition software makes...
Owner's Manual - Page 17
3
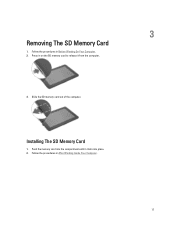
Removing The SD Memory Card
1. Follow the procedures in Before Working On Your Computer. 2. Press in on the SD memory card to release it from the computer.
3. Slide the SD memory card out of the computer.
Installing The SD Memory Card
1. Push the memory card into the compartment until it clicks into place. 2. Follow the procedures in After Working Inside Your Computer.
17
Owner's Manual - Page 19
4
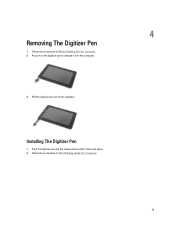
Removing The Digitizer Pen
1. Follow the procedures in Before Working On Your Computer. 2. Press in on the digitizer pen to release it from the computer.
3. Pull the digitizer pen out of the computer.
Installing The Digitizer Pen
1. Push the digitizer pen into the compartment until it clicks into place. 2. Follow the procedures in After Working Inside Your Computer.
19
Owner's Manual - Page 21

... the release latch that secures the label door.
3. Lift up the label door diagonally and remove it from the computer.
Installing The Label Door
1. Place the label door diagonally and align it with the securing clips on the edges. 2. Push the edges of the label door ...
Owner's Manual - Page 24

Installing The SIM Card
1. Push the SIM card into the SIM card slot until it clicks into place. 2. Install the label door. 3. Follow the procedures in After Working Inside Your Computer.
24
Owner's Manual - Page 26

Installing The Bottom Cover
1. Attach the bottom cover to the computer. 2. Push the edges of the bottom cover into the securing clips until they are fully engaged. 3. Tighten the screws that secure the bottom cover. 4. Install the label door. 5. Follow the procedures in After Working Inside Your Computer.
26
Owner's Manual - Page 28

Installing The Battery
1. Place the battery in the battery compartment. 2. Tighten the screws that secure the battery. 3. Connect the battery cable. 4. Install the bottom cover. 5. Install the label door. 6. Follow the procedures in After Working Inside Your Computer.
28
Owner's Manual - Page 30
... Computer. 8. Optionally if the Latitude ST unit is shipped from the factory without a LAN driver and the driver is installed
manually, you will be prompted to turn on the WLAN. The following steps need to be performed to successfully install the WLAN card. a) Connect a USB keyboard to the computer and restart the computer. b) Press the key at the Dell logo to "Enter Setup". c) Select to load...
Owner's Manual - Page 32
Installing The Wireless Wide Area Network (WWAN) Card
1. Slide the Wireless Wide Area Network (WWAN) card into its slot. 2. Tighten the screw securing the WWAN card in place. 3. Connect the antennas according to the color code on the WWAN card. 4. Install the battery. 5. Install the bottom cover. 6. Install the label door. 7. Follow the procedures in After Working Inside Your Computer.
32
Owner's Manual - Page 33
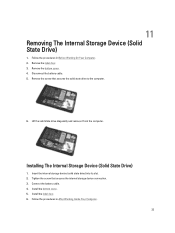
... the solid state drive to the computer.
6. Lift the solid state drive diagonally and remove it from the computer.
Installing The Internal Storage Device (Solid State Drive)
1. Insert the internal storage device (solid state drive) into its slot. 2. Tighten the screw that secures the internal storage device connection. 3. Connect the battery cable. 4. Install the bottom cover. 5. Install the label...
Owner's Manual - Page 51
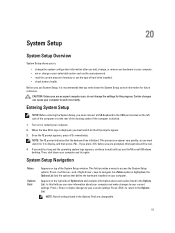
... configuration information after you add, change, or remove any hardware in your computer. • set or change a user-selectable option such as the user password. • read the current amount of memory or set the type of hard drive installed. • check battery health.
Before you use System Setup, it is recommended that you write down the System...
Owner's Manual - Page 58
... controller test failure System board failure 4 RAM Read/Write failure Memory failure 5 Real-time clock power fail CMOS battery failure 6 Video BIOS test failure Video card failure 7 CPU - cache test failure Processor failure 8 Display Display failure
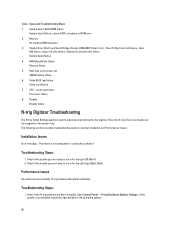
N-trig Digitizer Troubleshooting
The N-trig Tablet Settings applet is used to adjust several settings for the digitizer. Once the N-trig drivers...
Owner's Manual - Page 59
... Software Bundle Is Installed
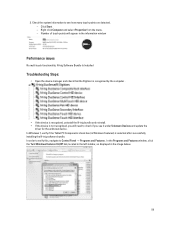
Troubleshooting Steps:
• Open the device manager and check that the Digitizer is recognized by the computer .
• If the device is recognized, uninstall the N-trig bundle and reinstall. • If the device is not recognized, you will need to check if you see it under Unknown Devices and update the
driver for the unknown device. In Windows...