Dell OptiPlex GX110 driver and firmware

Related Dell OptiPlex GX110 Manual Pages
Download the free PDF manual for Dell OptiPlex GX110 and other Dell manuals at ManualOwl.com
Service Manual - Page 2

... in any manner whatsoever without the written permission of Dell Computer Corporation is strictly forbidden.
Trademarks used in this text: Dell, the DELL logo, and OptiPlex are registered trademarks of Dell Computer Corporation; Intel and Pentium are registered trademarks and MMX is a trademark of Intel Corporation; Microsoft, Windows, and MS-DOS are registered trademarks of Microsoft Corporation...
Service Manual - Page 9
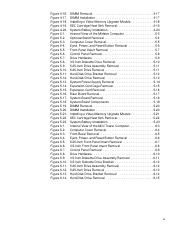
... Removal 5-11 5.25-Inch Drive Removal 5-11 Hard-Disk Drive Bracket Removal 5-12 Hard-Disk Drive Removal 5-13 System Power-Supply Removal 5-14 Expansion-Card Cage Removal 5-15 Expansion-Card Removal 5-16 Riser Board Removal 5-17 System Board Removal 5-18 System Board Components 5-19 DIMM Removal 5-20 DIMM Installation 5-20 Installing a Video-Memory Upgrade Module 5-21 SEC Cartridge...
Service Manual - Page 10
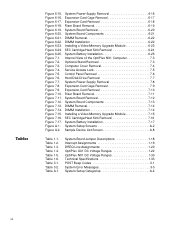
...-Memory Upgrade Module 6-23 SEC Cartridge/Heat Sink Removal 6-24 System Battery Installation 6-25 Internal View of the OptiPlex NX1 Computer 7-3 Optional-Stand Removal 7-3 Computer Cover Removal 7-4 Service Access Lock 7-5 Control Panel Removal 7-6 Hard-Disk Drive Removal 7-7 System Power-Supply Removal 7-8 Expansion-Card Cage Removal 7-9 Expansion-Card Removal 7-10 Riser Board Removal...
Service Manual - Page 13
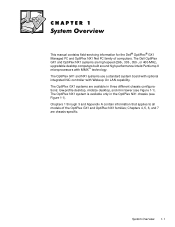
... of computers. The Dell OptiPlex GX1 and OptiPlex NX1 systems are high-speed (266-, 333-, 350-, or 400-MHz), upgradable desktop computers built around high-performance Intel® Pentium® II microprocessors with MMX™ technology. The OptiPlex GX1 and NX1 systems use a standard system board with optional integrated NIC controller with Wakeup On LAN capability. The OptiPlex GX1 systems...
Service Manual - Page 15
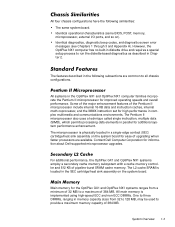
... (SEC) cartridge/heat sink assembly on the system board for ease of upgrading when faster processors are available. Contact Dell Computer Corporation for information about Dell-supported microprocessor upgrades.
For additional performance, the OptiPlex GX1 and OptiPlex NX1 systems employ a secondary cache memory subsystem with a cache memory controller and 512 KB of pipeline-burst SRAM cache...
Service Manual - Page 16

... on the system board provides two Mode-4, DMA bus-mastered EIDE interfaces, each of which can support up to two EIDE devices (for example, CD-ROM drive, hard-disk drive, and so on). The EIDE controller attaches to the high-speed PCI local bus. The primary EIDE interface (IDE1) provides support for up to two highperformance EIDE devices. The computer's boot drive should be connected...
Service Manual - Page 17
... from the graphic controller, and an inter-integrated circuit (I2C)-compatible serial control port for controlling the attached devices. A fourth port, audio mixing bus (AMB), is not supported by the system. To route mixed audio from an AMC-compliant adapter card to the system board, CD-ROM audio cables must be attached from the adapter card's CD-ROM audio input and CD-ROM
System Overview 1-5
Service Manual - Page 24
...
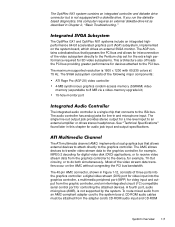
USB connectors (2)
serial port 2 connector
hard-disk drive
expansion-card cage expansion-card slot
security cable slot
AC power receptacle NIC connector (optional) video connector
The OptiPlex GX1 systems contain advanced expansion subsystems that can support a mixture of traditional ISA expansion cards (called legacy cards), Plug and Play ISA expansion cards, and PCI expansion cards...
Service Manual - Page 27
...
HDLED connector
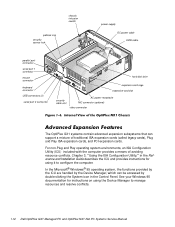
The system board has various accommodations for system upgrades including:
Microprocessor upgrade Main memory expansion Video memory expansion These upgrades are summarized in the following subsections, and installation procedures are provided for the various chassis configurations in Chapters 4, 5, 6, and 7.
On the OptiPlex GX1 and OptiPlex NX1 systems, the microprocessor...
Service Manual - Page 28
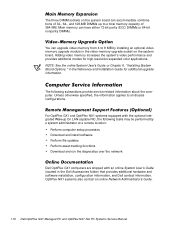
... Wakeup On LAN-capable NIC, the following tasks may be performed by a system administrator at a remote location:
Perform computer setup processes Download and install software Perform file updates Perform asset-tracking functions Download and run the diagnostics over the network
Dell OptiPlex GX1 computers are shipped with an online System User's Guide (located in the Dell Accessories folder...
Service Manual - Page 53
... of the Dell OptiPlex GX1 Managed PC and OptiPlex NX1 Net PC families. A brief explanation of how to load and start the system diagnostics is also provided at the end of the chapter. Dell recommends that you perform the following procedures in the order they are presented in this manual. Chapter 3, "Beep Codes and Error Messages," also...
Service Manual - Page 70
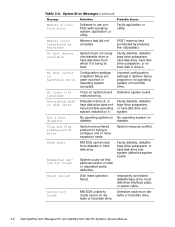
...expansion cards.
System resource conflict.
MS-DOS cannot read from diskette or harddisk drive.
System could not find particular sector on disk or requested sector defective.
Faulty diskette, diskette/ tape drive subsystem, or hard-disk drive subsystem (defective system board).
Disk reset operation failed.
Improperly connected diskette/tape drive, harddisk drive interface cable, or power cable...
Service Manual - Page 87

..., the video-memory upgrade module (if present), the single-edge contact (SEC) cartridge/heat sink assembly, and the guide bracket assembly from the old system board and install them on the replacement board. Also, set the jumpers on the new system board so that they are identical to those on the old board, unless a microprocessor upgrade is being installed. If the...
Service Manual - Page 90
...
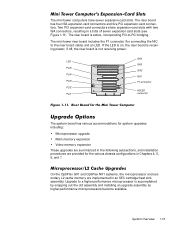
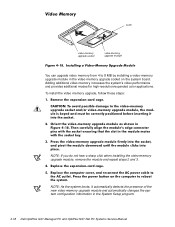
video-memory upgrade socket
video-memory upgrade module
You can upgrade video memory from 4 to 8 MB by installing a video-memory upgrade module in the video-memory upgrade socket on the system board. Adding additional video memory increases the system's video performance and provides additional modes for high-resolution/expanded color applications.
To install the video memory upgrade, follow...
Service Manual - Page 112

..., the video-memory upgrade module (if present), the single-edge contact (SEC) cartridge/heat sink assembly, and the guide bracket assembly from the old system board and install them on the replacement board. Also, set the jumpers on the new system board so that they are identical to those on the old board, unless a microprocessor upgrade is being installed. If the...
Service Manual - Page 115

...
video-memory upgrade socket
video-memory upgrade module
You can upgrade video memory from 4 to 8 MB by installing a video-memory upgrade module in the video-memory upgrade socket on the system board. Adding additional video memory increases the system's video performance and provides additional modes for high-resolution/expanded color applications.
To install the video memory upgrade, follow...
Service Manual - Page 138
..., the video-memory upgrade module (if present), the single-edge contact (SEC) cartridge/heat sink assembly, and the guide bracket assembly from the old system board and install them on the replacement board. Also, set the jumpers on the new system board so that they are identical to those on the old board, unless a microprocessor upgrade is being installed. If the...
Service Manual - Page 141
...
video-memory upgrade socket
video-memory upgrade module
You can upgrade video memory from 4 to 8 MB by installing a video-memory upgrade module in the video-memory upgrade socket on the system board. Adding additional video memory increases the system's video performance and provides additional modes for high-resolution/expanded color applications.
To install the video memory upgrade, follow...
Service Manual - Page 156
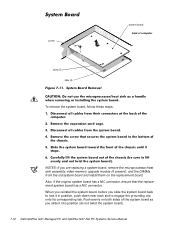
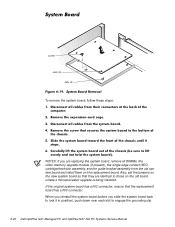
screw
system board back of computer
slots (5) tabs (5)
To remove the system board, follow these steps:
NOTES: If you are replacing a system board, remove the microprocessor/heat sink assembly, video-memory upgrade module (if present), and the DIMMs from the old system board and install them on the replacement board.
Also, if the original system board has a NIC connector, ensure that...
Service Manual - Page 159
...
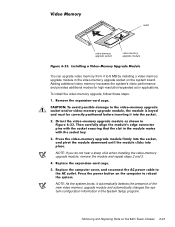
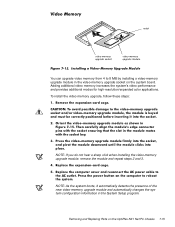
video-memory upgrade socket
video-memory upgrade module
You can upgrade video memory from 4 to 8 MB by installing a video-memory upgrade module in the video-memory upgrade socket on the system board. Adding additional video memory increases the system's video performance and provides additional modes for high-resolution/expanded color applications.
To install the video memory upgrade, follow...