Lexmark 4076 Execjet II driver and firmware
Drivers and firmware downloads for this Lexmark item
Related Lexmark 4076 Execjet II Manual Pages
Download the free PDF manual for Lexmark 4076 Execjet II and other Lexmark manuals at ManualOwl.com
Service Manual - Page 2
... STATES GOVERNMENT RESTRICTED RIGHTS This software and documentation are provided with RESTRICTED RIGHTS. Use, duplication or disclosure by the Government is subject to restrictions as set forth in subparagraph (c)(1)(ii) of the Rights in Technical Data and Computer Software clause at DFARS 252.227-7013 and in applicable FAR provisions: Lexmark International, Inc., Lexington, KY 40550...
Service Manual - Page 6

... in your country.
Federal Communications Commission (FCC) Statement
This printer has been tested and found to comply with the limits for a Class B digital device, pursuant to Part 15 of the FCC Rules. These limits are designed to provide reasonable protection against harmful interference in a residential installation. This equipment generates, uses, and can radiate radio...
Service Manual - Page 13
...General Information
3
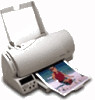
This manual is used to service both the IBM ExecJet II by Lexmark 4076 and the ExecJet IIc 4076 printers. The ExecJet IIc is capable of using a color print cartridge or a black print cartridge. The ExecJet II uses only a black print cartridge.
Both the Execjet II and the ExecJet IIc are general purpose highquality ink jet printers with a customer-replaceable print cartridge...
Service Manual - Page 23
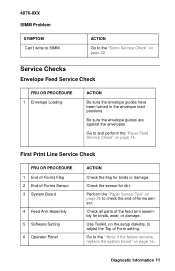
... been turned to the envelope load positions
Be sure the envelope guides are against the envelopes
Go to and perform the "Paper Feed Service Check" on page 14.
First Print Line Service Check
FRU OR PROCEDURE 1 End-of-Forms Flag 2 End-of-Forms Sensor 3 System Board
4 Feed Arm Assembly 5 Software Setting 6 Operator Panel
ACTION
Check the flag...
Service Manual - Page 27
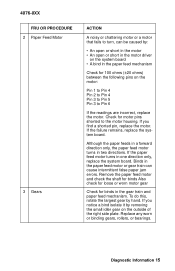
4076-0XX FRU OR PROCEDURE
2 Paper Feed Motor
3 Gears
ACTION
A noisy or chattering motor or a motor that fails to turn, can be caused by:
• An open or short in the motor • An open or short in the motor driver
on the system board...direction only, replace the system board. Binds in the paper feed motor or gear train can cause intermittent false paper jam errors. Remove the paper feed motor...
Service Manual - Page 36
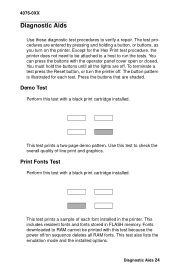
... Fonts Test
Perform this test with a black print cartridge installed.
This test prints a sample of each font installed in the printer. This includes resident fonts and fonts stored in FLASH memory. Fonts downloaded to RAM cannot be printed with this test because the power off/on sequence deletes all RAM fonts. This test also lists the emulation mode and...
Service Manual - Page 37
4076-0XX
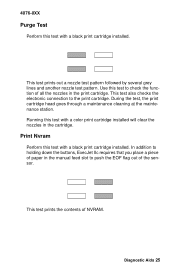
Purge Test
Perform this test with a black print cartridge installed.
This test prints out a nozzle test pattern followed by several grey lines and ... cartridge.
Print Nvram
Perform this test with a black print cartridge installed. In addition to holding down the buttons, ExecJet IIc requires that you place a piece of paper in the manual feed slot to push the EOF flag out of the sensor....
Service Manual - Page 38
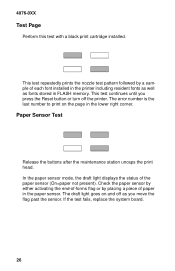
4076-0XX
Test Page
Perform this test with a black print cartridge installed.
This test repeatedly prints the nozzle test pattern followed by a sample of each font installed in the printer including resident fonts as well as fonts stored in FLASH memory. This test continues until you press the Reset button or turn off the printer. The error number is...
Service Manual - Page 39
4076-0XX
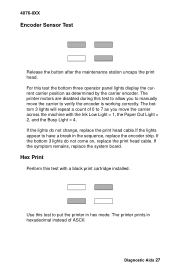
Encoder Sensor Test
Release the button after the maintenance station uncaps the print head. For this test the bottom three operator panel lights display the current carrier position as determined by the carrier encoder. The printer motors are disabled during this test to allow you to manually move the carrier to verify the...
Service Manual - Page 40
4076-0XX
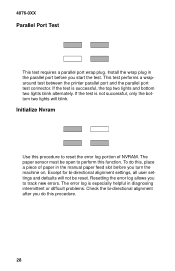
Parallel Port Test
This test requires a parallel port wrap plug. Install the wrap plug in the parallel port before you start the test. This test performs a wraparound test between the printer parallel port and the parallel port test connector. If the test is successful, the top two lights and bottom two lights blink alternately. If the test...
Service Manual - Page 41
4076-0XX
Serial Adapter Test
Perform this test with a black print cartridge installed. This test checks out the connection between the serial adapter and the printer. To run the test: 1. Turn the machine off. 2. Set switch 10 on the serial adapter card to ON. 3. Turn the machine on to print out the current switch settings and a
test pattern. 4. You may have to press...
Service Manual - Page 42
4076-0XX
Repair Information
5
This chapter explains how to make adjustments to the printer... parts, follow the instructions below in addition to all the usual precautions, such as turning off power before removing logic boards:
• Keep ... Prevent ESD-sensitive parts from being accidentally touched by
other personnel. Install machine covers when you are not working on the machine, and do...
Service Manual - Page 43
...with the black print cartridge installed.
1. Turn off the printer. 2. Hold down the Install Print Cartridge button and the Line Feed
Button, then turn on the printer. Release the buttons when all the lights go out. 3. A page loads and the bi-directional alignment... the draft mode.
7. When you complete the adjustment and turn off the printer the settings will be saved in NVRAM.
Repair Information 31
Service Manual - Page 48
4076-0XX
Carrier Transport Motor Frame Removal
1. Remove the top cover. 2. Disconnect J6 from the system board. 3. Move the carrier in line with the opening in the carrier transport
motor frame. 4. Reach through the opening and pull the belt from the carrier. 5. To unlock the carrier guide... carrier guide rod...guide rod latches, rotate the rod top-to-rear.
Gently push the carrier guide... paper guide. 5....
Service Manual - Page 52
4076-0XX
To install the left side frame onto the middle frame, align the right side frame latch with the latching surface on the middle frame before you align the roller shafts and carrier guide. It may be easier to do this with the machine on its right side.
Maintenance Drive And Rocker Assemblies Removal...
Service Manual - Page 54
4076-0XX
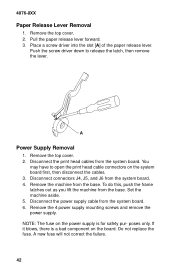
Paper Release Lever Removal
1. Remove the top cover. 2. Pull the paper release lever forward. 3. Place a screw driver into the slot [A] of the paper release lever.
Push the screw driver down to release the latch, then remove the lever.
A
Power Supply Removal
1. Remove the top cover. 2. Disconnect the print head cables from the system board. You...
Service Manual - Page 56
...cable connectors on the system board first, then disconnect the cables. 5. Disconnect connectors J4, J5, and J6 from the system board. 6. Remove the machine from the base. To do this, push the frame latches out as you lift the machine from the base. Set...want to remove the carrier guide and reinstall it after you install the paper guide.
When you reinstall the paper guide, be sure the front edge ...
Service Manual - Page 57
4076-0XX
carrier guide, push down the front, bottom edge. It will snap under the carrier guide.
To install the right side frame onto the middle frame, align the right side frame latch with the latching surface on the mid frame before you align the roller shafts and carrier guide. It may be easier to do...
Service Manual - Page 58
...Set the machine aside. 4. Disconnect the power supply cable from the system board. 5. Remove the 6 system board mounting screws and remove the system board. 6. Check the bi-directional alignment adjustment.
After replacing the system board, reset the printer...off the printer. 2. Place a piece of paper in the manual feed slot to push the EOF
flag out of the sensor. 3. Hold down the Install Print ...