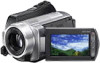
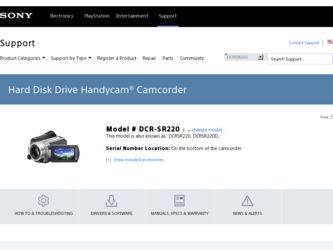
Sony DCR-SR220D - 120gb Hard Disk Drive Handycam Camcorder driver and firmware
Related Sony DCR-SR220D Manual Pages
Download the free PDF manual for Sony DCR-SR220D and other Sony manuals at ManualOwl.com
Operating Guide - Page 2
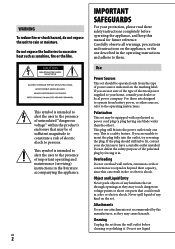
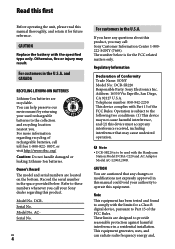
... SAFEGUARDS
For your protection, please read these safety instructions completely before operating the appliance, and keep this manual for future reference. Carefully observe all warnings, precautions and instructions on the appliance, or the one described in the operating instructions and adhere to them.
Use
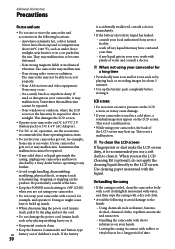
Power Sources
This set should be operated only from the type of...
Operating Guide - Page 3
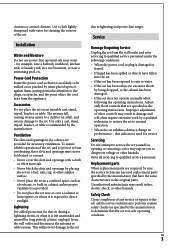
... are specified in the operating instructions. Improper adjustment of other controls may result in damage and will often require extensive work by a qualified technician to restore the set to normal operation. When the set exhibits a distinct change in performance - this indicates a need for service.
Servicing
Do not attempt to service the set yourself as opening or removing...
Operating Guide - Page 4
... below is for the FCC related matters only.
Regulatory Information
Declaration of Conformity Trade Name: SONY Model No.: DCR-SR220 Responsible Party: Sony Electronics Inc. Address: 16530 Via Esprillo, San Diego, CA 92127 U.S.A. Telephone number: 858-942-2230 This device complies with Part 15 of the FCC Rules. Operation is subject to the following two...
Operating Guide - Page 5
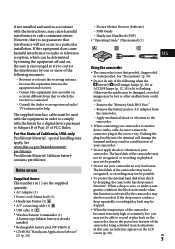
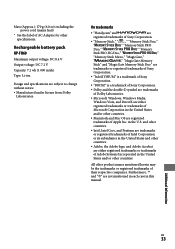
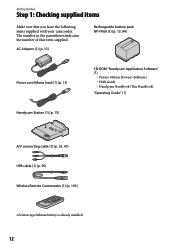
...58320; Wireless Remote Commander (1)
A button-type lithium battery is already installed. Rechargeable battery pack NP-FH60 (1) CD-ROM "Handycam Application Software" (1) (p. 24)
Picture Motion Browser (Software) PMB Guide Handycam Handbook (PDF) "Operating Guide" (This manual) (1)
US
Using the camcorder
...
Operating Guide - Page 7
... this manual were taken with a digital still camera, and may look different from what you actually see.
In this Operating Guide, the hard disk and "Memory Stick PRO Duo" are called "media."
The screenshots are from Windows Vista, and may vary depending on the operating system of the computer.
* Refer also to "Handycam Handbook" (PDF) and "PMB Guide."
IMPORTANT...
Operating Guide - Page 20
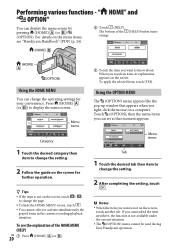
...change the operating settings for your convenience. Press (HOME) (or ) to display the menu screen.
Menu items
Category
1 Touch the desired category then
item to change the setting.
2 Follow the guide on the ...menu appears like the pop-up window that appears when you right-click the mouse on a computer. Touch (OPTION), then the menu items you can set at that moment appears.
Menu ...
Operating Guide - Page 24
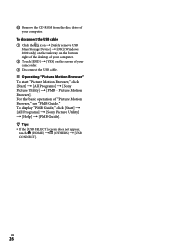
...The supplied software "Picture Motion
Browser" is not supported by Macintosh computers. To use a Macintosh computer connected to your camcorder, see the following website for details. http://guide.d-imaging.sony.co.jp/mac/ms/us/
Installing and viewing "Handycam Handbook" (PDF)
To view "Handycam Handbook" (PDF), you need to install Adobe Reader on your computer. Continue with the installation, even...
Operating Guide - Page 25
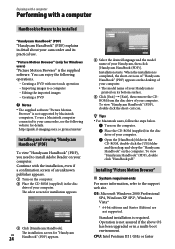
Memory: 256 MB or more
Hard disk: Disk volume required for installation: Approximately 500 MB (5 GB or more may be necessary when creating DVD-Videos.)
Display: Minimum 1,024 × 768 dots Others: USB port (this must be provided
as standard, Hi-Speed USB (USB 2.0 compatible) is recommended), DVD burner (CD-ROM drive is necessary for installation)
Installing software You need to...
Operating Guide - Page 26
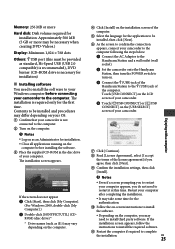
Remove the CD-ROM from the disc drive of your computer.
To disconnect the USB cable
Click the icon [Safely remove USB Mass Storage Device] [OK] (Windows 2000 only) on the task tray on the bottom right of the desktop of your computer.
Touch [END] [YES] on the screen of your camcorder.
Disconnect the USB cable. Operating...
Operating Guide - Page 27
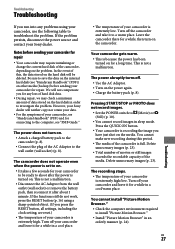
... may check a minimum amount of data stored on the hard disk in order to investigate the problem. However, your Sony dealer will neither copy nor retain your data.
For the symptoms of your camcorder, see "Handycam Handbook" (PDF) and for connecting to the computer, see "PMB Guide."
The power does not turn on.
Attach a charged battery pack...
Operating Guide - Page 30
... it checked by a Sony dealer before operating it any further.
Avoid rough handling, disassembling, modifying, physical shock, or impact such as hammering, dropping or stepping on the product. Be particularly careful of the lens.
Keep the POWER switch setting to OFF (CHG) when you are not using your camcorder.
Do not...
Operating Guide - Page 31
... battery. However, even if the pre-installed rechargeable battery is not charged, the camcorder operation will not be affected as long as you are not recording the date.
Procedures
Connect your camcorder to a wall outlet (wall socket) using the supplied AC Adaptor, and leave it with the POWER switch set to OFF (CHG) for more...
Operating Guide - Page 33
... under license from Dolby
Laboratories.
On trademarks
"Handycam" and
are
registered trademarks of Sony Corporation.
"Memory Stick," " ," "Memory Stick Duo,"
"
," "Memory Stick PRO
Duo," "
," "Memory
Stick PRO-HG Duo," "
,"
"Memory Stick Micro," "MagicGate,"
"
," "MagicGate Memory
Stick" and "MagicGate Memory Stick Duo" are
trademarks or registered trademarks of...
Marketing Specifications (DCR-SR220) - Page 2
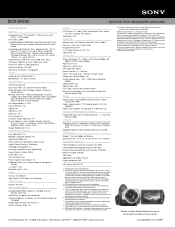
...) Audio/Video Remote Terminal: Yes Active Interface Shoe: Yes
Hard Disk Drive Handycam® camcorder
Display
LCD Screen: 2.7" wide1 (16:9) touch panel Clear Photo LCD Plus™ display (211k pixels)
Viewfinder: N/A
Hardware
Memory Stick slot: Memory Stick PRO Duo™ Media Manual / Auto Lens Cover: Auto Assignable Dial: N/A S/S & Zoom button on LCD: Yes Light/Flash: Yes
Optics/Lens...
Handycam® Handbook - Page 12
... 13, 94)
Power cord (Mains lead) (1) (p. 13)
CD-ROM "Handycam Application Software" (1)
Picture Motion Browser (Software) PMB Guide Handycam Handbook (This Handbook)
"Operating Guide" (1)
Handycam Station (1) (p. 13)
A/V connecting cable (1) (p. 35, 47) USB cable (1) (p. 50) Wireless Remote Commander (1) (p. 103)
A button-type lithium battery is already installed.
12
Handycam® Handbook - Page 37
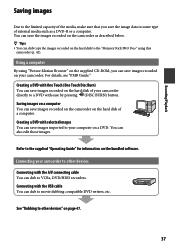
... the hard disk of a computer. Creating a DVD with selected images You can save images imported to your computer on a DVD. You can also edit those images.
Refer to the supplied "Operating Guide" for information on the bundled software.
Connecting your camcorder to other devices
Connecting with the A/V connecting cable You can dub to VCRs, DVD/HDD recorders. Connecting with the USB cable...
Handycam® Handbook - Page 45
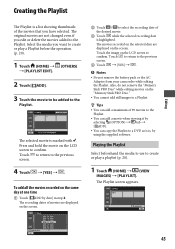
...recorded on the selected date are displayed on the screen. Touch the image on the LCD screen to confirm. Touch to return to the previous screen.
Touch [YES] .
Notes Do not remove the battery pack or the AC
Adaptor from your camcorder...]. You can copy the Playlist to a DVD as it is, by using the supplied software.
Playing the Playlist
Select ...
Handycam® Handbook - Page 71
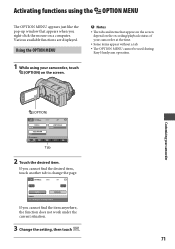
...like the pop-up window that appears when you right-click the mouse on a computer. Various available functions are displayed.
Using the OPTION MENU
1 While using your camcorder, touch
(OPTION) on...the recording/playback status of your camcorder at the time.
Some items appear without a tab.
The OPTION MENU cannot be used during Easy Handycam operation.
Customizing your camcorder
(...
Handycam® Handbook - Page 75
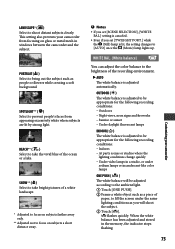
... subjects clearly. This setting also prevents your camcorder from focusing on glass or metal mesh in windows between the camcorder and the subject.
...setting is canceled. Even if you set [TWILIGHT PORT.] while
the (Still) lamp is lit, the setting changes to [AUTO] once the (Movie) lamp lights up.
WHITE BAL. (White balance)
You can adjust the color balance to the brightness of the recording...
Handycam® Handbook - Page 98
... contents of source code.
Read "license2.pdf" in the "License" folder on the CD-ROM. You will find licenses (in English) of "GPL," and "LGPL" software.
To view the PDF, Adobe Reader is needed. If it is not installed on your computer, you can download it from the Adobe Systems web page:
http://www.adobe.com/