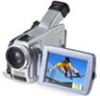
Sony DCR-TRV39 - Digital Handycam Camcorder driver and firmware
Related Sony DCR-TRV39 Manual Pages
Download the free PDF manual for Sony DCR-TRV39 and other Sony manuals at ManualOwl.com
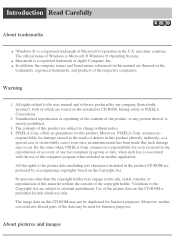
PIXELA ImageMixer v1.5 Instruction Manual - Page 2
... of Apple Computer, Inc. q In addition, the company names and brand names referenced in this manual are themselves the
trademarks, registered trademarks, and products of the respective companies.
Warning
1. All rights related to the user manual and software produced by our company (henceforth, 'product'), both of which are stored on the installation CD-ROM, belong solely...
PIXELA ImageMixer v1.5 Instruction Manual - Page 6
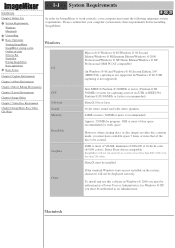
..., or in less than 256 colors.
DirectX must be installed.
Other
If the standard Windows fonts are not installed on the system, characters will not be displayed correctly.
To install and use this software in Windows ® 2000 you must be authorized as a Power User or Administrator; for Windows ® XP you must be authorized as an Administrator.
Macintosh
PIXELA ImageMixer v1.5 Instruction Manual - Page 36
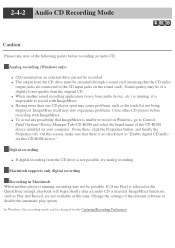
... of the CD-ROM device installed on your computer. From there, click the Properties button, and finally the Properties tab. On this screen, make sure that there is no check next to "Enable digital CD audio for this CD-ROM device."
Digital recording
q If digital recording from the CD drive is not possible, try analog recording.
Macintosh supports only digital recording
Recording in Macintosh When...
PIXELA ImageMixer v1.5 Instruction Manual - Page 145
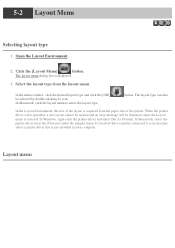
... layout cannot be created and an error message will be displayed when the Layout menu is selected. In Windows, right-click the printer driver and select [Set As Default]. In Macintosh, select the printer driver from the [Chooser] under the [Apple] menu. If you don't have a printer connected to your machine, select a printer driver that is pre-installed in your computer.
Layout menu
PIXELA ImageMixer v1.5 Instruction Manual - Page 231
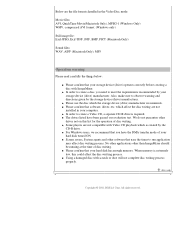
... the storage device (drive) manufacturer recommends. q Please confirm that software, driver, etc. which affect the disc writing are not
installed in your computer. q In order to create a Video CD, a separate CD-R drive is required. q The drives listed have been passed our evaluation test. We do not guarantee other
drives not on this list for the operation of disc writing. q Some players...
Operating Instructions (primary manual) - Page 137
... to the computer. If you connect your camcorder to the computer first, you will not be able to install the USB driver correctly.
For details about the computer's ports and editing software, contact the computer manufacturer.
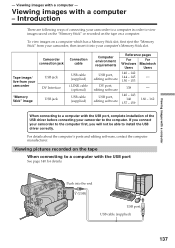
Viewing pictures recorded on the tape
When connecting to a computer with the USB port
See page 140 for details.
Push into the end (USB)
USB port USB cable (supplied)
137
Operating Instructions (primary manual) - Page 138
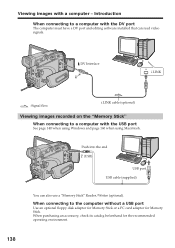
... with the DV port
The computer must have a DV port and editing software installed that can read video signals.
DV Interface
i.LINK
: Signal flow
i.LINK cable (optional)
Viewing images recorded on the "Memory Stick"
When connecting to a computer with the USB port
See page 140 when using Windows and page 160 when using Macintosh.
Push into the end (USB)
USB port USB cable (supplied)
You can...
Operating Instructions (primary manual) - Page 140
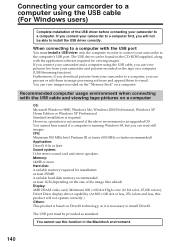
... to a computer with the USB port
You must install a USB driver onto the computer in order to connect your camcorder to the computer's USB port. The USB driver can be found on the CD-ROM supplied, along with the application software required for viewing images. If you connect your camcorder and a computer using the USB cable, you can view pictures live from your camcorder and pictures recorded on...
Operating Instructions (primary manual) - Page 141
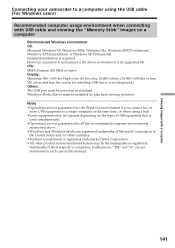
... with USB cable and viewing the "Memory Stick" images on a computer
Recommended Windows environment OS: Microsoft Windows 98, Windows 98SE, Windows Me, Windows 2000 Professional, Windows XP Home Edition or Windows XP Professional Standard installation is required. However, operation is not assured if the above environment is an upgraded OS. CPU: MMX Pentium 200 MHz or faster Display: Minimum...
Operating Instructions (primary manual) - Page 142
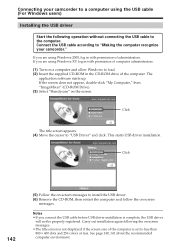
... the computer. Connect the USB cable according to "Making the computer recognize your camcorder." If you are using Windows 2000, log in with permission of administrators. If you are using Windows XP, log in with permission of computer administrators. (1) Turn on a computer and allow Windows to load. (2) Insert the supplied CD-ROM in the CD-ROM drive of the computer. The
application software starts...
Operating Instructions (primary manual) - Page 143
... with a computer
Connecting your camcorder to a computer using the USB cable (For Windows users)
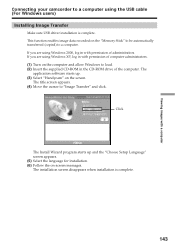
Installing Image Transfer
Make sure USB driver installation is complete. This function enables image data recorded on the "Memory Stick" to be automatically transferred (copied) to a computer. If you are using Windows 2000, log in with permission of administrators. If you are using Windows XP, log...
Operating Instructions (primary manual) - Page 144
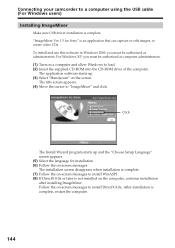
...USB driver installation is complete. "ImageMixer Ver.1.5 for Sony" is an application that can capture or edit images, or create video CDs. To install and use this software in Windows 2000, you must be authorized as administrators. For Windows XP, you must be authorized as computer administrators. (1) Turn on a computer and allow Windows to load. (2) Insert the supplied CD-ROM into the CD-ROM drive...
Operating Instructions (primary manual) - Page 145
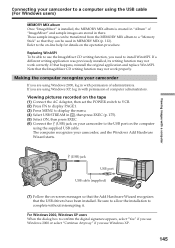
... recorded on the tape (1) Connect the AC Adaptor, then set the POWER switch to VCR. (2) Press FN to display PAGE1. (3) Press MENU to display the menu. (4) Select USB STREAM in , then press EXEC (p. 175). (5) Select ON, then press EXEC. (6) Connect the (USB) jack on your camcorder to the USB port on the computer
using the supplied USB cable. The computer recognizes your camcorder, and the Windows...
Operating Instructions (primary manual) - Page 146
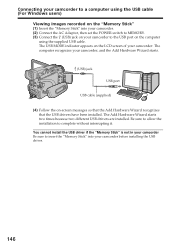
... camcorder to a computer using the USB cable (For Windows users)
Viewing images recorded on the "Memory Stick" (1) Insert the "Memory Stick" into your camcorder. (2) Connect the AC Adaptor, then set the POWER switch to MEMORY. (3) Connect the (USB) jack on your camcorder to the USB port on the computer
using the supplied USB cable. The USB MODE indicator appears on the LCD screen of your camcorder...
Operating Instructions (primary manual) - Page 147
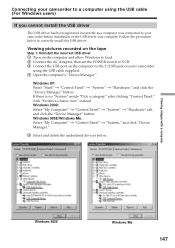
... install the USB driver.
Viewing pictures recorded on the tape
Step 1: Uninstall the incorrect USB driver 1 Turn on the computer and allow Windows to load. 2 Connect the AC Adaptor, then set the POWER switch to VCR. 3 Connect the USB port on the computer to the (USB) jack on your camcorder
using the USB cable supplied. 4 Open the computer's "Device Manager."
Windows XP: Select "Start" t "Control...
Operating Instructions (primary manual) - Page 148
Connecting your camcorder to a computer using the USB cable (For Windows users)
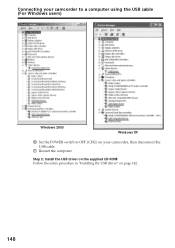
Windows 2000
Windows XP
6 Set the POWER switch to OFF (CHG) on your camcorder, then disconnect the USB cable.
7 Restart the computer.
Step 2: Install the USB driver on the supplied CD-ROM Follow the entire procedure in "Installing the USB driver" on page 142.
148
Operating Instructions (primary manual) - Page 149
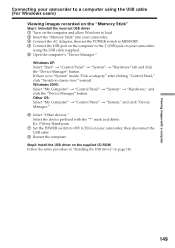
... images recorded on the "Memory Stick"
Step1: Uninstall the incorrect USB driver 1 Turn on the computer and allow Windows to load. 2 Insert the "Memory Stick" into your camcorder. 3 Connect the AC Adaptor, then set the POWER switch to MEMORY. 4 Connect the USB port on the computer to the (USB) jack on your camcorder
using the USB cable supplied. 5 Open the computer's "Device Manager."
Windows XP...
Operating Instructions (primary manual) - Page 150
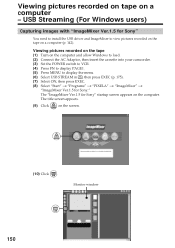
... Sony"
You need to install the USB driver and ImageMixer to view pictures recorded on the tape on a computer (p. 142).
Viewing pictures recorded on the tape (1) Turn on the computer and allow Windows to load. (2) Connect the AC Adaptor, then insert the cassette into your camcorder. (3) Set the POWER switch to VCR. (4) Press FN to display PAGE1. (5) Press MENU to display the menu. (6) Select USB...
Operating Instructions (primary manual) - Page 153
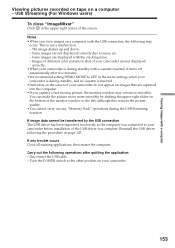
... window to the left, although this reduces the picture quality. •You cannot carry out any "Memory Stick" operations during the USB Streaming function.
If image data cannot be transferred by the USB connection The USB driver has been registered incorrectly as the computer was connected to your camcorder before installation of the USB driver was complete. Reinstall the USB driver following...
Operating Instructions (primary manual) - Page 160
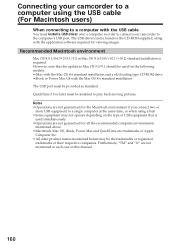
Connecting your camcorder to a computer using the USB cable (For Macintosh users)
When connecting to a computer with the USB cable
You must install a USB driver onto a computer in order to connect your camcorder to the computer's USB port. The USB driver can be found on the CD-ROM supplied, along with the application software required for viewing images.
Recommended Macintosh environment
Mac OS ...