Sony HDR-CX560V driver and firmware
Drivers and firmware downloads for this Sony item
Related Sony HDR-CX560V Manual Pages
Download the free PDF manual for Sony HDR-CX560V and other Sony manuals at ManualOwl.com
Handycam® Handbook - Page 3
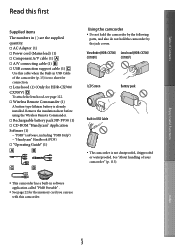
...; Power cord (Mains lead) (1) Component A/V cable (1) A/V connecting cable (1) USB connection support cable (1)
Use this cable when the Built-in USB Cable of the camcorder (p. 15) is too short for connection. Lens hood (1) (Only for HDR-CX700/ CX700V) To attach the lens hood, see page 122. Wireless Remote Commander...
Handycam® Handbook - Page 44
...) [Setup]
[ (Playback Settings)] [Empty Music],
then transfer the music file again. If you
delete music files using [Empty Music], the
music data recorded on your camcorder at the
factory will be deleted too. In this case, you can
restore them using Music Transfer, a software
installed together with "PMB." For operating
instructions, see Music...
Handycam® Handbook - Page 48
... date and time of the camcorder are
not correctly set When the camcorder is moved for a long
distance
Tips The GPS Assist Data can be updated using the
"PMB Portable" software that is stored on the camcorder.
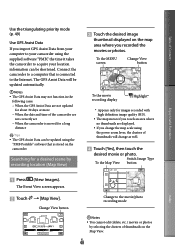
Searching for a desired scene by recording location (Map View)
Touch the desired image
thumbnail...
Handycam® Handbook - Page 55
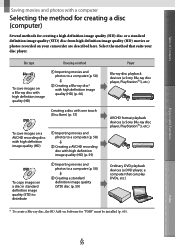
... image quality (STD) disc (p. 59)
Player Blu-ray disc playback devices (a Sony Blu-ray disc player, PlayStation3, etc.)
AVCHD format playback devices (a Sony Blu-ray disc player, PlayStation3, etc.)
Ordinary DVD playback devices (a DVD player, a computer that can play DVDs, etc.)
* To create a Blu-ray disc, the BD Add-on Software for "PMB" must be installed (p. 60).
Index
US
55
Handycam® Handbook - Page 57
... DVD drive.
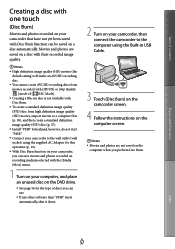
See page 56 for the type of discs you can use.
If any other software than "PMB" starts automatically, shut it down.
2 Turn on your camcorder, then connect the camcorder to the computer using the Built-in USB Cable.
3 Touch [Disc Burn] on the camcorder screen.
4 Follow the instructions on the computer screen...
Handycam® Handbook - Page 59

... drag and drop onto the window for selecting movies.
5 Follow the instructions on the screen to create a disc.
It may take a long time to create a disc.
Playing an AVCHD recording disc on a computer
You can play back AVCHD recording discs using "Player for AVCHD" that is installed together with "PMB."
To start "Player for AVCHD" Click [Start...
Handycam® Handbook - Page 60
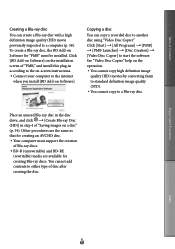
... a Blu-ray disc, the BD Add-on Software for "PMB" must be installed. Click [BD Add-on Software] on the installation screen of "PMB," and install this plug-in according to the on-screen instructions. Connect your computer to the internet
when you install [BD Add-on Software].
Copying a disc
You can copy a recorded disc to another disc using "Video Disc Copier...
Handycam® Handbook - Page 93
...files cannot be displayed on the connected device. To import images from the camcorder to your computer, use the supplied "PMB" software. If the "Device Stage*" window does not open when you connect the camcorder to a computer equipped with Windows 7, set [USB Connect Setting] to [Auto]. * "Device Stage" is a menu of Windows 7, that is used to manage devices (camcorder, camera, etc.) that...
Handycam® Handbook - Page 118
... somebody, it is recommended that you delete data completely using data deletion software on a computer. Also, when you dispose of the memory card, it is recommended that you destroy the actual body of the memory card.
On trademarks
"Handycam" and
are
registered trademarks of Sony Corporation.
"AVCHD" and "AVCHD" logotype are
trademarks of Panasonic Corporation...
Handycam® Handbook - Page 119
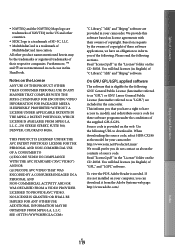
... source code. Read "license2.pdf " in the "License" folder on the CD-ROM. You will find licenses (in English) of "GPL," and "LGPL" software.
To view the PDF, Adobe Reader is needed. If it is not installed on your computer, you can download it from the Adobe Systems web page: http://www.adobe.com/
Index
US...
Operating Guide (Large File - 12.06 MB) - Page 8
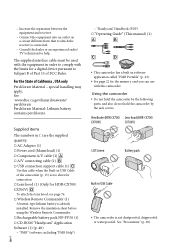
...; Power cord (Mains lead) (1) Component A/V cable (1) A/V connecting cable (1) USB connection support cable (1)
Use this cable when the Built-in USB Cable of the camcorder (p. 15) is too short for connection. Lens hood (1) (Only for HDR-CX700/ CX700V) To attach the lens hood, see page 76. Wireless Remote Commander...
Operating Guide (Large File - 12.06 MB) - Page 28
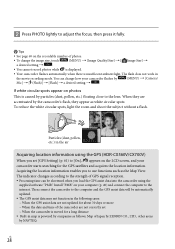
.... Processing time can be shortened when you load the GPS assist data into the camcorder using the
supplied software "PMB." Install "PMB" on your computer (p. 40) and connect the computer to the internet. Then connect the camcorder to the computer and the GPS assist data will be automatically updated. The GPS assist data may not function in the following...
Operating Guide (Large File - 12.06 MB) - Page 39
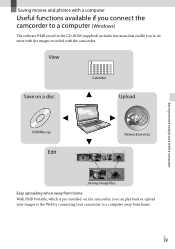
... available if you connect the camcorder to a computer (Windows)
The software PMB stored in the CD-ROM (supplied) includes functions that enable you to do more with the images recorded with the camcorder.
View
Save on a disc
Calendar
Upload
Saving movies and photos with a computer
DVD/Blu-ray
Edit
Network services
Joining image files
Easy uploading when away...
Operating Guide (Large File - 12.06 MB) - Page 40
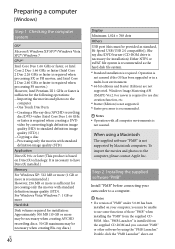
...-Speed USB (USB 2.0 compatible)), Bluray disc/DVD burner (CD-ROM drive is necessary for installation) Either NTFS or exFAT file system is recommended as the hard disk file system. *1 Standard installation is required. Operation is
not assured if the OS has been upgraded or in a multi-boot environment. *2 64-bit editions and Starter (Edition) are not supported. Windows Image Mastering...
Operating Guide (Large File - 12.06 MB) - Page 41
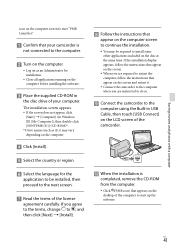
... computer when you are instructed to do so.
Connect the camcorder to the
computer using the Built-in USB Cable, then touch [USB Connect] on the LCD screen of the camcorder.
When the installation is
completed, remove the CD-ROM from the computer.
Click (PMB icon) that appears on the desktop of the computer to start up the software...
Operating Guide (Large File - 12.06 MB) - Page 42
... using, consult the manufacturer of the software.
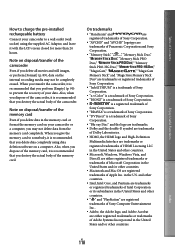
To disconnect your camcorder from the computer
Click the icon at the bottom right of the desktop of the computer [Safely remove USB Mass Storage Device].
Touch [Cancel] [Yes] on the camcorder screen.
Disconnect the USB cable. If you are using Windows 7, the icon may not appear...
Operating Guide (Large File - 12.06 MB) - Page 43
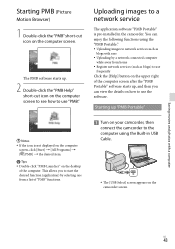
... desired item. Tips Double-click "PMB Launcher" on the desktop of the computer. This allows you to start the desired function (application) by selecting one from a list of "PMB" functions.
Uploading images to a network service
The application software "PMB Portable" is pre-installed in the camcorder. You can enjoy the following functions using the...
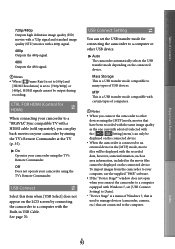
Operating Guide (Large File - 12.06 MB) - Page 44
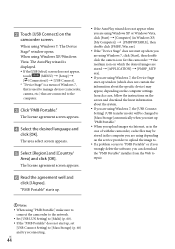
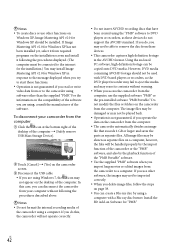
... appear, depending on the computer settings. In such a case, follow the instructions on the screen and download the latest information about the system.
If you are using Windows 7, the [USB Connect Setting] (USB transfer mode) will be changed to [Mass Storage] automatically when you start up "PMB Portable."
When you upload images via Internet, as in the case...
Operating Guide (Large File - 12.06 MB) - Page 62
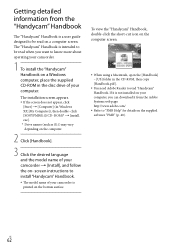
....
When using a Macintosh, open the [Handbook] - [US] folder in the CD-ROM, then copy [Handbook.pdf ].
You need Adobe Reader to read "Handycam" Handbook. If it is not installed on your computer, you can download it from the Adobe Systems web page: http://www.adobe.com/
Refer to "PMB Help" for details on...
Operating Guide (Large File - 12.06 MB) - Page 78
... time....65 Recording media 21 Recording time of movies/ number of recordable photos....65 Repair 63 RESET 77
S
Saving images in external media 48 Screen indicators 74 Self-diagnosis display 64 Setting the date and time...........18 Software 40 Specifications 71 Supplied items 8
T Thumbnail 38 Tripod 30, 77 Troubleshooting 63 Turning the power on 18 TV 35 U USB cable 51...