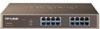
TP-Link TL-SG1016D driver and firmware
Drivers and firmware downloads for this TP-Link item
Related TP-Link TL-SG1016D Manual Pages
Download the free PDF manual for TP-Link TL-SG1016D and other TP-Link manuals at ManualOwl.com
User Guide - Page 3
... for a Class A digital device, pursuant to part 15 of the FCC Rules. These limits are designed to provide reasonable protection against harmful interference when the equipment is operated in a commercial environment. This equipment generates, uses, and can radiate radio frequency energy and, if not installed and used in accordance with the instruction manual, may cause...
User Guide - Page 4
...
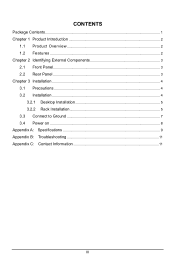
1.1 Product Overview 2 1.2 Features ...2 Chapter 2 Identifying External Components 3 2.1 Front Panel...3 2.2 Rear Panel ...3 Chapter 3 Installation ...4 3.1 Precautions ...4 3.2 Installation ...4
3.2.1 Desktop Installation 5 3.2.2 Rack Installation 5 3.3 Connect to Ground 7 3.4 Power on ...8 Appendix A: Specifications 9 Appendix B: Troubleshooting 11 Appendix C: Contact Information 11
III
User Guide - Page 6
... 1000Mbps Ethernet devices because it is standard-based. It protects your existing network investments while providing you with a straightforward migration path to faster Gigabit speeds.
The TL-SG1008/TL-SG1016D/TL-SG1024D Switch is plug-and-play and no configuration is required. Auto MDI/MDI-X cable detection on all ports eliminate the need for crossover cable or Uplink port. Each port can...
User Guide - Page 8
...Cable. For detail information, please refer to section 3.3 Connect to Ground. ¾ AC Power Socket: Connect the female connector of the power cord here, and the male connector to the AC power outlet. Please make sure the voltage of the power supply meets the requirement of the input voltage.
Chapter 3 Installation...• Install the Switch on a flat and stable surface that can support the entire...
User Guide - Page 9
Caution: Please unplug the power cord before installing or removing the Switch.
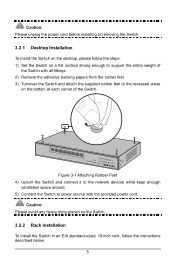
3.2.1 Desktop Installation
To install the Switch on the desktop, please follow the steps: 1) Set the Switch on a flat surface strong enough to support the entire weight of
the Switch with all fittings. 2) Remove the adhesive backing papers from the rubber feet. 3) Turnover the Switch and attach the...
User Guide - Page 10
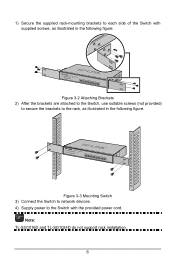
..., use suitable screws (not provided)
to secure the brackets to the rack, as illustrated in the following figure.
Figure 3-3 Mounting Switch 3) Connect the Switch to network devices. 4) Supply power to the Switch with the provided power cord.
Note: TL-SG1016D and TL-SG1024D do not support rack installation.
6
User Guide - Page 11
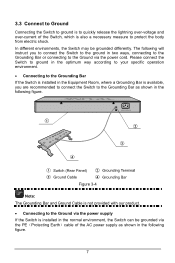
... shock. In different environments, the Switch may be grounded differently. The following will instruct you to connect the Switch to the ground in two ways, connecting to the Grounding Bar or... 3-4 Note: The Grounding Bar and Ground Cable is not provided with our product. • Connecting to the Ground via the power supply If the Switch is installed in the normal environment, the Switch can ...
User Guide - Page 13

... 100m)
Network Media (Cable)
100Base-TX: UTP category 5, 5e cable (maximum 100m) EIA/TIA-568 100 STP (maximum 100m)
1000Base-T: UTP category 5, 5e cable (maximum 100m) EIA/TIA-568 100 STP (maximum 100m)
Number of Ports 8/16/24 10/100/1000Mbps Auto-Negotiation RJ-45 ports
LED indicators POWER, Link/Act, 1000Mbps
Transfer Method Store-and-Forward
MAC Address Learning...
User Guide - Page 15
... the Switch and the device.
¾ Make sure the connected device is turned on and working well. ¾ The cable must be less than 100 meters long(328 feet).
Appendix C: Contact Information
For help with the installation or operation of the TP-LINK TL-SG1008/TL-SG1016D/ TL-SG1024D Switch, please contact us. E-mail: support@tp-link.com Website: http://www.tp-link.com
11