Dell Alienware 17 R3 driver and firmware

Related Dell Alienware 17 R3 Manual Pages
Download the free PDF manual for Dell Alienware 17 R3 and other Dell manuals at ManualOwl.com
Specifications - Page 11
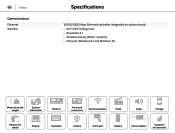
... Mbps Ethernet controller integrated on system board • Wi-Fi 802.11a/b/g/n/ac • Bluetooth 4.1 • Wireless display (WiDi) - optional • Miracast (Windows 8.1 and Windows 10)
Dimensions and weight
System information
Memory
Ports and connectors
Communications
Video
Audio
Storage
Media-card reader
Display
Keyboard
Camera
Touch pad
Battery
Power adapter
Computer...
Service Manual - Page 12
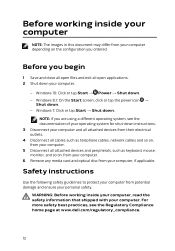
.... 3 Disconnect your computer and all attached devices from their electrical outlets. 4 Disconnect all cables such as telephone cables, network cables and so on, from your computer. 5 Disconnect all attached devices and peripherals, such as keyboard, mouse, monitor, and so on, from your computer. 6 Remove any media card and optical disc from your computer, if applicable.
Safety instructions
Use the...
Service Manual - Page 13
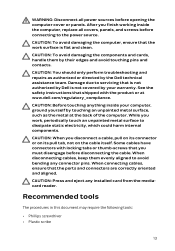
... thumb-screws that you must disengage before disconnecting the cable. When disconnecting cables, keep them evenly aligned to avoid bending any connector pins. When connecting cables, ensure that the ports and connectors are correctly oriented and aligned.
CAUTION: Press and eject any installed card from the mediacard reader.
Recommended tools
The procedures in this document may require...
Service Manual - Page 136

...Set or change a user-selectable option, such as the user password, type of hard drive installed, enabling or disabling base devices, and so on.
Entering BIOS setup program
1 Turn on (or restart) your computer. 2 During POST, when the Alienware logo is displayed... desktop. Then, restart your computer and try again.
BIOS setup program options
NOTE: Depending on your computer and its installed devices,...
Service Manual - Page 137
... HDD
AC Adapter Type
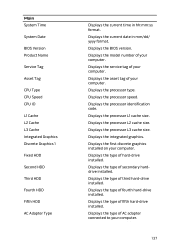
Displays the current time in hh:mm:ss format.
Displays the current date in mm/dd/ yyyy format.
Displays the BIOS version.
Displays the model number of your computer.
Displays the service tag of your computer.
Displays the asset tag of your computer.
Displays the processor type.
Displays the processor speed.
Displays the processor identification code.
Displays the processor L1...
Service Manual - Page 139
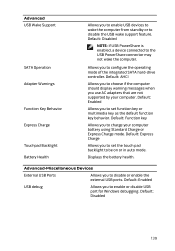
...: If USB PowerShare is enabled, a device connected to the USB PowerShare connector may not wake the computer.
Allows you to configure the operating mode of the integrated SATA hard-drive controller. Default: AHCI
Allows you to choose if the computer should display warning messages when you use AC adapters that are not supported by your computer. Default: Enabled
Allows you to set function...
Service Manual - Page 140
....
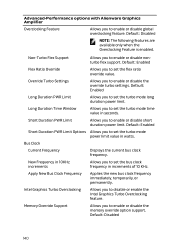
Long Duration Time Window
Allows you to set the turbo mode time value in seconds.
Short Duration PWR Limit
Allows you to enable or disable short duration power limit. Default: Enabled
Short Duration PWR Limit Options Allows you to set the turbo mode power limit value in watts.
Bus Clock
Current Frequency
Displays the current bus clock frequency...
Service Manual - Page 141
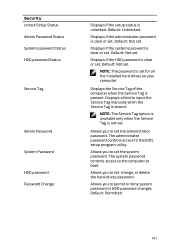
... set for all the installed hard drives on your computer.
Displays the Service Tag of the computer when the Service Tag is present. Displays a field to input the Service Tag manually when the Service Tag is absent.
NOTE: The Service Tag option is available only when the Service Tag is not set.
Allows you to set the administrator password. The administrator password controls access to the BIOS setup...
Service Manual - Page 142
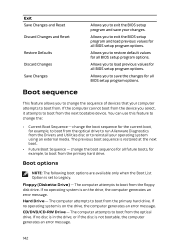
... (Diskette Drive) - The computer attempts to boot from the floppy disk drive. If no operating system is on the drive, the computer generates an error message. Hard Drive - The computer attempts to boot from the primary hard drive. If no operating system is on the drive, the computer generates an error message. CD/DVD/CD-RW Drive - The computer attempts to boot from the optical drive. If...
Service Manual - Page 143
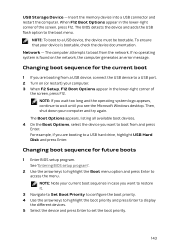
USB Storage Device - Insert the memory device into a USB connector and restart the computer. When F12 Boot Options appear in the lower-right corner of the screen, press F12. The BIOS detects the device and adds the USB flash option to the boot menu.
NOTE: To boot to a USB device, the device must be bootable. To ensure that your device is bootable, check the device documentation.
Network - The...
Service Manual - Page 144
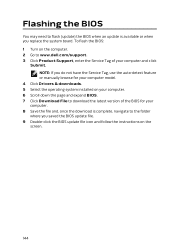
... update is available or when you replace the system board. To flash the BIOS: 1 Turn on the computer. 2 Go to www.dell.com/support. 3 Click Product Support, enter the Service Tag of your computer and click
Submit. NOTE: If you do not have the Service Tag, use the auto-detect feature or manually browse for your computer model.
4 Click Drivers & downloads. 5 Select the operating system installed...
Service Manual - Page 145
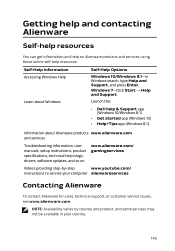
...Click Start → Help and Support.
Launch the:
• Dell Help & Support app (Windows 10/Windows 8.1)
• Get started app (Windows 10) • Help+Tips app (Windows 8.1)
Information about Alienware products www.alienware.com and services
Troubleshooting information, user manuals, setup instructions, product specifications, technical help blogs, drivers, software updates, and so on
www...