Dell Alienware M14x R2 driver and firmware

Related Dell Alienware M14x R2 Manual Pages
Download the free PDF manual for Dell Alienware M14x R2 and other Dell manuals at ManualOwl.com
Owner's Manual - Page 2
...make better use of your computer. CAUTION: A CAUTION indicates potential damage to hardware or loss of data if instructions are not followed. WARNING:...Dell Inc. is strictly forbidden.
Trademarks used in this text: Dell™ and the DELL logo are trademarks of Dell Inc.; Alienware® is a trademark or registered trademark of Alienware Corporation; Microsoft®, Windows®, and the Windows...
Owner's Manual - Page 9
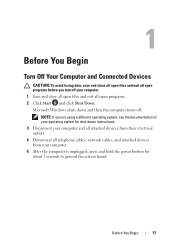
... system, see the documentation of your operating system for shut-down instructions. 3 Disconnect your computer and all attached devices from their electrical outlets. 4 Disconnect all telephone cables, network cables, and attached devices from your computer. 5 After the computer is unplugged, press and hold the power button for about 5 seconds to ground the system board.
Before You Begin
11
Owner's Manual - Page 23
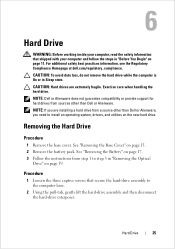
... the computer is On or in Sleep state. CAUTION: Hard drives are extremely fragile. Exercise care when handling the hard drive. NOTE: Dell or Alienware does not guarantee compatibility or provide support for hard drives from sources other than Dell or Alienware. NOTE: If you are installing a hard drive from a source other than Dell or Alienware, you need to install an operating system, drivers, and...
Owner's Manual - Page 29
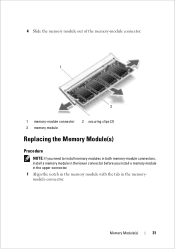
...Slide the memory module out of the memory-module connector. 1
3
1 memory-module connector 3 memory module
2 securing clips (2)
Replacing the Memory Module(s)
Procedure
NOTE: If you need to install memory modules in both memory-module connectors, install a memory module in the lower connector before you install a memory module in the upper connector. 1 Align the notch in the memory module with...
Owner's Manual - Page 30
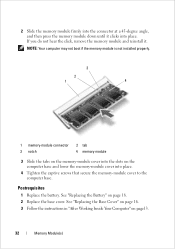
... do not hear the click, remove the memory module and reinstall it. NOTE: Your computer may not boot if the memory module is not installed properly.
3
2
1
4
1 memory-module connector 3 notch
2 tab 4 memory module
3 Slide the tabs on the memory-module cover into the slots on the computer base and lower the memory-module cover into place.
4 Tighten the captive...
Owner's Manual - Page 43
... safety best practices information, see the Regulatory Compliance Homepage at dell.com/regulatory_compliance. NOTE: Dell or Alienware does not guarantee compatibility or provide support for Mini-Cards from sources other than Dell or Alienware. If you ordered a wireless mini-card with your computer, the card is already installed. NOTE: The procedure for removing and replacing the WirelessHD...
Owner's Manual - Page 63

...Rest Assembly" on page 41.
Procedure
1 Disconnect the Bluetooth-card cable from the connector on the system board.
2 Remove the screw that secures the Bluetooth card to the computer base. 3 Note the routing of Bluetooth-card cable and remove the cable from the
routing guides. 4 Lift the Bluetooth card along with the cable off the computer base.
Internal Card with Bluetooth Wireless Technology
65
Owner's Manual - Page 67
... at dell.com/regulatory_compliance. WARNING: The battery may explode if installed incorrectly. Replace the battery only with the same or equivalent type. Discard used batteries according to the manufacturer's instructions.
Removing the Coin-Cell Battery
CAUTION: Removing the coin-cell battery resets the BIOS settings to default. It is recommended that you note the BIOS settings before...
Owner's Manual - Page 79
... best practices information, see the Regulatory Compliance Homepage at dell.com/regulatory_compliance. The system board's BIOS chip contains the Service Tag, which is also visible on a barcode label at the bottom of the computer.
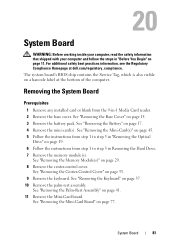
Removing the System Board
Prerequisites
1 Remove any installed card or blank from the 9-in-1 Media Card reader. 2 Remove the base cover. See "Removing the Base Cover...
Owner's Manual - Page 83
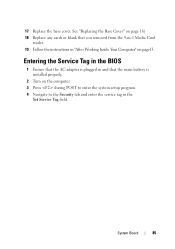
... you removed from the 9-in-1 Media Card
reader. 19 Follow the instructions in "After Working Inside Your Computer" on page13.
Entering the Service Tag in the BIOS
1 Ensure that the AC adapter is plugged in and that the main battery is installed properly.
2 Turn on the computer. 3 Press during POST to enter the system setup program. 4 Navigate to the Security...
Owner's Manual - Page 93
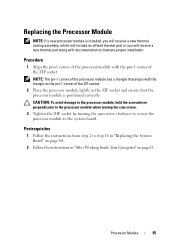
... to the processor module when turning the cam screw.
3 Tighten the ZIF socket by turning the cam screw clockwise to secure the processor module to the system board.
Postrequisites
1 Follow the instructions from step 2 to step 18 in "Replacing the System Board" on page 84.
2 Follow the instructions in "After Working Inside Your Computer" on page13.
Processor Module...
Owner's Manual - Page 95
...
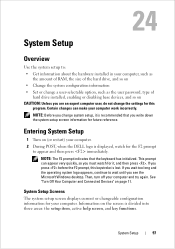
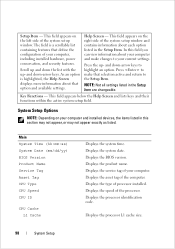
Use the system setup to: • Get information about the hardware installed in your computer, such as
the amount of RAM, the size of the hard drive, and so on • Change the system configuration information • Set or change a user-selectable option, such as the user password, type of
hard drive installed, enabling or disabling base devices, and so...
Owner's Manual - Page 96
... BIOS Version Product Name Service Tag Asset Tag CPU Type CPU Speed CPU ID
CPU Cache L1 Cache
Displays the system time. Displays the system date. Displays the BIOS version. Displays the product name. Displays the service tag of your computer. Displays the asset tag of the computer. Displays the type of processor installed. Displays the speed of the processor. Displays the processor identification...
Owner's Manual - Page 97
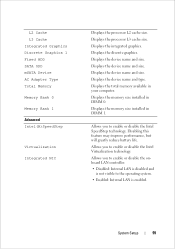
... cache size. Displays the processor L3 cache size. Displays the integrated graphics. Displays the discrete graphics. Displays the device name and size. Displays the device name and size. Displays the device name and size. Displays the device name and type. Displays the total memory available in your computer. Displays the memory size installed in DIMM 0. Displays the memory size installed in DIMM...
Owner's Manual - Page 101
... boot sequence, for example, to boot from the optical drive to run Dell Diagnostics from the Drivers and Utilities disc. The previous boot sequence is restored at the next boot.
1 If you are booting from a USB device, connect the USB device to a USB connector.
2 Turn on (or restart) your computer. 3 When F2 Setup, F12 Boot Options appears in the lower-right...
Owner's Manual - Page 103
25
Flashing the BIOS
The BIOS may require flashing when an update is available or when replacing the system board. To flash the BIOS:
1 Turn on the computer. 2 Go to support.dell.com/support/downloads. 3 Locate the BIOS update file for your computer:
NOTE: The Service Tag for your computer is located on a label at the bottom of your computer. For more information, see the Quick Start Guide that ...
Owner's Manual - Page 104
9 Navigate to the folder where you downloaded the BIOS update file. The file icon appears in the folder and is titled the same as the downloaded BIOS update file.
10 Double-click the BIOS update file icon and follow the instructions that appear on the screen.
106
Flashing the BIOS