Netgear EX6100 driver and firmware
Related Netgear EX6100 Manual Pages
Download the free PDF manual for Netgear EX6100 and other Netgear manuals at ManualOwl.com
Installation Guide - Page 2
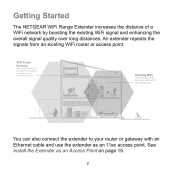
... the range of your existing WiFi and creates a stronger signal in hard-to-reach areas.
Existing WiFi
Sometimes your router does not provide the WiFi coverage you need.
You can also connect the extender to your router or gateway with an Ethernet cable and use the extender as an 11ac access point. See Install the Extender as an...
Installation Guide - Page 3

Meet Your Extender
Before you install your extender, familiarize yourself with its LEDs, buttons, and ports.
Front Panel and Side Panel
Router Link LED Router Arrow LED
Client Arrow LED Client Link LED
Power LED WPS LED
Access Point/Extender switch Power On/Off button WPS button Factory Reset button Ethernet port
3
Installation Guide - Page 5
... as your WiFi router.
Note: Proximity to the WiFi router is required only during the initial setup process.
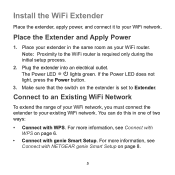
2. Plug the extender into an electrical outlet.
The Power LED
lights green. If the Power LED does not
light, press the Power button.
3. Make sure that the switch on the extender is set to Extender.
Connect to an Existing WiFi Network
To extend...
Installation Guide - Page 8

... LED
lights solid green.
3. Open a web browser window from the same computer or mobile device. The browser takes you directly to the NETGEAR genie® smart
setup.
Note: If you are not automatically directed to NETGEAR genie, launch a web browser and enter www.mywifiext.net in the address field. Enter admin for the user name and password for the...
Installation Guide - Page 15

Install the Extender as an Access Point
You can also use the extender as a WiFi access point, which creates a new AC750 WiFi hotspot within your local network.
15
Installation Guide - Page 16
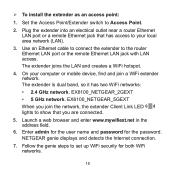
... outlet near a router Ethernet LAN port or a remote Ethernet jack that has access to your local area network (LAN).
3. Use an Ethernet cable to connect the extender to the router Ethernet LAN port or the remote Ethernet LAN jack with LAN access. The extender joins the LAN and creates a WiFi hotspot.
4. On your computer or mobile device, find and join a WiFi extender network. The extender is...
Installation Guide - Page 17
... Extender Settings
After installation, you can log in to the extender to view or change the extender's settings. To log in to the extender after the initial setup: 1. Connect a computer or mobile device to the extender's network. 2. Launch a web browser and enter www.mywifiext.net in the
address field. A login screen displays. 3. Enter admin for the user name and password...
Installation Guide - Page 20
... NETGEAR products. After installing your device, locate the serial number on the label of your product and use it to register your product at https://my.netgear.com. You must register your product before you can use NETGEAR telephone support. NETGEAR recommends registering your product through the NETGEAR website. For product updates and web support, visit http://support.netgear.com. NETGEAR...
Product Data Sheet - Page 3
... Band Gigabit
Data Sheet EX6100
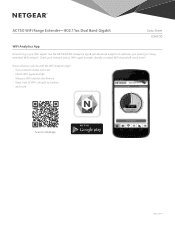
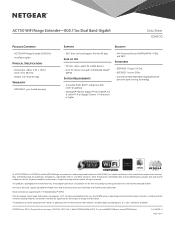
WiFi Analytics App
How strong is your WiFi signal? Use the NETGEAR WiFi Analytics app & get advanced analytics to optimize your existing or newly extended WiFi network. Check your network status, WiFi signal strength, identify crowded WiFi channels & much more!
Here's what you can do with the WiFi Analytics App! • Get a network status overview • Check...
Product Data Sheet - Page 4
... EX6100
Package Contents
• AC750 WiFi Range Extender (EX6100) • Installation guide
Physical Specifications
• Dimensions: 4.80 x 2.91 x 1.50 in (122 x 74 x 38 mm)
• Weight: 0.47 lb (0.213 kg)
Warranty
• NETGEAR 1-year limited warranty
Support
Security
• 24/7 basic technical support free for 90 days
Ease of Use
• CD-less setup-great for mobile devices...
User Manual - Page 2
... NETGEAR products. After installing your device, locate the serial number on the label of your product and use it to register your product at https://my.netgear.com. You must register your product before you can use NETGEAR telephone support. NETGEAR recommends registering your product through the NETGEAR website. For product updates and web support, visit http://support.netgear.com. Phone...
User Manual - Page 3
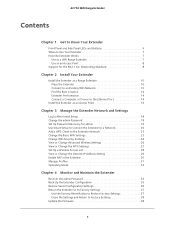
... a Computer or Device to the Ethernet Port 14
Install the Extender as an Access Point 16
Chapter 3 Manage the Extender Network and Settings
Log In After Initial Setup 18 Change the admin Password 18 Set Up Password Recovery for admin 19 Use Smart Setup to Connect the Extender to a Network 20 Add a WPS Client to the Extender Network 23 Change the Basic WiFi Settings 23 Change WiFi Security...
User Manual - Page 5
....11ac Networking Standard
For more information about the topics covered in this manual, visit the support website at http://support.netgear.com.
Firmware updates with new features and bug fixes are made available from time to time on downloadcenter.netgear.com. Some products can regularly check the site and download new firmware, or you can check for and download new firmware manually. If...
User Manual - Page 9
2. Install Your Extender
This chapter covers the following topics: • Install the Extender as a Range Extender • Install the Extender as an Access Point
2
9
User Manual - Page 10

...; Connect with genie Smart Setup. For more information, see Connect with NETGEAR
genie Smart Setup on page 11.
Connect with WPS
Wi-Fi Protected Setup (WPS) lets you join a secure WiFi network without typing the network name and password. The WPS button is a physical button on the router or access point. WPS does not support WEP network security. If you are...
User Manual - Page 11
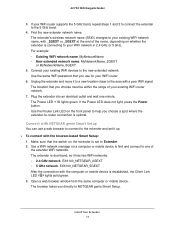
... dual band, so it has two WiFi networks: • 2.4 GHz network. EX6100_NETGEAR_2GEXT • 5 GHz network. EX6100_NETGEAR_5GEXT After the connection with the computer or mobile device is established, the Client Link LED lights solid green. 3. Open a web browser window from the same computer or mobile device. The browser takes you directly to NETGEAR genie Smart Setup.
Install Your Extender 11
User Manual - Page 18
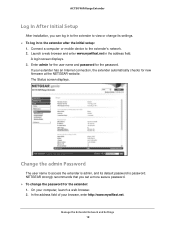
...extender after the initial setup:
1. Connect a computer or mobile device to the extender's network. 2. Launch a web browser and enter www.mywifiext.net in the address field.
A login screen displays. 3. Enter admin for the user name and password for the password.
If your extender has an Internet connection, the extender automatically checks for new firmware at the NETGEAR website. The Status screen...
User Manual - Page 34
4. Monitor and Maintain the Extender
4
This chapter covers the following topics:
• Recover the admin Password • Back Up the Extender Configuration • Restore Saved Configuration Settings • Return the Extender to Its Factory Settings • Update the Firmware • View Wired and Wireless Network Devices
34
User Manual - Page 38
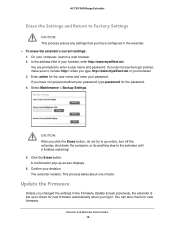
... the computer, or do anything else to the extender until it finishes restarting! 5. Click the Erase button. A confirmation pop-up screen displays. 6. Confirm your decision. The extender restarts. This process takes about one minute.
Update the Firmware
Unless you changed the settings in the Firmware Update screen previously, the extender is set up to check for new firmware automatically...
User Manual - Page 39
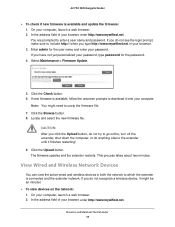
.... The firmware updates and the extender restarts. This process takes about two minutes.
View Wired and Wireless Network Devices
You can view the active wired and wireless devices in both the network to which the extender is connected and the extender network. If you do not recognize a wireless device, it might be an intruder. To view devices on the network: 1. On your computer...