Sony DSC-WX5 - Cyber-shot Digital Still Camera driver and firmware
Drivers and firmware downloads for this Sony item
Related Sony DSC-WX5 Manual Pages
Download the free PDF manual for Sony DSC-WX5 and other Sony manuals at ManualOwl.com
Cyber-shot® Handbook - Page 3
...Operation Search
MENU/Settings Search
Index
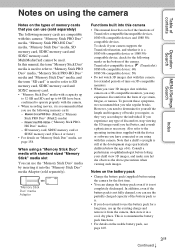
Notes on the types of memory cards that you can use (sold separately)
The following memory cards are compatible with this camera: "Memory Stick PRO Duo" media, "Memory Stick PRO-HG Duo"
media, "Memory Stick Duo" media, SD
memory card, SDHC memory card and
SDXC memory card.
MultiMediaCard cannot be used.
In this manual, the term "Memory Stick Duo...
Cyber-shot® Handbook - Page 4
..., and are not actual images shot using this camera.
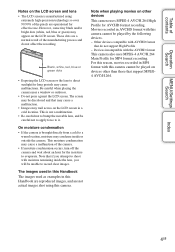
Note when playing movies on other devices
This camera uses MPEG-4 AVC/H.264 High Profile for AVCHD format recording. Movies recorded in AVCHD format with this camera cannot be played by the following devices. - Other devices compatible with AVCHD format
that do not support High Profile - Devices incompatible with the AVCHD format...
Cyber-shot® Handbook - Page 7
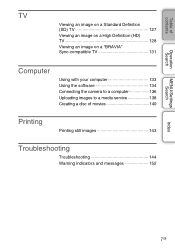
Table of contents
Operation Search
MENU/Settings Search
TV
Viewing an image on a Standard Definition (SD) TV 127
Viewing an image on a High Definition (HD) TV 128
Viewing an image on a "BRAVIA" Sync-compatible TV 131
Computer
Using with your computer 133 Using the software 134 Connecting the camera to a computer 136 Uploading images to a media service 138 Creating a disc of movies...
Cyber-shot® Handbook - Page 14
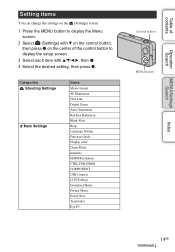
... the setup screen.
3 Select each item with v/V/b/B, then z. 4 Select the desired setting, then press z.
Categories Shooting Settings
Main Settings
Items Movie format AF Illuminator Grid Line Digital Zoom Auto Orientation Red Eye Reduction Blink Alert Beep Language Setting Function Guide Display color Demo Mode Initialize HDMI Resolution CTRL FOR HDMI COMPONENT USB Connect LUN Settings Download...
Cyber-shot® Handbook - Page 83
... their audio.
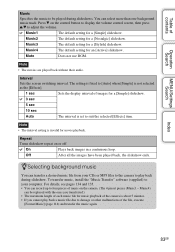
Interval
Sets the screen switching interval. The setting is fixed to [Auto] when [Simple] is not selected as the [Effects].
1 sec
Sets the display interval of...camera to play back during slideshow. To transfer music, install the "Music Transfer" software (supplied) to your computer. For details, see pages 134 and 135. • You can record up to four pieces of music on the camera...
Cyber-shot® Handbook - Page 111
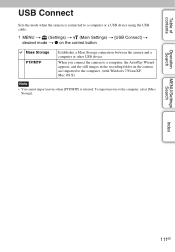
...the USB cable.
1 MENU t (Settings) t (Main Settings) t [USB Connect] t desired mode t z on the control button
Mass Storage PTP/MTP
Establishes a Mass Storage connection between the camera and a computer or other USB device.
When you connect the camera to a computer, the AutoPlay Wizard appears, and the still images in the recording folder on the camera are imported to the computer. (with Windows...
Cyber-shot® Handbook - Page 118
.... • If the (error) icon is displayed, eject and re-insert the Eye-Fi card, or turn the power of the camera
off and on again. If the (error) icon is still displayed, the Eye-Fi card may be corrupted. For details, contact Eye-Fi, Inc. • Wireless LAN communication may be interrupted by the other communication devices. If data reception is...
Cyber-shot® Handbook - Page 133
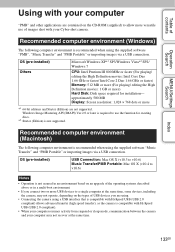
... CD-ROM (supplied) to allow more versatile use of images shot with your Cyber-shot camera.
Recommended computer environment (Windows)
The following computer environment is recommended when using the supplied software "PMB", "Music Transfer" and "PMB Portable" or importing images via a USB connection.
OS (pre-installed) Others
Microsoft Windows XP*1 SP3/Windows Vista*2 SP2/ Windows 7
CPU: Intel...
Cyber-shot® Handbook - Page 134

... the camera and the computer via USB cable, the available "PMB" function is activated. • If "PMB" has already been installed on your computer and that "PMB" version number is lower than 5.0, some functions may become invalid after you install "PMB" using the supplied CD-ROM. Also, you can start up "PMB" or other various software from "PMB Launcher" installed at...
Cyber-shot® Handbook - Page 135
... software before you install "Music Transfer". • For installation, you need to log on as Administrator.
zIntroduction to "PMB"
• "PMB" allows you to import images shot with the camera to a computer for display. Make a USB connection between the camera and your computer, and click [Import].
• Images on a computer can be exported to a memory card, and displayed on the camera...
Cyber-shot® Handbook - Page 137
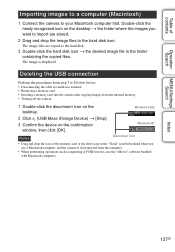
... a memory card into the camera after copying images from the internal memory. • Turning off the camera.
1 Double-click the disconnect icon on the tasktray.
Windows Vista
2 Click (USB Mass Storage Device) t [Stop]. 3 Confirm the device on the confirmation
window, then click [OK].
Windows XP
Notes
Disconnect icon
• Drag and drop the icon of the memory card or the drive icon...
Cyber-shot® Handbook - Page 139
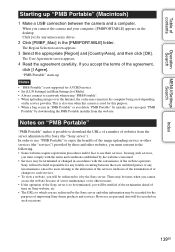
...; "PMB Portable" is not supported for AVCHD movies. • Set [LUN Settings] in [Main Settings] to [Multi]. • Always connect to a network when using "PMB Portable". • When uploading images over the Internet, the cache may remain in the computer being used depending
on the service provider. This is also true when this camera is used for this purpose...
Cyber-shot® Handbook - Page 140
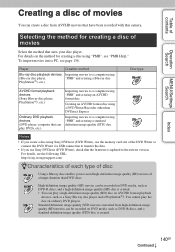
...) disc
Notes
• If you create a disc using Sony DVDirect (DVD Writer), use the memory card slot of the DVD Writer or connect the DVD Writer via USB connection to transfer the data.
• If you use Sony DVDirect (DVD Writer), check that the firmware is updated to the newest version. For details, see the following URL: http...
Cyber-shot® Handbook - Page 141
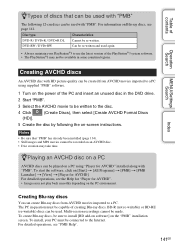
... instructions.
Notes
• Be sure that "PMB" has already been installed (page 134). • Still images and MP4 movies cannot be recorded on an AVCHD disc. • Disc creation may take time.
zPlaying an AVCHD disc on a PC
AVCHD discs can be played on a PC using "Player for AVCHD" installed along with "PMB". To start the software...
Cyber-shot® Handbook - Page 142
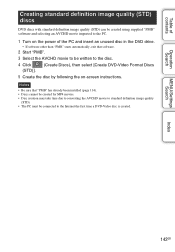
... unused disc in the DVD drive.
• If software other than "PMB" starts automatically, exit that software.
2 Start "PMB".
3 Select the AVCHD movie to be written to the disc.
4 Click (STD)].
(Create Discs), then select [Create DVD-Video Format Discs
5 Create the disc by following the on-screen instructions.
Notes
• Be sure that...
Cyber-shot® Handbook - Page 168
... 133 Recommended computer environment ..........133 Windows 133 Connecting Computer 136 TV 127
Continuous Playback 81 Control button 16 Copy 123 Create REC.Folder 120 Creating a disc 140 CTRL FOR HDMI 109
D
Date & Time Setting 126 Defocus Effect 61 Delete 45, 90 Delete REC.Folder 122 Demo Mode 106 Digital Zoom 98 DISP 34 Display Burst Group 88 Display color 105 Download Music...
Cyber-shot® Handbook - Page 170
... Trimming (Resize 89 Troubleshooting 144 TV 56, 127, 128 Twilight 26 Twilight Portrait 26
U
Unsharp masking 89 USB Connect 111 Using the camera abroad 157
V
VGA 62 View Mode 87 Viewing burst images 47
W
Warning indicators and messages 152 White Balance 69 Windows computer 133
Z
Zoom 32
170GB
Index
MENU/Settings Search
Operation Search
Table of contents
Cyber-shot® Handbook - Page 171
... (in English) of "GPL", and "LGPL" software. To view the PDF, Adobe Reader is needed. If it is not installed on your computer, you can download it from the Adobe Systems web page: http://www.adobe.com/
On the license of "Music Transfer" in the CD-ROM (supplied)
MPEG Layer-3 audio coding technology and patents licensed from...
Instruction Manual - Page 11
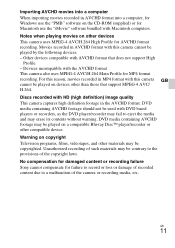
...movies into a computer When importing movies recorded in AVCHD format into a computer, for Windows use the "PMB" software on the CD-ROM (supplied) or for Macintosh use the "iMovie" software bundled with Macintosh computers. Notes when playing movies on other devices This camera uses MPEG-4 AVC/H.264 High Profile for AVCHD format recording. Movies recorded in AVCHD format with this camera cannot be...
Instruction Manual - Page 24
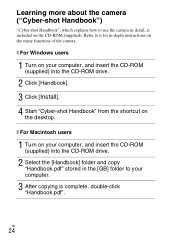
... instructions on the many functions of the camera.
x For Windows users
1 Turn on your computer, and insert the CD-ROM (supplied) into the CD-ROM drive.
2 Click [Handbook]. 3 Click [Install]. 4 Start "Cyber-shot Handbook" from the shortcut on
the desktop.
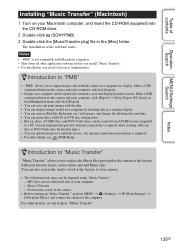
x For Macintosh users
1 Turn on your computer, and insert the CD-ROM (supplied) into the CD-ROM drive.
2 Select the [Handbook] folder and copy...