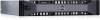
Dell Equallogic PS4110XV driver and firmware
Drivers and firmware downloads for this Dell item
Related Dell Equallogic PS4110XV Manual Pages
Download the free PDF manual for Dell Equallogic PS4110XV and other Dell manuals at ManualOwl.com
EqualLogic PS4110 Storage Arrays - Installation and Setup Guide - Page 3
...
10
Connect and Secure the Power Cables
11
Connect the Array to the Network
12
Set Up a Serial Connection to the Array
13
4 Software Configuration
15
Choose a Configuration Method
15
Collect Configuration Information
15
Start the Software Configuration
16
Set the Member RAID Policy
18
5 Storage Allocation
21
Create a Volume
21
Connect a Computer to a Volume
25
6 Where to...
EqualLogic PS4110 Storage Arrays - Installation and Setup Guide - Page 5
...
This manual describes how to install Dell™ EqualLogic® storage array hardware, configure the software, and start using the iSCSI SAN array. With one or more PS Series storage arrays, you can create a PS Series group-a self-managing, iSCSI storage area network (SAN) that is affordable and easy to use, regardless of scale.
Audience
The information in this guide...
EqualLogic PS4110 Storage Arrays - Installation and Setup Guide - Page 7
1 Understanding the Array Installation Procedure
To set up your array and start using the iSCSI SAN array, follow these steps: 1. Install the array in a rack. See Rack Mounting the Array on page 3. 2. Connect the array to power and the network. See Connect and Secure the Power Cables on page 11 and
Connect the Array to the Network on page...
EqualLogic PS4110 Storage Arrays - Installation and Setup Guide - Page 13

Installation and Setup Guide
2 Rack Mounting the Array
Attach the Chassis to the Mounting Rails
Make sure the chassis captive fasteners on the front of the array line up with the threaded holes on the front of
the mounting rails, and manually secure the captive fasteners to the rails.
Caution: Do not use an automatic...
EqualLogic PS4110 Storage Arrays - Installation and Setup Guide - Page 23
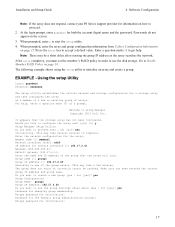
... group IP address as the array searches the network.
After setup completes, you must set the member's RAID policy in order to use the disk storage. Go to Set the Member RAID Policy on page 18.
The following example shows using the setup utility to initialize an array and create a group.
EXAMPLE - Using the setup Utility
Login: grpadmin
Password: xxxxxxxx
The setup utility...
EqualLogic PS4110 Storage Arrays - Installation and Setup Guide - Page 24

... or CLI to set the RAID policy for the member. You can then create a
volume that a host can connect to using an iSCSI initiator.
group1>
Using the Remote Setup Wizard to Configure the Software
The Remote Setup wizard is located on the Host Integration Tools CD-ROM and must be installed on a Windows computer. The Host Integration Tools User Guide provides detailed...
EqualLogic PS4110 Storage Arrays - Installation and Setup Guide - Page 25

Installation and Setup Guide
4 Software Configuration
If you used the setup utility to create or expand a group, or added the array to an existing group with the Remote Setup Wizard, you must set the RAID policy for the group member. Use either the Group Manager command line interface (CLI) or the graphical user interface (GUI) to set the RAID policy.
Using the...
EqualLogic PS4110 Storage Arrays - Installation and Setup Guide - Page 26

Installation and Setup Guide
4 Software Configuration
20
EqualLogic PS4110 Storage Arrays - Installation and Setup Guide - Page 37
... where to mount 6 initializing 15 mounting in rack 6 network address 15 RAID policy 18 software configuration 15
B
bezel installing 7
C
cables 10GB copper 9 10GB, optical 9 Ethernet 5
CHAP accounts configuring 28
CLI creating volumes 21 setting RAID policy 18-19
connecting the serial cable 13 control modules 5 copper cables 9
D
date setting 28
E
electrostatic discharge 4 electrostatic wrist strap...
EqualLogic PS4110 Storage Arrays - Installation and Setup Guide - Page 38
... 10
R
rack mount choosing rail location 6
inserting chassis 6
installing chassis 6
rail kit parts 5
requirements 3
RAID levels supported 18
RAID policy description 18
32
setting with CLI 19
setting with GUI 19
Remote Setup Wizard configuring the software 18
S
safety precautions installation 3
serial cable characteristics 14
connecting 13
pin locations 14
pinout information 14...
PS4110 Hardware Owners Manual - Page 11
... cannot be installed in other Dell arrays, or arrays not from Dell Inc.
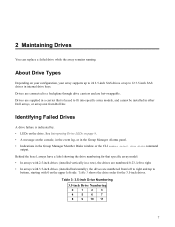
Identifying Failed Drives
A drive failure is indicated by: • LEDs on the drive. See Interpreting Drive LEDs on page 8. • A message on the console, in the event log, or in the Group Manager Alarms panel. • Indications in the Group Manager Member Disks window or the...
PS4110 Hardware Owners Manual - Page 16
... until you hear a click (callout 4).
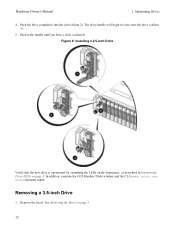
Figure 9: Installing a 2.5-inch Drive
Verify that the new drive is operational by examining the LEDs on the front panel, as described in Interpreting Drive LEDs on page 8. In addition, examine the GUI Member Disks window and the CLI member select show disks command output.
Removing a 3.5-inch Drive
1. Remove the bezel. See Removing the...
PS4110 Hardware Owners Manual - Page 18
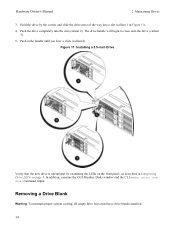
... you hear a click (callout 4).
Figure 11: Installing a 3.5-inch Drive
Verify that the new drive is operational by examining the LEDs on the front panel, as described in Interpreting Drive LEDs on page 8. In addition, examine the GUI Member Disks window and the CLI member select show disks command output.
Removing a Drive Blank
Warning: To maintain proper system cooling...
PS4110 Hardware Owners Manual - Page 25

... can use either its own local network interface, or the network interface on the previously-active control module.)
Control module failover is transparent to applications, but iSCSI initiators must reconnect to the group IP address.
Maintaining Control Module Firmware
A control module has a microSD card running the array firmware. You should run the latest firmware version to take advantage of new...
PS4110 Hardware Owners Manual - Page 26
... sure that you keep the correct firmware.
To display the firmware version running on an array, examine the GUI Member Controllers window or use the following CLI command:
member select show controllers
If the firmware on a microSD card does not match the firmware running on an array, do not install it. Instead, contact your array support provider.
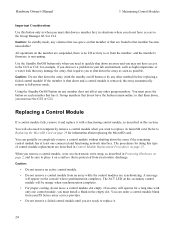
Control Module Handling Requirements
Follow these...
PS4110 Hardware Owners Manual - Page 28
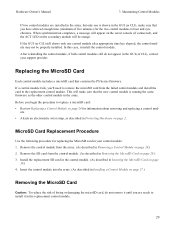
... 29 for information about replacing the MicroSD card.
You can partially or completely remove a control module without shutting down the array if the remaining control module has at least one connected and functioning network interface. The procedures for doing this type of control module replacement are described in Control Module Replacement Procedures on page 25.
When...
PS4110 Hardware Owners Manual - Page 31
... module was shipped. Contact your PS Series support provider for information about returning hardware.
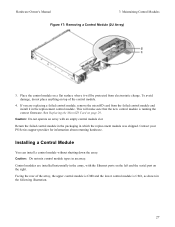
Installing a Control Module
You can install a control module without shutting down the array. Caution: Do not mix control module types in an array. Control modules are installed horizontally in the array, with the Ethernet ports on the left and the serial port on the right. Facing the rear...
PS4110 Hardware Owners Manual - Page 33
... do not appear in the GUI (or CLI), contact your support provider.
Replacing the MicroSD Card
Each control module includes a microSD card that contains the PS Series firmware. If a control module fails, you'll need to remove the microSD card from the failed control module and install the card in the replacement control module. This will make sure that the new...
PS4110 Hardware Owners Manual - Page 46
... (5 times per sequence), update the firmware to the latest
supported firmware on both the control module. For more information about downloading the latest firmware, see the PS Series Release Notes and the document Updating PS Series Storage Array Firmware, available on the customer support site. 5. If the link status LEDs are not green: a. Reseat the cables on the control modules and the switches...
PS4110 Hardware Owners Manual - Page 47

...front panel
features
4
I
17
identifying the firmware version
22
29
indicators
21
power
4
20
installing
17
drive blank
15
21
front bezel
3
22
power supply/cooling fan module
36
22
27
19
L
21
24
LEDs
27
control module
19
18
disks
8
27
network interfaces
19
22, 24
27
28
M
35
microSD card
firmware requirements
21
inserting
30
removing
29
replacing
22...