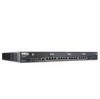
Dell PowerConnect J-SRX240 driver and firmware
Drivers and firmware downloads for this Dell item
Related Dell PowerConnect J-SRX240 Manual Pages
Download the free PDF manual for Dell PowerConnect J-SRX240 and other Dell manuals at ManualOwl.com
Hardware Guide - Page 2
..., 6,538,899, 6,552,918, 6,567,902, 6,578,186, and 6,590,785.
J-SRX240 Services Gateway Hardware Guide © Copyright Dell, Inc. , 2010. All rights reserved.
Revision History July 2010 - Revision 01
The information in this document is current as of the date listed in the revision history.
SOFTWARE LICENSE
The terms and conditions for using this...
Hardware Guide - Page 3
...also includes updates, upgrades and new releases of such software. "Embedded Software" means Software which Juniper has embedded in or loaded onto the Juniper equipment and any updates, upgrades, additions or replacements which are subsequently embedded in or loaded onto the equipment.
3. License Grant. Subject to payment of the applicable fees and the limitations and restrictions set forth herein...
Hardware Guide - Page 4
... of the Software, associated documentation, or copies of the Software.
8. Warranty, Limitation of Liability, Disclaimer of Warranty. The warranty applicable to the Software shall be as set forth in the warranty statement that accompanies the Software (the "Warranty Statement"). Nothing in this Agreement shall give rise to any obligation to support the Software. Support services may be purchased...
Hardware Guide - Page 5

12. Commercial Computer Software. The Software is "commercial computer software" and is provided with restricted rights. Use, duplication, or disclosure by the United States government is subject to restrictions set forth in ... Networks, Inc., 1194 N. Mathilda Ave., Sunnyvale, CA 94089, ATTN: General Counsel. You may obtain a copy of the GPL at http://www.gnu.org/licenses/gpl.html, and a copy of...
Hardware Guide - Page 8
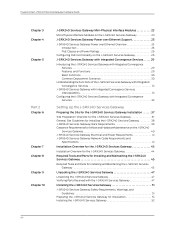
PowerConnect J-SRX240 Services Gateway Hardware Guide
Chapter 3 Chapter 4 Chapter 5
Part 2
Chapter 6
Chapter 7 Chapter 8 Chapter 9 Chapter 10
J-SRX240 Services Gateway Mini-Physical Interface Modules 23
Mini-Physical Interface Modules on the J-SRX240 Services Gateway 23
J-SRX240 Services Gateway Power over Ethernet Support 25
J-SRX240 Services Gateway Power over Ethernet Overview 25 ...
Hardware Guide - Page 9
... or Installing Mini-Physical Interface Modules in the J-SRX240 Services Gateway 54
Connecting, Grounding, and Powering On the J-SRX240 Services Gateway 55
Connecting the J-SRX240 Services Gateway to the Power Supply 55 Connecting and Organizing Interface Cables to the J-SRX240 Services
Gateway 56 Grounding the J-SRX240 Services Gateway 57 Powering On and Powering Off the J-SRX240 Services...
Hardware Guide - Page 10

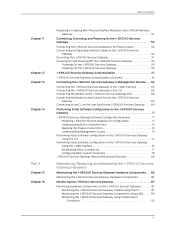
PowerConnect J-SRX240 Services Gateway Hardware Guide
Part 4
Appendix A
Appendix B
Monitoring the J-SRX240 Services Gateway Power System 93 Resetting the Configuration File When the J-SRX240 Services Gateway Is
Inaccessible 94 Using the Reset Config Button on the J-SRX240 Services Gateway 94 Changing the Reset Config Button Behavior on the J-SRX240 Services
Gateway 95 Dell Support 96
...
Hardware Guide - Page 13
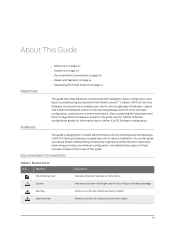
...for information about further JUNOS Software configuration.
This guide is designed for network administrators who are installing and maintaining a J-SRX240 Services Gateway or preparing a site for device installation. To use this guide, you need a broad understanding of networks in general and the Internet in particular, networking principles, and network configuration. Any detailed discussion of...
Hardware Guide - Page 14

PowerConnect J-SRX240 Services Gateway Hardware Guide
Table 2: Text and Syntax Conventions
Convention
Description
Examples
Bold text like this Fixed-width text like this
Represents text that you type.
To enter configuration ...
Hardware Guide - Page 21
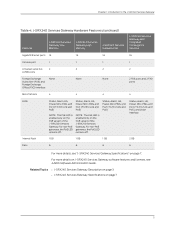
... High Memory
J-SRX240 Services Gateway PoE
J-SRX240 Services Gateway with Integrated Convergence Services
Gigabit Ethernet ports 16
16
16
16
Console port
1
1
1
1
Universal serial bus
2
2
2
2
(USB) ports
Foreign Exchange Subscriber (FXS) and Foreign Exchange Office (FXO) interface
None
None
None
2 FXS ports and 2 FXO ports
Mini-PIM slots
4
4
4
4
LEDs Internal flash...
Hardware Guide - Page 29
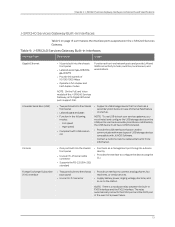
...-duplex modes
Function as front-end network ports and provide LAN and WAN connectivity to hubs, switches, local servers, and workstations.
NOTE: On the PoE and Voice models of the J-SRX240 Services Gateway, all 16 Gigabit Ethernet ports support PoE.
Universal Serial Bus (USB)
• Two ports built into the chassis front panel
• Labeled usb 0 and usb 1 • Function in the following...
Hardware Guide - Page 51
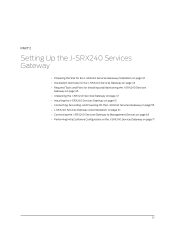
... on page 47 • Installing the J-SRX240 Services Gateway on page 51 • Connecting, Grounding, and Powering On the J-SRX240 Services Gateway on page 55 • J-SRX240 Services Gateway Autoinstallation on page 61 • Connecting the J-SRX240 Services Gateway to Management Devices on page 63 • Performing Initial Software Configuration on the J-SRX240 Services Gateway on page 71
35
Hardware Guide - Page 76
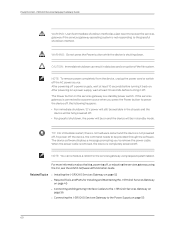
... to remove the power cable. When the power cable is removed, the device is completely powered off.
NOTE: You can schedule a reboot to the services gateway using request system reboot.
For more information about halting, powering off, or rebooting the services gateway using the CLI, see the JUNOS Software Administration Guide. Related Topics • Installing the J-SRX240 Services Gateway on page...
Hardware Guide - Page 84
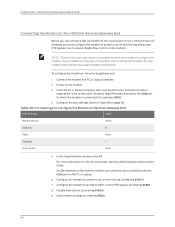
... Modem on Services Gateway End
Port Settings
Value
Bits per second
9600
Data bits
8
Parity
None
Stop bits
1
Flow control
None
5. In the HyperTerminal window, enter AT. For more information on the AT commands, see the JUNOS Software Administration Guide. An OK response verifies that the modem can communicate successfully with the COM port on the PC or laptop.
6. Configure the modem...
Hardware Guide - Page 86
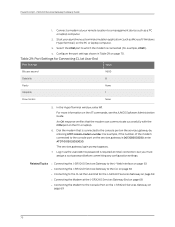
PowerConnect J-SRX240 Services Gateway Hardware Guide
1. Connect a modem at your remote location to a management device such as a PC or laptop computer.
2. Start your asynchronous terminal emulation application (such as Microsoft Windows HyperTerminal) on the PC or laptop computer.
3. Select the COM port to which the modem is connected (for example, COM1).
4. Configure the port settings shown in ...
Hardware Guide - Page 87
... JUNOS Software preinstalled and ready to be configured when the device is powered on. When the device boots, it first attempts to start the image on the USB flash drive. If a USB flash drive is not inserted into the Routing Engine or the attempt otherwise fails, the device next tries the CompactFlash card (if installed), and finally the hard disk. You configure the services gateway...
Hardware Guide - Page 89
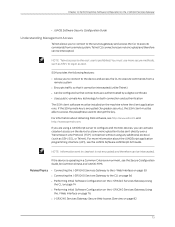
....
If the device is operating in a Common Criteria environment, see the Secure Configuration Guide for Common Criteria and JUNOS-FIPS. Related Topics • Connecting the J-SRX240 Services Gateway to the J-Web Interface on page 63 • Connecting the J-SRX240 Services Gateway to the CLI on page 66 • Performing Initial Software Configuration on the J-SRX240 Services Gateway Using
the...
Hardware Guide - Page 97
... a source address, destination address, and an...instructions on managing users and operations, monitoring network performance, upgrading software, and diagnosing common problems on J-SRX240 Series Services Gateways, see the JUNOS Software Administration Guide. Related Topics • Connecting the J-SRX240 Services Gateway to the J-Web Interface on page 63 • J-SRX240 Services Gateway Software...
Hardware Guide - Page 108
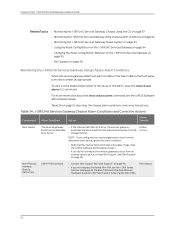
...boot device (USB storage device).
Amber (minor)
NOTE: If you configured your services gateway to boot from an alternative boot device, ignore this alarm condition.
• Reformat the internal flash and install a bootable image. (See the JUNOS Software Administration Guide.)
• If you did not configure the services gateway to boot from an alternative boot device, contact Dell Support. See...
Hardware Guide - Page 153
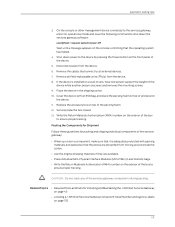
... halted.
4. Shut down power to the device by pressing the Power button on the front panel of the device.
5. Disconnect power from the device. 6. Remove the cables that connect to all external devices. 7. Remove all field-replaceable units (FRUs) from the device. 8. If the device is installed on a wall or rack, have one person support the weight of the
device while another person...