Dell Vostro 130 driver and firmware
Related Dell Vostro 130 Manual Pages
Download the free PDF manual for Dell Vostro 130 and other Dell manuals at ManualOwl.com
Service Manual - Page 3
... cable from your computer and then unplug the cable from the network device. 4. Disconnect all network cables from the computer. 5. Disconnect your computer and all attached devices from their electrical outlets. 6. Close the display and turn the computer upside-down on a flat work surface.
NOTE: To avoid damaging the system board, you must remove the main battery before you service the computer...
Service Manual - Page 4
..., press and hold the power button for about 4 seconds to turn them off.
After Working Inside Your Computer
After you complete any replacement procedure, ensure you connect any external devices, cards, and cables before turning on your computer.
CAUTION: To avoid damage to the computer, use only the battery designed for this particular Dell computer. Do not use batteries...
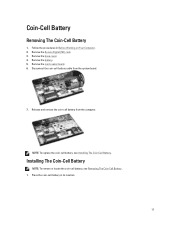
Service Manual - Page 7
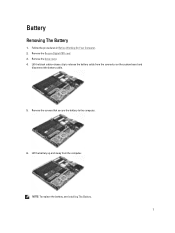
... Computer. 2. Remove the Secure Digital (SD) card. 3. Remove the base cover. 4. Lift the black cable-release clip to release the battery cable from the connector on the system board and
disconnect the battery cable.
5. Remove the screws that secure the battery to the computer.
6. Lift the battery up and away from the computer.
NOTE: To replace the battery, see Installing...
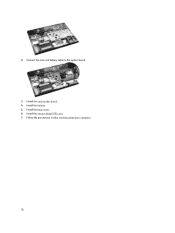
Service Manual - Page 8
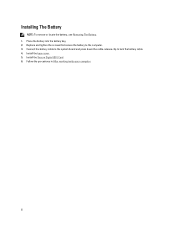
... The Battery. 1. Place the battery into the battery bay. 2. Replace and tighten the screws that secure the battery to the computer. 3. Connect the battery cable to the system board and press down the cable-release clip to lock the battery cable. 4. Install the base cover. 5. Install the Secure Digital (SD) Card. 6. Follow the procedures in After working inside your...
Service Manual - Page 10
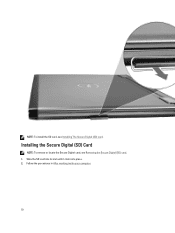
NOTE: To install the SD card, see Installing The Secure Digital (SD) card.
Installing the Secure Digital (SD) Card
NOTE: To remove or locate the Secure Digital card, see Removing the Secure Digital (SD) card. 1. Slide the SD card into its slot until it clicks into place. 2. Follow the procedures in After working inside your computer.
10
Service Manual - Page 11

... in Before Working On Your Computer. 2. Remove the Secure Digital (SD) Card. 3. Remove the screws that secure the base cover to the computer.
4. Slide the base cover towards the front of the computer. Lift it up and away from the computer.
NOTE: To replace the base cover see, Installing The Base Cover.
Installing The Base Cover
NOTE: To...
Service Manual - Page 15
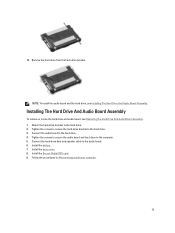
... Tighten the screws to secure the hard-drive bracket to the hard drive. 3. Connect the audio board to the hard drive. 4. Tighten the screws to secure the audio board and hard drive to the computer. 5. Connect the hard-drive data and speaker cable to the audio board. 6. Install the battery. 7. Install the base cover. 8. Install the Secure Digital (SD) card. 9. Follow the procedures in After working...
Service Manual - Page 17
... Before Working on Your Computer. 2. Remove the Secure Digital (SD) card. 3. Remove the base cover. 4. Remove the battery. 5. Remove the card-reader board. 6. Disconnect the coin-cell battery cable from the system board.
7. Release and remove the coin-cell battery from the computer.
NOTE: To replace the coin-cell battery, see Installing The Coin-Cell Battery.
Installing The Coin-Cell Battery...
Service Manual - Page 18
2. Connect the coin-cell battery cable to the system board.
3. Install the card-reader board. 4. Install the battery. 5. Install the base cover. 6. Install the secure digital (SD) card. 7. Follow the procedures in After working inside your computer.
18
Service Manual - Page 19
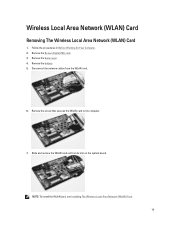
... On Your Computer. 2. Remove the Secure Digital (SD) card. 3. Remove the base cover. 4. Remove the battery. 5. Disconnect the antenna cables from the WLAN card.
6. Remove the screw that secures the WLAN card to the computer.
7. Slide and remove the WLAN card out from its slot on the system board.
NOTE: To install the WLAN card, see Installing The Wireless Local Area Network (WLAN) Card. 19
Service Manual - Page 20
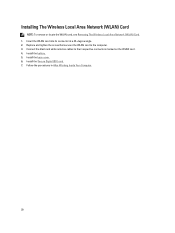
... card, see Removing The Wireless Local Area Network (WLAN) Card. 1. Insert the WLAN card into its connector at a 45-degree angle. 2. Replace and tighten the screw that secures the WLAN card to the computer. 3. Connect the black and white antenna cables to their respective connectors marked on the WLAN card. 4. Install the battery. 5. Install the base cover. 6. Install the Secure Digital (SD) card...
Service Manual - Page 22
... reader. 9. Install the keyboard. 10. Install the memory. 11. Install the LED cover. 12. Install the wireless wide area network (WWAN) card. 13. Install the wireless local area network (WLAN) card. 14. Install the audio board and hard drive. 15. Install the battery. 16. Install the base cover. 17. Install the Secure Digital (SD) card. 18. Follow the procedures in After Working Inside Your Computer...
Service Manual - Page 23
... board and remove it from the system board.
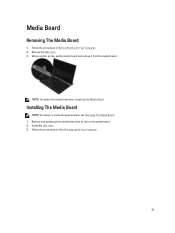
NOTE: To replace the system board see, Installing The Media Board.
Installing The Media Board
NOTE: To remove or locate the system board, see Removing The Media Board. 1. Replace and gently push the media board into its slot on the system board. 2. Install the LED cover. 3. Follow the procedures in After Working Inside Your Computer...
Service Manual - Page 26
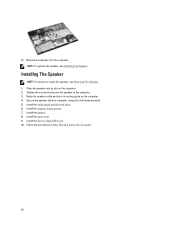
... that secure the speaker to the computer. 3. Route the speaker cable back into its routing guide on the computer. 4. Secure the speaker cable to computer, using the cloth tapes provided. 5. Install the audio board and the hard drive. 6. Install the display closure sensor. 7. Install the battery. 8. Install the base cover. 9. Install the Secure Digital (SD) card. 10. Follow the procedures in After...
Service Manual - Page 29
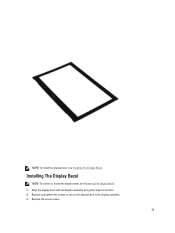
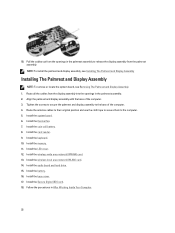
NOTE: To install the display bezel, see Installing The Display Bezel.
Installing The Display Bezel
NOTE: To remove or locate the display bezel, see Removing The Display Bezel. 1. Align the display bezel with the display assembly and gently snap it into place. 2. Replace and tighten the screws to secure the display bezel to the display assembly. 3. Replace the screw covers.
29
Service Manual - Page 30

... the palmrest assembly and display assembly. 5. Install the system board. 6. Install the thermal fan. 7. Install the keyboard. 8. Install the memory. 9. Install the LED cover. 10. Install the wireless wide area network (WWAN) card. 11. Install the wireless local area network (WLAN) card. 12. Install the battery. 13. Install the base cover. 14. Install the secure digital (SD) Card. 15. Follow the...
Service Manual - Page 31
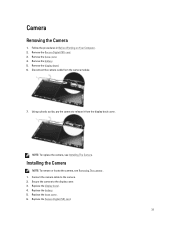
... in Before Working on Your Computer. 2. Remove the Secure Digital (SD) card. 3. Remove the base cover. 4. Remove the battery. 5. Remove the display bezel. 6. Disconnect the camera cable from the camera module.
7. Using a plastic scribe, pry the camera to release it from the display back cover.
NOTE: To replace the camera, see Installing The Camera.
Installing the Camera
NOTE: To remove or locate...
Service Manual - Page 33
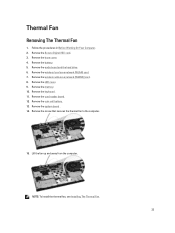
...in Before Working On Your Computer. 2. Remove the Secure Digital (SD) card. 3. Remove the base cover. 4. Remove the battery. 5. Remove the audio board and the hard drive. 6. Remove the wireless local area network (WLAN) card. 7. Remove the wireless wide area network (WWAN) card. 8. Remove the LED cover. 9. Remove the memory. 10. Remove the keyboard. 11. Remove the card reader board. 12. Remove the...
Service Manual - Page 34
... the computer. 3. Connect the thermal fan cable to the system board. 4. Install the system board. 5. Install the coin cell battery. 6. Install the card-reader board. 7. Install the keyboard. 8. Install the memory. 9. Install the LED cover. 10. Install the wireless wide area network (WWAN) card. 11. Install the wireless local area network (WLAN) card. 12. Install the audio board and the hard drive...
Service Manual - Page 61
... add, change, or remove any hardware in your computer. • set or change a user-selectable option such as the user password. • read the current amount of memory or set the type of hard drive installed.
Before you use System Setup, it is recommended that you write down the System Setup screen information for future reference.
CAUTION: Unless you...