Lexmark 2070 Color Jetprinter driver and firmware
Drivers and firmware downloads for this Lexmark item

Related Lexmark 2070 Color Jetprinter Manual Pages
Download the free PDF manual for Lexmark 2070 Color Jetprinter and other Lexmark manuals at ManualOwl.com
Service Manual - Page 2

.... Color Jetprinter is a trademark of Lexmark International, Inc. Other trademarks are the property of their respective owners. © Copyright Lexmark International, Inc. 1995, 1997. All Rights Reserved. UNITED STATES GOVERNMENT RESTRICTED RIGHTS This software and documentation are provided with RESTRICTED RIGHTS. Use, duplication or disclosure by the Government is subject to restrictions as set...
Service Manual - Page 6

... and safety instructions.
2. Diagnostic Information contains error indicator table, symptom table, and service checks used to isolate failing field replaceable units (FRUs).
3. Diagnostic Aids contains tests and checks used to locate or repeat symptoms of printer problems.
4. Repair Information provides instructions for making printer adjustments and removing and installing FRUs.
5. Connector...
Service Manual - Page 10

... this manual leads you to the correct field replaceable unit (FRU) or part. Use the error indicator charts, symptom index, service checks, and diagnostic aids to determine the symptom and repair the failure. Begin with "Start" on page 2-1.
This printer can be serviced without being connected to a host computer. The user is directed, in the Printer Control program...
Service Manual - Page 20
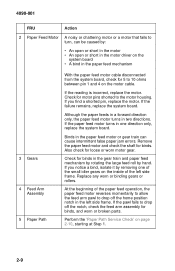

... motor driver on the
system board • A bind in the paper feed mechanism
3 Gears
4 Feed Arm Assembly
5 Paper Path
With the paper feed motor cable disconnected from the system board, check... only, replace the system board.
Binds in the paper feed motor or gear train can cause intermittent false paper jam errors. Remove the paper feed ... Service Check' on page 2-10, starting at Step 1.
2-9
Service Manual - Page 21
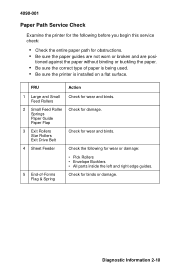

... Service Check
Examine the printer for the following before you begin this service check:
• Check the entire paper path for obstructions. • Be sure the paper guides ...printer is installed on a flat surface.
FRU
Action
1 Large and Small Feed Rollers
Check for wear and binds.
2 Small Feed Roller Check for damage. Springs Paper Guide Paper Flap
3 Exit Rollers Star Rollers Exit Drive...
Service Manual - Page 30


.... This test requires a parallel port wrap plug. Install the wrap plug in the parallel port before you start the test. To run the test:
1. Turn the printer off and place a two pin jumper on connector J6 as shown (Pins 3 & 4).
2. Attach the wrap plug to the parallel port. 3. Turn the printer on. The power light blinks while the...
Service Manual - Page 32
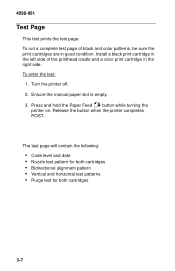

..., be sure the print cartridges are in good condition. Install a black print cartridge in the left side of the printhead cradle and a color print cartridge in the right side. To enter the test:
1. Turn the printer off. 2. Ensure the manual paper slot is empty. 3. Press and hold the Paper Feed button while turning the...
Service Manual - Page 33
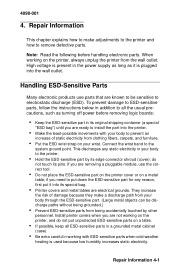

... to ESD-sensitive parts, follow the instructions below in addition to all the usual precautions, such as turning off power before removing logic boards:
• Keep the ESD-sensitive part in its original shipping container (a special
"ESD bag") until you are ready to install the part into the printer.
• Make the least-possible movements...
Service Manual - Page 42
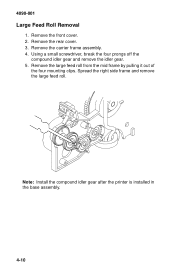

... from the mid frame by pulling it out of
the four mounting clips. Spread the right side frame and remove the large feed roll.
Note: Install the compound idler gear after the printer is installed in the base assembly.
4-10
Service Manual - Page 44
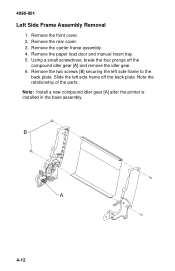

...1. Remove the front cover. 2. Remove the rear cover. 3. Remove the carrier frame assembly. 4. Remove the paper load door and manual insert tray. 5. Using a small screwdriver, break the four prongs off the
compound idler gear [A] and remove the ... back plate. Note the relationship of the parts. Note: Install a new compound idler gear [A] after the printer is installed in the base assembly.
B
A
4-12
Service Manual - Page 53
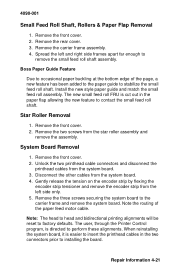

... paper feed motor cable.
Note: The head to head and bidirectional printing alignments will be reset to factory defaults. The user, through the Printer Control program, is directed to perform these alignments. When reinstalling the system board, it is easier to insert the printhead cables in the two connectors prior to installing the board.
Repair Information 4-21

