MSI MS91F7 driver and firmware

Related MSI MS91F7 Manual Pages
Download the free PDF manual for MSI MS91F7 and other MSI manuals at ManualOwl.com
User Guide - Page 2
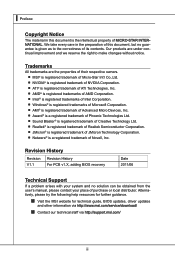
... no solution can be obtained from the user's manual, please contact your place of purchase or local distributor. Alternatively, please try the following help resources for further guidance.
◙ Visit the MSI website for technical guide, BIOS updates, driver updates
and other information via http://www.msi.com/service/download/
◙ Contact our technical staff via http://support.msi.com/
ii
User Guide - Page 4

... the user's authority to operate the equipment. Notice 2 Shielded interface cables and A.C. power cord, if any, must be used in order to comply with the emission limits.
VOIR LA NOTICE D'INSTALLATION AVANT DE RACCORDER AU RESEAU.
Micro-Star International MS-91F7
This device complies with Part 15 of the FCC Rules. Operation is subject...
User Guide - Page 13

... chapter provides you with the information about hardware setup procedures. While doing the installation, be careful in holding the components and follow the installation procedures. For some components, if you install in the wrong orientation, the components will not work properly. Use a grounded wrist strap before handling computer components. Static electricity may damage the components...
User Guide - Page 15

MS-91F7
CPU (Central Processing Unit)
When installing the CPU, make sure the cooler is installed to prevent overheating. For proper CPU cooler type, please consult the dealer before turning on the computer. Important CPU Installation If only one CPU will be installed, please install it in socket CPU0 to ensure successful system boot. Overheating Overheating will seriously damage the CPU and system...
User Guide - Page 16
... Setup
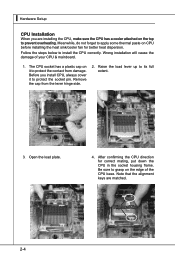
CPU Installation
When you are installing the CPU, make sure the CPU has a cooler attached on the top to prevent overheating. Meanwhile, do not forget to apply some thermal paste on CPU before installing the heat sink/cooler fan for better heat dispersion.
Follow the steps below to install the CPU correctly. Wrong installation will cause the damage of your CPU...
User Guide - Page 17
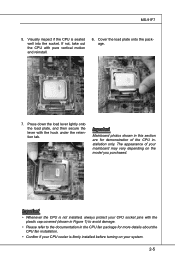
... pure vertical motion and reinstall.
6. Cover the load plate onto the package.
7. Press down the load lever lightly onto the load plate, and then secure the lever with the hook under the retention tab.
Important
Mainboard photos shown in this section are for demonstration of the CPU installation only. The appearance of your mainboard may...
User Guide - Page 18

▍ Hardware Setup
Memory
These DIMM slots are intended for memory modules.
DDR3
240-pin, 1.5V / 1.35V
48x2=96 pin
72x2=144 pin
Memory Population Rules
In Multi-Channel mode, make sure that you install memory modules of the same type and density in different channel DIMM slots.
CPU0_DIMM _A1 CPU0_DIMM _A0 CPU0_DIMM _B1 CPU0_DIMM _B0
CPU1_DIMM...
User Guide - Page 19
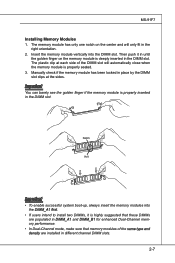
... each side of the DIMM slot will automatically close when the memory module is properly seated. 3. Manually check if the memory module has been locked in place by the DIMM slot clips ... the memory modules into
the DIMM_A1 first. • If users intend to install two DIMMs, it is highly suggested that these DIMMs
are populated in DIMM_A1 and DIMM_B1 for enhanced Dual-Channel memory performance....
User Guide - Page 27
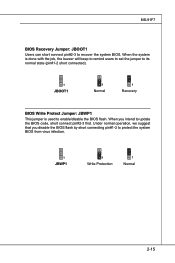
... pin#2-3 to recover the system BIOS. When the system is done with the job, the buzzer will beep to remind users to set the jumper to its normal state (pin#1-2 short connected).
1
JBOOT1
1
Normal
1
Recovery
BIOS Write Protect Jumper: JBWP1
This jumper is used to enable/disable the BIOS flash. When you intend to update the BIOS code, short...
User Guide - Page 28
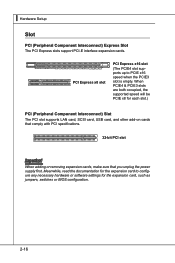
... PCI slot supports LAN card, SCSI card, USB card, and other add-on cards that comply with PCI specifications.
32-bit PCI slot
Important
When adding or removing expansion cards, make sure that you unplug the power supply first. Meanwhile, read the documentation for the expansion card to configure any necessary hardware or software settings for the expansion card, such as jumpers, switches or BIOS...
User Guide - Page 30
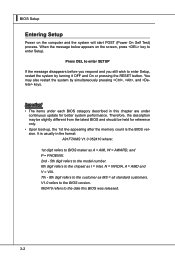
...; Upon boot-up, the 1st line appearing after the memory count is the BIOS version. It is usually in the format:
A91F7AMS V1.0 062410 where:
1st digit refers to BIOS maker as A = AMI, W = AWARD, and P = PHOENIX. 2nd - 5th digit refers to the model number. 6th digit refers to the chipset as I = Intel, N = NVIDIA, A = AMD and V = VIA. 7th - 8th...
User Guide - Page 33
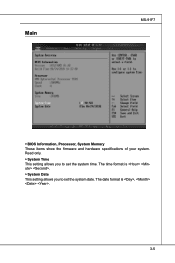
Main
MS-91F7
▶ BIOS Information, Processor, System Memory These items show the firmware and hardware specifications of your system. Read only. ▶ System Time This setting allows you to set the system time. The time format is . ▶ System Date This setting allows you to set the system date. The date format is , .
3-5
User Guide - Page 38
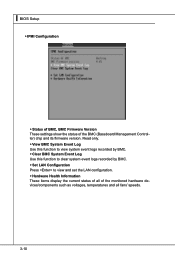
... its firmware version. Read only. ▶ View BMC System Event Log Use this function to view system event logs recorded by BMC. ▶ Clear BMC System Event Log Use this function to clear system event logs recorded by BMC. ▶ Set LAN Configuration Press to view and set the LAN configuration. ▶ Hardware Health Information These items display the...
User Guide - Page 40

▍ BIOS Setup
▶ USB Configuration
▶ Legacy USB Support Set to [Enabled] if you need to use any USB 1.1/2.0 device in the operating system that does not support or have any USB 1.1/2.0 driver installed, such as DOS and SCO Unix. Set to [Disabled] only if you want to use any USB device other than the USB mouse.
3-12
User Guide - Page 46

▍ BIOS Setup
BIOS Recovery
Follow the steps to recover the BIOS.
1. Download the BIOS file from this website: http://www.msi.com/product/server/MS-91F7.html#Download
2. Extract the BIOS file. Rename the A91F7KMS.xxx file (xxx refers to the downloaded BIOS version) to "MSIBoot.rom".
3. Format your USB flash disk, and then copy the "MSIBoot.rom" file to it. Note that the USB disk must have ...