Ricoh SP 112SU driver and firmware

Related Ricoh SP 112SU Manual Pages
Download the free PDF manual for Ricoh SP 112SU and other Ricoh manuals at ManualOwl.com
User Guide - Page 3
... only 6
Important Safety Instructions
...7
Notes to Users in the State of California...7
1. Guide to the Machine
Guide to Components...9
Exterior...9
Interior...10
Installing the Driver and Software...11
Quick Install...11
Installing the Printer Driver...11
Upgrading or Deleting the Printer Driver 11
What is Smart Organizing Monitor?...14
2. Loading Paper
Supported Paper...15
Non...
User Guide - Page 4
...Errors...26 4. Configuring the Machine Using Smart Organizing Monitor Checking the System Information...29
Checking the Status Information...29 Printing the Configuration Page or Test Page 30 Configuring the Machine Settings...31 Tab Settings...31 Updating the Firmware... of the Machine...43 Printer Problems...44 Print Positions Do Not Match Display Positions 45 Error and Status Messages Appear ...
User Guide - Page 5
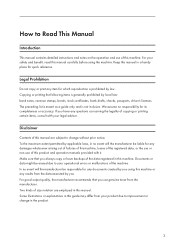
..., bank drafts, checks, passports, driver's licenses. The preceding list is meant as a guide only and is not inclusive. We assume no responsibility for its completeness or accuracy. If you have any questions concerning the legality of copying or printing certain items, consult with your legal advisor.
Disclaimer
Contents of this manual are subject to change...
User Guide - Page 12
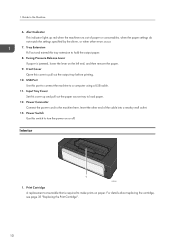
... this cover to pull out the output tray before printing.
10. USB Port Use this port to connect the machine to a computer using a USB cable.
11. Input Tray Cover Set this cover up and pull out the paper source tray to load paper.
12. Power Connector Connect the power cord to the machine here. Insert the other end of the...
User Guide - Page 13
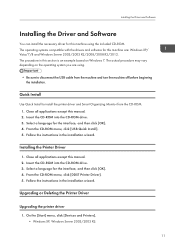
... except this manual. 2. Insert the CD-ROM into the CD-ROM drive. 3. Select a language for the interface, and then click [OK]. 4. From the CD-ROM menu, click [DDST Printer Driver]. 5. Follow the instructions in the installation wizard.
Upgrading or Deleting the Printer Driver
Upgrading the printer driver 1. On the [Start] menu, click [Devices and Printers]. • Windows XP, Windows Server 2003...
User Guide - Page 14
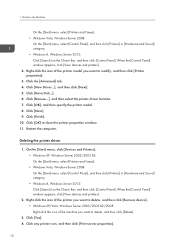
... [OK] to close the printer properties window. 11. Restart the computer.
Deleting the printer driver
1. On the [Start] menu, click [Devices and Printers]. • Windows XP, Windows Server 2003/2003 R2: On the [Start] menu, select [Printers and Faxes]. • Windows Vista, Windows Server 2008: On the [Start] menu, select [Control Panel], and then click [Printers] in [Hardware and Sound] category...
User Guide - Page 15

Installing the Driver and Software
5. Click the [Drivers] tab. 6. Click the [Change Driver Settings] button if it is displayed. 7. Click [Remove...]. 8. Select [Remove driver and driver package.], and then click [OK]. 9. Click [Yes]. 10. Click [Delete]. 11. Click [OK]. 12. Click [Close] to close the print server properties window.
13
User Guide - Page 16
1. Guide to the Machine
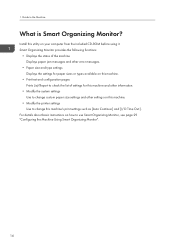
What is Smart Organizing Monitor?
Install this utility on your computer from the included CD-ROM before using it. Smart Organizing Monitor provides the following functions:
• Displays the status of the machine Displays paper jam messages and other error messages.
• Paper size and type settings Displays the settings for paper sizes or types available on...
User Guide - Page 18
... • Paper weighing heavier or lighter than the limit • Paper with windows, holes, perforations, cutouts, or embossing • Adhesive label paper on which glue or base paper is exposed • Paper with clips or staples
• When loading paper, take care not to touch the surface of the paper. • Even...
User Guide - Page 19
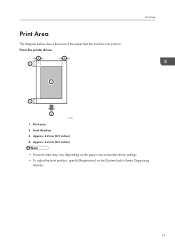
... the area of the paper that the machine can print on. From the printer driver
4
4
3
1
Print Area
3
2
CHZ904
1. Print area 2. Feed direction 3. Approx. 4.2 mm (0.2 inches) 4. Approx. 4.2 mm (0.2 inches)
• The print area may vary depending on the paper size and printer driver settings. • To adjust the print position, specify [Registration] on the [System] tab...
User Guide - Page 20
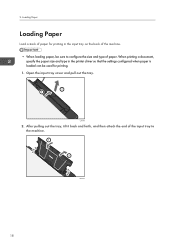
..., be sure to configure the size and type of paper. When printing a document, specify the paper size and type in the printer driver so that the settings configured when paper is loaded can be used for printing. 1. Open the input tray cover and pull out the tray.
2 1
CXP044
2. After pulling out the tray, tilt...
User Guide - Page 22
2. Loading Paper
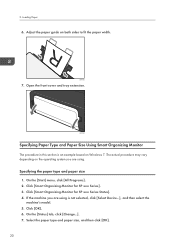
6. Adjust the paper guide on both sides to fit the paper width.
CXP006
7. Open the front cover and tray extension.
CXP046
Specifying Paper Type and Paper Size Using Smart Organizing Monitor
The procedure in this section is an example based on Windows 7. The actual procedure may vary depending on the operating system...
User Guide - Page 25
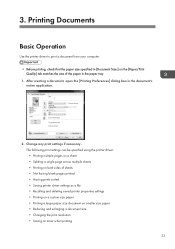
... printer driver to print a document from your computer.
• Before printing, check that the paper size specified in [Document Size:] on the [Paper/Print Quality] tab matches the size of the paper in the paper tray.
1. After creating a document, open the [Printing Preferences] dialog box in the document's native application.
2. Change any print settings...
User Guide - Page 28
...
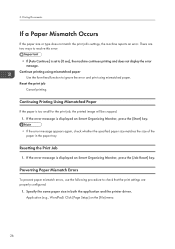
1. If the error message is displayed on Smart Organizing Monitor, press the [Job Reset] key.
Preventing Paper Mismatch Errors
To prevent paper mismatch errors, use the following procedure to check that the print settings are properly configured:
1. Specify the same paper size in both the application and the printer driver. Application (e.g., WordPad): Click [Page Setup] on the [File...
User Guide - Page 29

... dialog box): Click the [Paper/Print Quality] tab. 2. If the error persists even after you have performed Step 1, check that the paper size
setting specified in the printer driver matches the size of paper you are using. Smart Organizing Monitor: On the [Status] tab, click [Change...].
• If [Sub Paper Size:] is enabled, the...
User Guide - Page 33
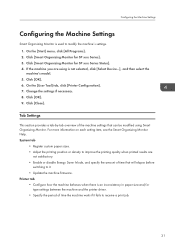
... specify the amount of time that will elapse before
switching to it. • Update the machine firmware. Printer tab • Configure how the machine behaves when there is an inconsistency in paper size and/or
type settings between the machine and the printer driver. • Specify the period of time the machine waits if it fails...
User Guide - Page 34
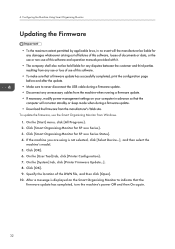
... Make sure to never disconnect the USB cable during a firmware update. • Disconnect any unnecessary cables from the machine when running a firmware update. • If necessary, modify power management settings on your computer in advance so that the
computer will not enter standby or sleep mode when during a firmware update. • Download the firmware from the manufacturer's Web site. To...
User Guide - Page 39
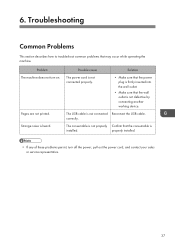
... that the wall outlet is not defective by connecting another working device.
The USB cable is not connected Reconnect the USB cable. correctly.
The consumable is not properly Confirm that the consumable is
installed.
properly installed.
• If any of these problems persist, turn off the power, pull out the power cord, and contact your sales or service representative.
37
User Guide - Page 49
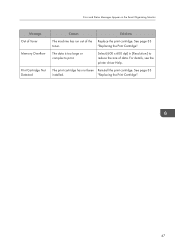
Error and Status Messages Appear on the Smart Organizing Monitor
Message Out of Toner
Memory Overflow
Print Cartridge Not Detected
Causes
Solutions
The ...
Select [600 x 600 dpi] in [Resolution:] to reduce the size of data. For details, see the printer driver Help.
The print cartridge has not been Reinstall the print cartridge. See page 33
installed.
"Replacing the Print Cartridge".
47
User Guide - Page 59
... of the machine 43 Configuration page 30 Consumables 51
D
Delete 12 Disclaimer 3 Driver 11 Duplex 24
E
Error messages 46 Exterior 9
F
Firmware 32
I
Important Safety Instructions 5, 7 Install 11 Interior 10, 36 Introduction 3
J
Job cancel 25
L
Legal prohibition 3 Loading paper 18
M
Machine settings 31 Models 4 Moving 50
N
Non-recommended paper 16 Notes 49
P
Paper feed...