Samsung RB12J8896S4 driver and firmware
Related Samsung RB12J8896S4 Manual Pages
Download the free PDF manual for Samsung RB12J8896S4 and other Samsung manuals at ManualOwl.com
User Manual - Page 2
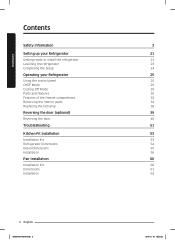
Contents
Contents
Safety information Setting up your Refrigerator
Getting ready to install the refrigerator Levelling the refrigerator Completing the Setup
Operating your Refrigerator
Using the control panel CHEF Mode Cooling Off Mode Parts and features Features of the freezer compartment Removing the interior parts Replacing the led lamp
Reversing the door (...
User Manual - Page 5
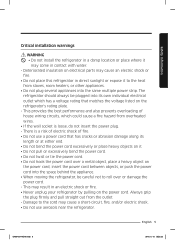
Safety information
Critical installation warnings
WARNING • Do not install the refrigerator in a damp location or place where it
may come in ...heat
from stoves, room heaters, or other appliances. • Do not plug several appliances into the same multiple power strip. The
refrigerator should always be plugged into its own individual electrical outlet which has a voltage rating that matches...
User Manual - Page 6
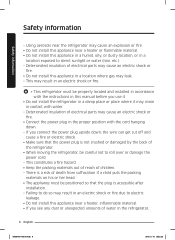
... accordance with the instructions in this manual before you use it.
• Do not install the refrigerator in a damp place or place where it may come in contact with water.
--Deteriorated insulation of electrical parts may cause an electric shock or fire.
• Connect the power plug in the proper position with the cord...
User Manual - Page 9
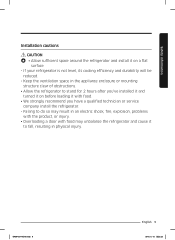
... mounting
structure clear of obstructions. • Allow the refrigerator to stand for 2 hours after you've installed it and
turned it on before loading it with food. • We strongly recommend you have a qualified technician or service
company install the refrigerator. --Failing to do so may result in an electric shock, fire, explosion, problems...
User Manual - Page 21
... appliance has to offer.
• This refrigerator must be properly installed and located in accordance with instructions in this before it is used.
• Use this appliance only for its intended purpose as described in this instruction manual.
• We strongly recommend that any servicing be performed by a qualified individual.
• Please dispose of the...
User Manual - Page 22
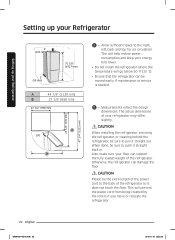
..., back and top for air circulation. This will help reduce power consumption and keep your energy bills lower.
• Do not install the refrigerator where the temperature will go below 50 °F ...servicing the refrigerator, or cleaning behind the refrigerator, be sure to pull it straight out. When done, be sure to push it straight back in. Also, make sure your floor can support the fully loaded...
User Manual - Page 23
Setting up your Refrigerator
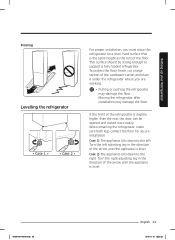
Flooring
Levelling the refrigerator
< Case 1 >
< Case 2 >
For proper installation, you must place this refrigerator on a level, hard surface that is the same height as the rest of the floor. This surface should be strong enough to support a fully loaded refrigerator. To protect the floor finish, cut a large section of the cardboard...
User Manual - Page 24
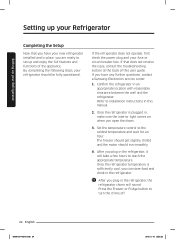
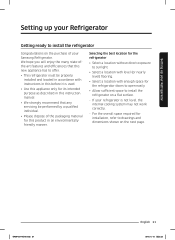
...user guide. If you have any further questions, contact a Samsung Electronics service center.
1. Confirm the refrigerator in an appropriate location with reasonable clearance between the wall and the refrigerator. Refer to installation instructions in this manual.
2. Once the refrigerator is plugged in, make sure the interior light comes on when you open the doors.
3. Set the temperature control to...
User Manual - Page 34
... Refrigerator
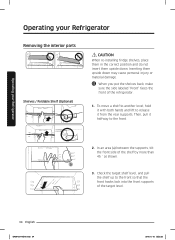
Removing the interior parts
Shelves / Foldable Shelf (Optional)
CAUTION
When re-installing fridge shelves, place them in the correct position and do not insert them upside...level, hold it with both hands and lift to release it from the rear supports. Then, pull it halfway to the front.
2. In an area (a) between the supports, tilt the front side of the shelf by more than 45 ˚ as...
User Manual - Page 39
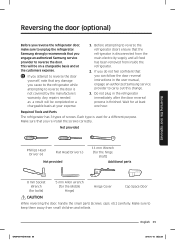
... do not feel confident that you can follow the door reversal instructions in the user manual, engage an authorized Samsung service provider to carry out this change.
3. Do not plug in... for a different purpose. Make sure that you re-install the screws correctly.
Not provided
Reversing the door (optional)
Phillips Head Driver (+)
Flat Head Driver (-)
Not provided
11 mm Wrench (for the hinge
...
User Manual - Page 43
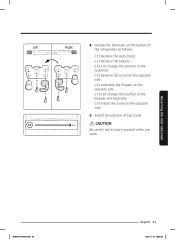
... of the Grommet. ( 5 ) Remove the screw on the opposite side. ( 6 ) Assembly the Stopper on the opposite side. ( 7 ),( 8 ) Change the position of the Stopper and assembly. ( 9 ) Install the screw on the opposite side.
9. Switch the position of Cap screw.
CAUTION
Be careful not to injure yourself while you work.
Reversing the door...
User Manual - Page 51
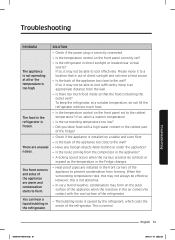
...the temperature is too high.
• Check if the power plug is correctly connected.
• Is the temperature control on the front panel correctly set?
• Is the refrigerator in direct sunlight or ... the appliance are warm and condensation starts to form.
• Heat-proof pipes are installed in the front corners of the appliance to prevent condensation from forming. When the surrounding ...
User Manual - Page 54
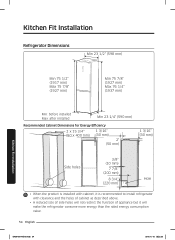
...(1927 mm)
Min 75 7/8" (1927 mm) Max 76 1/4" (1937 mm)
Min: before installed Max: after installed
Min 23 1/4" (590 mm)
Recommended Cabinet Dimensions for Energy Efficiency
2 x 15 3/4" (50...7/8" (200 mm)
8 3/4" (220 mm)
Hole
• When the product is installed with cabinet, it is recommended to install refrigerator with clearance and the holes of cabinet as described above.
• A reduced ...
User Manual - Page 56

... be caught.
• Do not let the product stand on the power cable when installing into the cabinet. - Damaged cables may cause a fire or electric shock.
• After placing the refrigerator, plug the power cable into the wall socket. • The guides included in the installation Kit are used for fitting the cabinet. Do not use for
other...
User Manual - Page 57
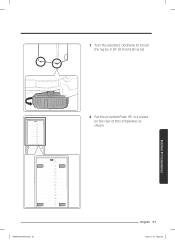
1. Turn the adjusters clockwise to loosen the leg by 0.35" (9.0 mm) (8 turns).
Kitchen Fit Installation
360
360
2. Put the provided Foam PE in 4 places on the rear of the refrigerator as shown.
DA68-03174Z-00.indb 57
English 57
2015. 6. 19. �� 2:23
User Manual - Page 58
Kitchen Fit Installation
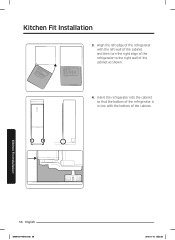
3. Align the left edge of the refrigerator with the left wall of the cabinet, and then turn the right edge of the refrigerator to the ... shown.
4. Insert the refrigerator into the cabinet so that the bottom of the refrigerator is in line with the bottom of the cabinet.
Kitchen Fit Installation
58 English
DA68-03174Z-00.indb 58
2015. 6. 19. �� 2:23
User Manual - Page 59
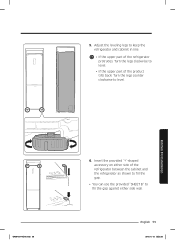
...: Turn the legs clockwise to level.
• If the upper part of the product tilts back: Turn the legs counter clockwise to level.
Kitchen Fit Installation
DA68-03174Z-00.indb 59
6. Insert the provided 'ㄱ'-shaped accessory on either side of the refrigerator between the cabinet and the refrigerator as shown...
User Manual - Page 62
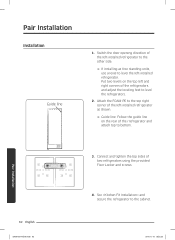
... the refrigerators.
2. Attach the FOAM-PE to the top right corner of the left-installed refrigerator as shown.
※※ Guide line: Follow the guide line on the rear of the rrefrigerator and attach top to bottom.
Pair Installation
62 English
DA68-03174Z-00.indb 62
3. Connect and tighten the top sides of two...
User Manual - Page 63

... between the two refrigerators. Use a flat-head screwdriver to make a gap in the cover ( 1 ), and then insert the FIXER ( 2 ).
※※ Insert up to the guide line as shown in the illustration on the left.
Pair Installation
DA68-03174Z-00.indb 63
English 63
2015. 6. 19. �� 2:23
User Manual - Page 64

... (5) years Labor on Digital Inverter Compressor (*Compressor, evaporator, condenser, drier, connecting tubing)
This limited warranty begins on the original date of purchase, and is valid only on products purchased and used in the United States. To receive warranty service, the purchaser must contact Samsung for problem determination and service procedures. Warranty service can only be...