Sony CCD-TR40 driver and firmware

Related Sony CCD-TR40 Manual Pages
Download the free PDF manual for Sony CCD-TR40 and other Sony manuals at ManualOwl.com
Primary User Manual - Page 2
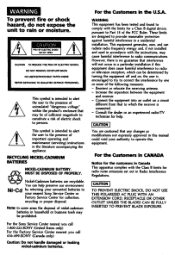
... the Sony Service Center nearest you call 1-800-222-SONY (United States only) For the Factory Service Center nearest you call 416-499-SONY (Canada only)
Caution: Do not handle damaged or leaking nickekadmium batteries.
For the Customers in the U.S.A.
WARNING This equipment has been tested and found to comply with the limits for a Class B digital device...
Primary User Manual - Page 3
... come.
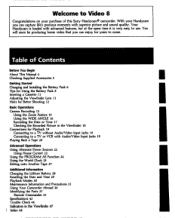
Table of Contents
Before You Begin About This Manual 4 Checking Supplied Accessories 5
Getting Started Charging and Installing the Battery Pack 6 Tips for Using the Battery Pack 8 Inserting a Cassette 11 Adjusting the Viewfinder Lens 11 Hints for Better Shooting 12
Basic Operations Camera Recording 13
Using the Zoom Feature 15 Using the WIDE ANGLE...
Primary User Manual - Page 5
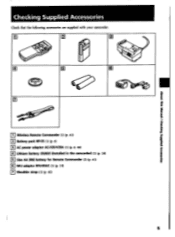
... Supplied Accessories
Check that the following accessories are supplied with your camcorder.
O
O
E Wireless Remote Commander (I) (p. 41) E Battery pack NP-55 (I) (p. 6) E AC power adaptor AC-V25N25A (1) (p. 6, 46)
E Lithium Battery CR2025 (Installed in the camcorder) (1) (p. 28) E Size AA (R6) battery for Remote Commander (2) (p. 41)
RFU adaptor RFU-95UC (1) (p. 19) E Shoulder strap (1) (p. 42...
Primary User Manual - Page 6
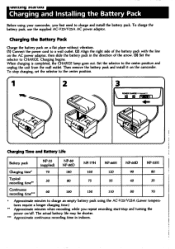
... outlet. Then remove the battery pack and install it on the camcorder.
To stop charging, set the selector to the center position.
1...recording time"
60
I60
150
110
80
70
Approximate minutes to charge an empty battery pack using the AC-V25/V25A (Lower temperatures require a longer charging time.) " Approximate minutes when recording while you repeat recording start/stop and turning the power...
Primary User Manual - Page 7
... normal. • If the POWER lamp does not light, set the selector to the center position and disconnect the power
cord. After about one minute, reconnect the power cord and set the selector to CHARGE again. • You cannot operate the camcorder using the AC power adaptor while charging the battery pack.
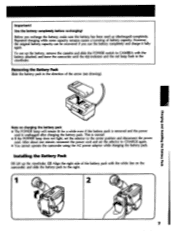
Installing the Battery Pack
(1) Lift...
Primary User Manual - Page 8
Charging and Installing the Battery Pack Removing the Battery Pack (1) Lift up the viewfinder. (2) While pressing BATT, slide the ...most out of your battery pack.
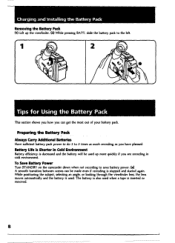
Preparing the Battery Pack Always Carry Additional Batteries
Have sufficient battery pack power to do 2 to 3 times as much recording as you have planned.
Battery Life is Shorter in Cold Environment
Battery efficiency is decreased and the ...
Primary User Manual - Page 10
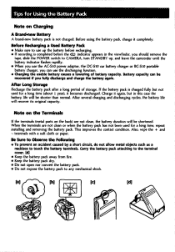
...recording is completed before the .to indicator appears in the viewfinder, you should remove the
tape, slide the POWER switch to CAMERA, turn STANDBY up, and leave the camcorder until the battery indicator flashes rapidly. • When you use the AC-SI0 power... recovered if you fully discharge and charge the battery again.
After Long Storage
Recharge the battery pack after a long period of storage....
Primary User Manual - Page 11
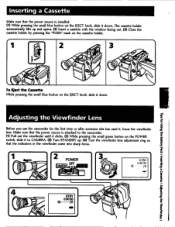
... sure that the power source is installed. (1) While pressing the small blue button on the EJECT knob, slide it down. The cassette holder automatically lifts up and opens. (2) Insert a cassette with the window facing out. (3)... POWER switch, slide it to CAMERA. (3) Turn STANDBY up. (4) Turn the viewfinder lens adjustment ring so that the indicators in the viewfinder come into sharp focus.
POWER
...
Primary User Manual - Page 13
...
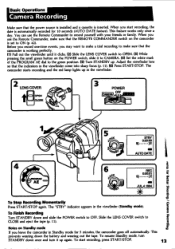
Camera Recording
Make sure that the power source is installed and a cassette is inserted. When you start recording, the date is automatically recorded for 10 seconds (AUTO DATE feature). This feature works only once a day. You can use the Remote Commander to record yourself with your friends or family. When you use the Remote Commander, make sure that the REMOTE...
Primary User Manual - Page 20
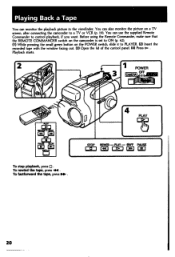
... to a TV or VCR (p. 19). You can use the supplied Remote Commander to control playback, if you want. Before using the Remote Commander, make sure that the REMOTE COMMANDER switch on the camcorder is set to ON (p. 42). (1) While pressing the small green button on the POWER switch, slide it to PLAYER. (2) Insert the recorded tape with the window facing...
Primary User Manual - Page 28

... is supplied with the lithium battery installed. The lithium battery lasts for about I year under normal operation. When the lithium battery becomes weak or dead, the 4,* indicator flashes in the viewfinder for about 5 seconds when you set the POWER switch to CAMERA. In this case, replace the battery with a Sony CR2025 or Duracell DL-202S lithium...
Primary User Manual - Page 30
... the viewfinder. This camcorder cannot record a tape in LP mode.
Foreign 8 mm video You cannot playback the software recorded on a different TV color system. Because the TV color systems differ from country to country, you may not be able to playback foreign pre-recorded software. Refer to page 36 to check the TV color system of foreign countries.
Primary User Manual - Page 43
... specifications are subject to change without notice.
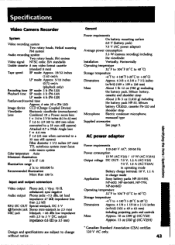
General
Power requirements
On battery mounting surface
6.0 V (battery pack)
7.5 V (AC power adaptor)
Average power consumption
53 W (camera recording) including
the viewfinder
Installation Vertically, Horizontally
Operating temperature
32. F to I04'F (0°C to 40'C)
Storage temperature
-47 to +1407 (-20. 0 to +60. C)
Dimensions...
Primary User Manual - Page 46
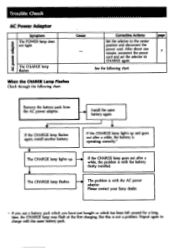
Trouble Check
AC power adaptor
AC Power Adaptor
Symptom The POWER lamp does not light.
The CHARGE lamp flashes.
Cause -
Corrective Actions
Page
Set the selector to the center position and disconnect the power cord. After about one minute, reconnect the power cord and set the selector to CHARGE again.
See the following chart.
When the CHARGE Lamp Flashes Check through...
Primary User Manual - Page 47

... or dead. Slow flashing: The battery is weak. Fast flashing: The battery is dead.
El The tape is near the end. The flashing is slow.
El The tape has run out. The flashing becomes rapid.
E No...other trouble has occurred. Disconnect the power source and contact your Sony dealer or local authorized facility.
E The lithium battery is weak or is not installed. (p. 28)
10 The LENS COVER switch is set to...