Sony DSC P20 - 1.3MP Digital Camera driver and firmware
Drivers and firmware downloads for this Sony item
Related Sony DSC P20 Manual Pages
Download the free PDF manual for Sony DSC P20 and other Sony manuals at ManualOwl.com
Operating Instructions - Page 3
... cable must be used with the equipment in order to comply with the limits for a digital device pursuant to Subpart B of Part 15 of FCC Rules.
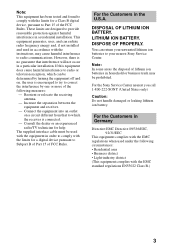
For the Customers in the U.S.A.
DISPOSAL OF LITHIUM ION BATTERY. LITHIUM ION BATTERY. DISPOSE OF PROPERLY.
You can return your unwanted lithium ion batteries to your nearest Sony Service...
Operating Instructions - Page 5
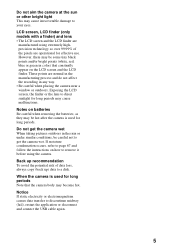
...in the manufacturing process and do not affect the recording in any way. • Be careful when placing the camera near a window or outdoors. Exposing the LCD screen, the finder...instructions on how to remove it before using the camera.
Back up recommendation To avoid the potential risk of data loss, always copy (back up) data to a disk.
When the camera is used for long periods Note that the camera...
Operating Instructions - Page 6
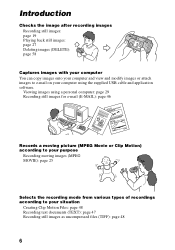
... images (DELETE): page 58
Captures images with your computer You can copy images onto your computer and view and modify images or attach images to e-mail on your computer using the supplied USB cable and application software.
Viewing images using a personal computer: page 29 Recording still images for e-mail (E-MAIL): page 46
Records a moving picture (MPEG Movie or Clip Motion...
Operating Instructions - Page 8
....
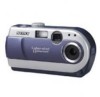
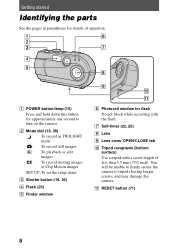
A POWER button/lamp (15) Press and hold down this button for approximately one second to turn on the camera.
B Mode dial (18, 38) : To record in TWILIGHT mode : To record still images : To playback or edit images : To record moving images or Clip Motion images
SET UP:To set the setup items
C Shutter button (19, 26)
D Flash (23)
E Finder window...
Operating Instructions - Page 10
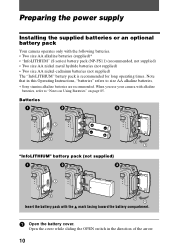
Preparing the power supply
Installing the supplied batteries or an optional battery pack
Your camera operates only with the following batteries. • Two size AA ... operating times. Note that in this Operating Instructions, "batteries" refers to size AA alkaline batteries. ∗ Sony stamina alkaline batteries are recommended. When you use your camera with alkaline
batteries, refer to "Notes on...
Operating Instructions - Page 11
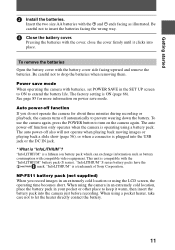
... operating the camera with batteries, set POWER SAVE in the SET UP screen to ON to extend the battery life. The factory setting is ON (page 66). See page 85 for more information on power save mode.
Auto power-off function If you do not operate the camera for about three minutes during recording or playback, the camera turns off...
Operating Instructions - Page 29

... image files recorded in a "Memory Stick" from the personal computer. In order to use the USB cable, a USB driver must be installed in the personal computer beforehand. Be sure to also refer to the operation manuals for your personal computer and the application software.
Notes • Data recorded with your camera is stored in the following formats. Make sure that applications
that support these...
Operating Instructions - Page 30
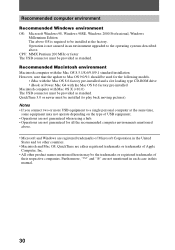
... CPU: MMX Pentium 200 MHz or faster The USB connector must be provided as standard.
Recommended Macintosh environment Macintosh computer with the Mac OS 8.5.1/8.6/9.0/9.1 standard installation However, note that the update to Mac OS 9.0/9.1 should be used for the following models.
• iMac with the Mac OS 8.6 factory pre-installed and a slot loading type CD-ROM drive • iBook or Power Mac...
Operating Instructions - Page 31
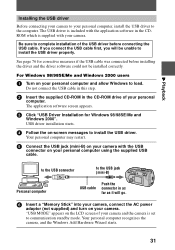
... personal computer and allow Windows to load.
Do not connect the USB cable in this step.
2 Insert the supplied CD-ROM in the CD-ROM drive of your personal
computer. The application software screen appears.
3 Click "USB Driver Installation for Windows 98/98SE/Me and
Windows 2000". USB driver installation starts.
4 Follow the on-screen messages to install the USB driver.
Your personal computer may...
Operating Instructions - Page 32
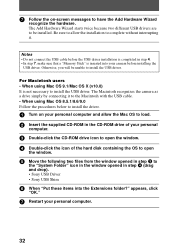
... Macintosh with the USB cable. • When using Mac OS 8.5.1/8.6/9.0 Follow the procedures below to install the driver.
1 Turn on your personal computer and allow the Mac OS to load. 2 Insert the supplied CD-ROM in the CD-ROM drive of your personal
computer.
3 Double-click the CD-ROM drive icon to open the window. 4 Double-click the icon of the hard disk containing the OS...
Operating Instructions - Page 33
... be installed.
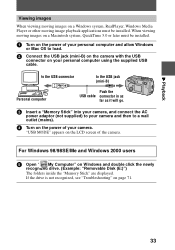
1 Turn on the power of your personal computer and allow Windows
or Mac OS to load.
2 Connect the USB jack (mini-B) on the camera with the USB
connector on your personal computer using the supplied USB cable.
to the USB connector
to the USB jack (mini-B)
Personal computer
Push the USB cable connector in as
far as it will go.
3 Insert a "Memory Stick" into your camera, and...
Operating Instructions - Page 34
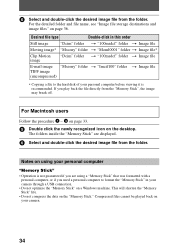
... desktop.
The folders inside the "Memory Stick" are displayed.
6 Select and double-click the desired image file from the folder.
Notes on using your personal computer
"Memory Stick"
• Operation is not guaranteed if you are using a "Memory Stick" that was formatted with a personal computer, or if you used a personal computer to format the "Memory Stick" in your camera through a USB...
Operating Instructions - Page 35
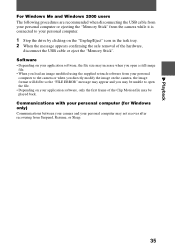
... disconnecting the USB cable from your personal computer or ejecting the "Memory Stick" from the camera while it is connected to your personal computer.
1 Stop the drive by clicking on the "Unplug/Eject" icon in the task tray. 2 When the message appears confirming the safe removal of the hardware,
disconnect the USB cable or eject the "Memory Stick". Software • Depending...
Operating Instructions - Page 36
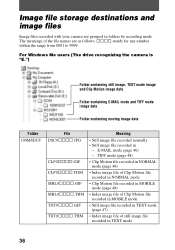
Image file storage destinations and image files
Image files recorded with your camera are grouped in folders by recording mode. The meanings of the file names are as follows. ssss stands for any number within the range from 0001 to 9999.
For Windows Me users (The drive recognizing the camera is "E.")
Folder containing still image, TEXT mode image...
Operating Instructions - Page 37
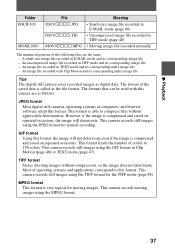
... its corresponding index image file
Tips
The digital still camera saves recorded images as digital data. The format of the saved data is called as the file format. The formats that can be used with this camera are as follows:
JPEG format
Most digital still cameras, operating systems of computers, and browser software adopt this format. This format is...
Operating Instructions - Page 57
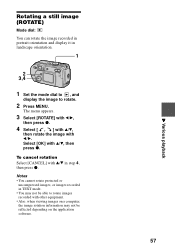
...a still image (ROTATE)
Mode dial:
You can rotate the image recorded in portrait orientation and display it in landscape orientation.
1
2 3,4
1 Set the mode dial to , and
display the image to rotate.
2 Press MENU.
The menu appears.
3 ...or images recorded in TEXT mode. • You may not be able to rotate images recorded with other equipment. • Also, when viewing images on a computer, the image...
Operating Instructions - Page 68
...), or install a charged battery pack or new alkaline batteries, and leave the camera for 24 hours or more with the POWER button set to OFF.
68
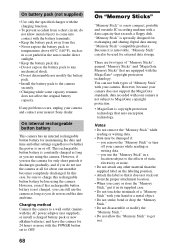
On "Memory Sticks"
"Memory Stick" is a new compact, portable and versatile IC recording medium with a data capacity that exceeds a floppy disk. "Memory Stick" is specially designed for exchanging and sharing digital data among "Memory Stick...
Operating Instructions - Page 73
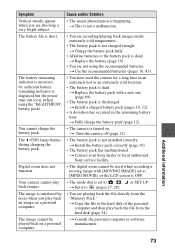
... turned on. t Turn the camera off (page 12).
• The battery pack is not installed correctly. t Install the battery pack correctly (page 10).
• The battery pack has malfunctioned. t Contact your Sony dealer or local authorized Sony service facility.
• The digital zoom cannot be used when recording a moving image with [MOVING IMAGE] set to [MPEG MOVIE], or the...
Operating Instructions - Page 74
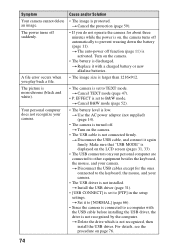
... camera.
• The USB driver is not installed. t Install the USB driver (page 31).
• [USB CONNECT] is set to [PTP] in the setup settings. t Set it to [NORMAL] (page 66).
• Since the camera is connected to a computer with the USB cable before installing the USB driver, the drive is not recognized by the computer. t Delete the drive which is not recognized, then install the USB driver...
Operating Instructions - Page 76
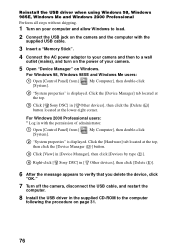
... button.
3 Click [View] in [Device Manager], then click [Devices by type (E)].
4 Right-click [ Sony DSC] in [ Other devices], then click [Delete (E)].
6 After the message appears to verify that you delete the device, click
"OK."
7 Turn off the camera, disconnect the USB cable, and restart the
computer.
8 Install the USB driver in the supplied CD-ROM to the computer
following the procedure on...