Asus P9D-E 4L driver and firmware

Related Asus P9D-E 4L Manual Pages
Download the free PDF manual for Asus P9D-E 4L and other Asus manuals at ManualOwl.com
User Guide - Page 4
...(x1 link 2-17 2.5.7 PCI slot 2-17 2.5.8 PIKE slot 2-18 2.5.9 Installing the ASUS PIKE RAID card 2-19 2.5.10 Installing the Baseboard Management Card 2-20 2.5.11 Connecting the Thermal sensor cable 2-21 2.5.12 Installing the Audio card 2-22
2.6 Onboard LEDs 2-23 2.7 Jumpers...2-26 2.8 Connectors 2-29
2.8.1 Rear panel connectors 2-29 2.8.2 Internal connectors 2-30
Chapter 3:
Powering Up...
User Guide - Page 6
... RAID controller driver 6-5
6.2 Management applications and utilities installation 6-7
6.3 Running the Support DVD 6-7
6.4 Installing the LAN driver 6-15
6.5 Installing the VGA driver 6-20 6.6 Installing the Intel® C22x MEI NULL HECI driver 6-23 6.7 Installing the Intel® I210 Gigabit Adapter driver 6-25
Appendix A: Reference Information A.1 P9D-E/4L block diagram A-3 ASUS...
User Guide - Page 10
... provides instructions for installing the necessary drivers for different system components. • Appendix: Reference information This appendix includes additional information that you may refer to when configuring the motherboard.
Where to find more information
Refer to the following sources for additional information and for product and software updates. 1. ASUS websites
The ASUS website...
User Guide - Page 36
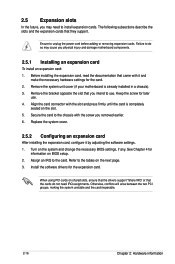
... card
After installing the expansion card, configure it by adjusting the software settings. 1. Turn on the system and change the necessary BIOS settings, if any. See Chapter 4 for
information on BIOS setup. 2. Assign an IRQ to the card. Refer to the tables on the next page. 3. Install the software drivers for the expansion card.
When using PCI cards on shared slots, ensure that the drivers support...
User Guide - Page 69
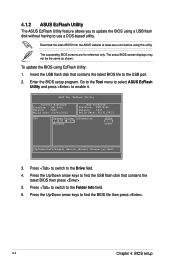
... only. The actual BIOS screen displays may not be the same as shown.
To update the BIOS using EzFlash Utility: 1. Insert the USB flash disk that contains the latest BIOS file to the USB port. 2. Enter the BIOS setup program. Go to the Tool menu to select ASUS EzFlash
Utility and press to enable it.
ASUS Tek. EzFlash Utility
Current Platform Platform : P9D-E/4L Version : 0060 Build...
User Guide - Page 72
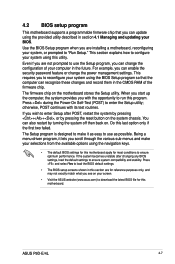
... can enable the security password feature or change the power management settings. This requires you to reconfigure your system using the BIOS Setup program so that the computer can recognize these changes and record them in the CMOS RAM of the firmware chip.
The firmware chip on the motherboard stores the Setup utility. When you start up the computer, the system provides you...
User Guide - Page 81
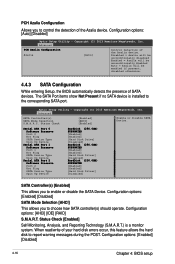
... 1 Hot Plug SATA Device Type Spin Up Device
Serial ATA Port 2 Software Preserve Port 2 Hot Plug SATA Device Type Spin Up Device
HardDisk (250.0GB) SUPPORTED [Enabled] [Enabled] [Hard Disk Drive] [Disabled] HardDisk (250.0GB) SUPPORTED [Enabled] [Enabled] [Hard Disk Driver] [Disabled] HardDisk (250.0GB) SUPPORTED [Enabled] [Enabled] [Hard Disk Driver] [Disabled]
SATA Controller(s) [Enabled] This...
User Guide - Page 108
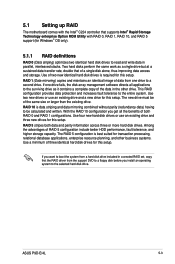
...relational database applications, enterprise resource planning, and other business systems. Use a minimum of three identical hard disk drives for this setup.
If you want to boot the system from a hard disk drive included in a created RAID set, copy first the RAID driver from the support DVD to a floppy disk before you install an operating system to the selected hard disk drive.
ASUS P9D-E/4L
5-3
User Guide - Page 125
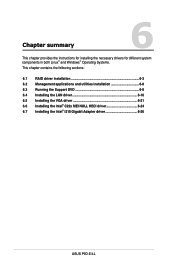
... Systems. This chapter contains the following sections:
6.1 RAID driver installation 6-3 6.2 Management applications and utilities installation 6-8 6.3 Running the Support DVD 6-8 6.4 Installing the LAN driver 6-16 6.5 Installing the VGA driver 6-21 6.6 Installing the Intel® C22x MEI NULL HECI driver 6-24 6.7 Installing the Intel® I210 Gigabit Adapter driver 6-26
ASUS P9D-E/4L
User Guide - Page 126
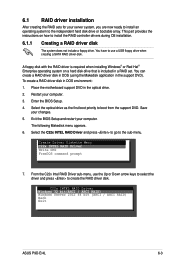
... to the independent hard disk drive or bootable array. This part provides the instructions on how to install the RAID controller drivers during OS installation.
6.1.1 Creating a RAID driver disk
The system does not include a floppy drive. You have to use a USB floppy drive when creating a SATA RAID driver disk.
A floppy disk with the RAID driver is required when installing Windows® or Red Hat...
User Guide - Page 127
...: 1. Start Windows®. 2. Place the motherboard support DVD into the optical drive. 3. Go to the Make disk menu, then select the type of RAID driver disk you want to create. 4. Insert a floppy disk into the USB floppy disk drive. 5. Follow succeeding screen instructions to complete the process.
Write-protect the floppy disk to avoid computer virus infection.
6-4
Chapter 6: Driver installation
User Guide - Page 128
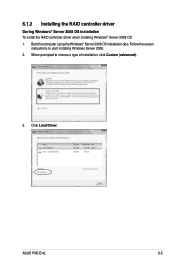
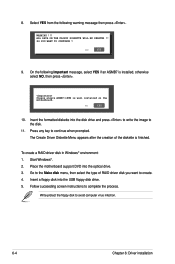
...During Windows® Server 2008 OS installation To install the RAID controller driver when installing Windows® Server 2008 OS 1. Boot the computer using the Windows® Server 2008 OS installation disc. Follow the screen
instructions to start installing Windows Server 2008. 2. When prompted to choose a type of installation, click Custom (advanced).
3. Click Load Driver.
ASUS P9D-E/4L
6-5
User Guide - Page 129
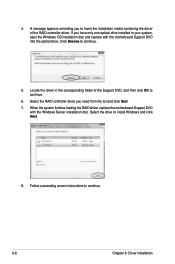
...message appears reminding you to insert the installation media containing the driver of the RAID controller driver. If you have only one optical drive installed in your system, eject the Windows OS installation disc and replace with the motherboard Support DVD into the optical drive. Click Browse to continue.
5. Locate the driver in the corresponding folder of the Support DVD, and then click OK to...
User Guide - Page 130
... the ASUS website (www.asus.com) for the latest updates on software and utilities.
2. The support DVD is supported on Windows® Server 2008 R2 and Windows® Server 2012.
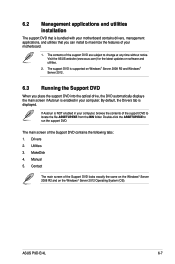
6.3 Running the Support DVD
When you place the support DVD into the optical drive, the DVD automatically displays the main screen if Autorun is enabled in your computer. By default, the Drivers tab is displayed.
If...
User Guide - Page 131
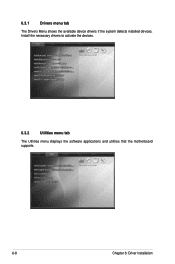
6.3.1
Drivers menu tab
The Drivers Menu shows the available device drivers if the system detects installed devices. Install the necessary drivers to activate the devices.
6.3.2
Utilities menu tab
The Utilities menu displays the software applications and utilities that the motherboard supports.
6-8
Chapter 6: Driver installation
User Guide - Page 133

... system.
You need to manually install the Intel® chipset device software on a Windows® Operating System.
To install the Intel® chipset device software on Windows® Server 2008 R2:
1. Restart the computer.
2. Log in with Administrator privileges. 3. Insert the Motherboard Support DVD to the optical drive.
The support DVD automatically displays the Drivers menu if Autorun is...
User Guide - Page 136
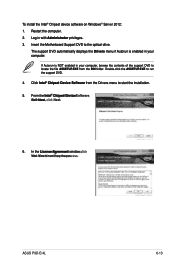
To install the Intel® Chipset device software on Windows® Server 2012: 1. Restart the computer. 2. Log in with Administrator privileges. 3. Insert the Motherboard Support DVD to the optical drive.
The support DVD automatically displays the Drivers menu if Autorun is enabled in your computer.
If Autorun is NOT enabled in your computer, browse the contents of the support DVD to locate the ...
User Guide - Page 138

...174; Network Connections Software drivers on the system. You need to manually install the LAN controller driver on a Windows® operating system. To install the LAN controller device on Windows® Server 2008 R2: 1. Restart the computer. 2. Log in with Administrator privileges. 3. Insert the Motherboard Support DVD to the optical drive.
The support DVD automatically displays the Drivers menu...
User Guide - Page 140
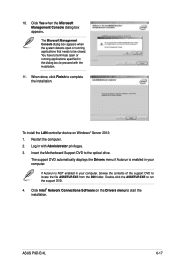
... specified in the dialog box to proceed with the installation.
11. When done, click Finish to complete the installation.
To install the LAN controller device on Windows® Server 2012: 1. Restart the computer. 2. Log in with Administrator privileges. 3. Insert the Motherboard Support DVD to the optical drive.
The support DVD automatically displays the Drivers menu if Autorun is enabled in your...
User Guide - Page 141
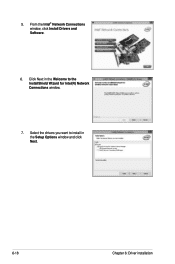
5. From the Intel® Network Connections window, click Install Drivers and Software.
6. Click Next in the Welcome to the InstallShield Wizard for Intel(R) Network Connections window.
7. Select the drivers you want to install in the Setup Options window and click Next.
6-18
Chapter 6: Driver installation