Brother International PE-DESIGN2.0 driver and firmware
Drivers and firmware downloads for this Brother International item

Related Brother International PE-DESIGN2.0 Manual Pages
Download the free PDF manual for Brother International PE-DESIGN2.0 and other Brother International manuals at ManualOwl.com
Owner's Manual - English - Page 2
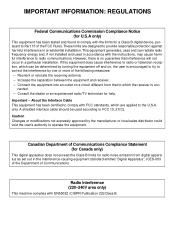
... for a Class B digital device, pursuant to Part 15 of the FCC Rules. These limits are designed to provide reasonable protection against harmful interference in a residential installation. This equipment generates, uses...is con-
nected. - Consult the dealer or an experienced radio/TV technician for help. Important - About the Interface Cable This equipment has been certified to comply with FCC ...
Owner's Manual - English - Page 4
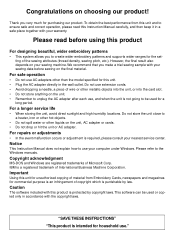
... nearest service center.
Notice
This Instruction Manual does not explain how to use your computer under Windows. Please refer to the Windows manuals.
Copyright acknowledgment
MS-DOS and Windows are registered trademarks of Microsoft Corp. IBM is a registered trademark of International Business Machine Corporation.
Important
Using this unit for unauthorized copying of material from Embroidery Cards...
Owner's Manual - English - Page 5
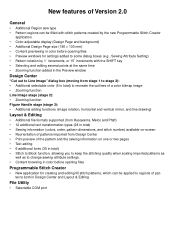
...display (Design Page and background) • Additional Design Page size (180 × 130 mm) • Content previewing in color before opening files • Preview windows for settings added to some dialog boxes (e.g., Sewing Attribute Setting...line drawing)
Layout & Editing
• Additional file formats supported (from Husqvarna, Melco and Pfaff) • 12 additional text ...
Owner's Manual - English - Page 6

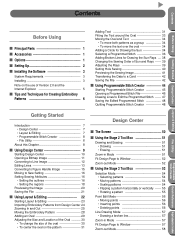
Contents
Note:
This user's manual has been written based on Ver.2.0 for Windows 95, Ver 2.0 Windows 3.1 differs somewhat in screen handling, so please pardon the variation. (Please use Ver 2.0 for Windows 3.1 if you are running Windows 3.1 on your personal computer.)
Before Using
Getting Started Design Center Layout & Editing
File Utility
Programmable Stich Creator
Quick Reference Alphabetic...
Owner's Manual - English - Page 7
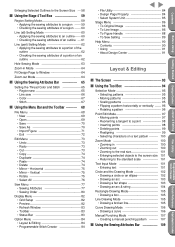
... 1 s Setting Up 2 s Installing the Software --------- 3
System Requirements 3 Installing 3 Note on the use of Version 2.0 and the Internet Explorer 5
... the Rays 39 Setting Hole Sewing 40 Previewing the Sewing Image--------- 41 Transferring the Data to a Card -------- 42 Saving...8226; Erasing 51
Zoom-in Mode 51 Fit Design Page to Window ---------- 52 Zoom-out Mode 52
s Using the Stage 3 Tool...
Owner's Manual - English - Page 8
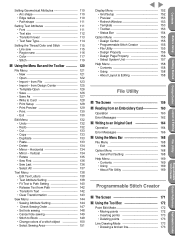
...• Redo 73 • Cut 73 • Copy 74 • Duplicate 74 • Paste 74 •...Sewing Order 80
Display Menu 82 • Grid Setup 82 • Preview 82 • Refresh Window 83 •...To Figure Handle 88 • To Sew Setting 89 Help Menu 90 • Contents 90 ... Drawing a curve 106
Manual Punching Mode ---------- 107 • Creating a manual punching pattern --- 107
s...
Owner's Manual - English - Page 9
... --------- 158
File Utility
s The Screen 159 s Reading from an Embroidery Card---- 160
Operation 160 Error Messages 162
s Writing to an Original Card ------ 164
Operation 164 Error Messages 166
s Using the Menu Bar --------- 168
File Menu 168 • Exit 168
Option Menu 168 • Serial Port Setting 168
Help Menu 169 • Contents 169 • Using 169 •...
Owner's Manual - English - Page 13
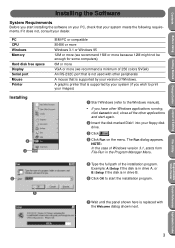
... start installing the software on your PC, check that your system meets the following requirements. If it does not, consult your dealer.
PC CPU Windows Memory
Hard disk free space Display Serial port Mouse Printer
IBM-PC or compatible 80486 or more Windows 3.1 or Windows 95 12M or more (we recommend 16M or more because 12M might not be enough for some computers...
Owner's Manual - English - Page 14
... applications and start again.
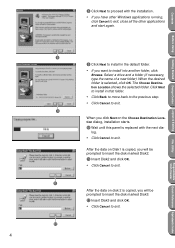
8 9 Click Next to install in the default folder. • If you want to install into another folder, click
Browse. Select a drive and a folder (if necessary, type the name of..., installation starts.
0 Wait until this panel is replaced with the next dia-
log.
• Click Cancel to exit.
After the data on Disk1 is copied, you will be prompted to insert the disk marked...
Owner's Manual - English - Page 15
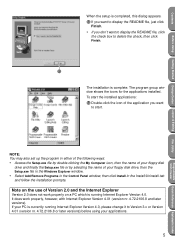
... by selecting the name of your floppy disk drive, then the Setup.exe file in the Windows Explorer window.
• Select Add/Remove Programs in the Control Panel window, then click Install in the Install/Uninstall tab
and follow the installation prompts.
Note on the use of Version 2.0 and the Internet Explorer
Version 2.0 does not work properly on a PC which is...
Owner's Manual - English - Page 17
... from scanning a... Setting:...on Embroidery cards from your dealer (installed using the... File Utility application). Note that some patterns cannot be read.
x Embroidery patterns in the Tajima, Melco, Pfaff and Husqvarna formats.
x Patterns created within Layout & Editing itself. These patterns include text, circles and related shapes, rounded boxes, polygonal lines, curves and manual...
Owner's Manual - English - Page 59
... created with Programmable Stitch Creator to regions of images displayed in Design Center. The resulting embroidery pattern can then... or scanned from a printed source using a scanner and the appropriate software. The image file must be in the uncompressed Windows DIB ...;le name extension will be PEM. x STAGE 4: Sewing settings You can set the stitch, thread color, etc. for the outlines and ...
Owner's Manual - English - Page 79
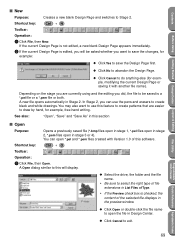
... *.pem files created with Version 1.0 of this software.
Shortcut key:
Ctrl + O
Toolbar:
Operation:
1 Click File, then Open.
A Open dialog similar to this will display.
x Select the drive, the folder and the fi...If the Preview check box is checked, the
content of the selected file displays in the preview window.
x Click Open or double-click the file name to open the &#...
Owner's Manual - English - Page 92
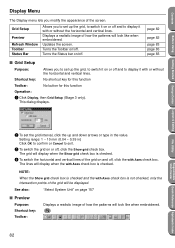
... the appearance of the screen.
Grid Setup
Preview Refresh Window Toolbar Status Bar
Allows you to set up the grid, to switch it on or off and to display it with or without the horizontal and vertical lines. Displays a realistic image of how the patterns will look like when embroidered. Updates the screen. Turns the Toolbar...
Owner's Manual - English - Page 93
...).
A preview of your embroidery patterns will appear. You cannot make any settings while previewing a pattern.
2 To return to the normal working screen, click Display, then Preview again or press the Esc key.
See also:
"Sewing Order" on page 80
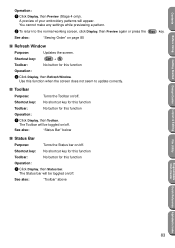
s Refresh Window
Purpose:
Updates the screen.
Shortcut key:
Ctrl + R
Toolbar:
No button for this function...
Owner's Manual - English - Page 134
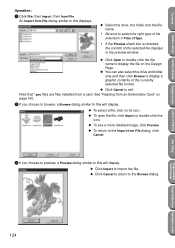
... the Design Page.
x You can also select the drive and folder only and then click Browse to display a graphic contents of the currently selected file format.
x Click Cancel to exit. Note that *.pec files are files installed from a card. See "Reading from an Embroidery Card" on page 160.
2 If you choose to...
Owner's Manual - English - Page 136
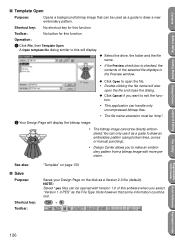
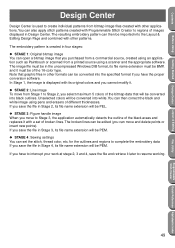
... or manual punching).
• Design Center allows you to make an embroi-
dery pattern from a bitmap image with more precision.
See also:
s Save
Purpose:
Shortcut key: Toolbar:
"Template" on page 153
Saves your Design Page on the disk as a Version 2.0 file (default). NOTE: Saved *.pes files can be opened with Version 1.0 of this software...
Owner's Manual - English - Page 162
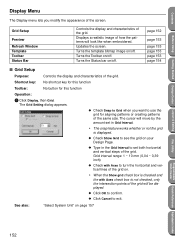
...Display Menu
The Display menu lets you modify the appearance of the screen.
Grid Setup
Preview
Refresh Window Template Toolbar Status Bar
Controls the display and characteristics of the grid. Displays a realistic image of how the patterns will look like when embroidered. Updates... by the amount set in Grid Interval.
• The snap feature works whether or not the grid
is displayed.
x Check Show...
Owner's Manual - English - Page 163
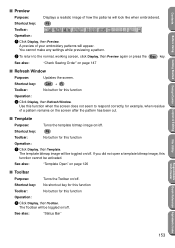
....
A preview of your embroidery patterns will appear. You cannot make any settings while previewing a pattern.
2 To return to the normal, working screen, click Display, then Preview again or press the Esc key.
See also:
"Check Sewing Order" on page 147
s Refresh Window
Purpose:
Updates the screen.
Shortcut key:
Ctrl + R
Toolbar:
No button for this...
Owner's Manual - English - Page 197
... tab 81
Contents 90, 158, 169, 178 Copy 74, 133
CPU 3 Creating a manual punching pattern 107 Curve Drawing mode 106
Cut 73, 133
D
Delete 74, 134 Deleting points 56, 99, 173 Design Center 7, 9, 155
Design Center window 10 Design Page Setup 84
Direction of programmed stitch 79, 146
Display 3
Display menu 82, 152
Drawing a box 105
Drawing...