Dell Inspiron 13 7352 driver and firmware
Related Dell Inspiron 13 7352 Manual Pages
Download the free PDF manual for Dell Inspiron 13 7352 and other Dell manuals at ManualOwl.com
Specifications - Page 6
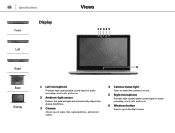
... sensor
Detects the ambient light and automatically adjusts the display brightness.
3 Camera
Allows you to video chat, capture photos, and record videos.
4 Camera-status light
Turns on when the camera is in use.
5 Right microphone
Provides high‑quality digital sound input for audio recording, voice calls, and so on.
6 Windows button
Press to go to the Start screen.
Service Manual - Page 8
...Post-requisites 82
Removing the camera 83
Prerequisites...83 Procedure...83
Replacing the camera 85
Procedure...85 Post-requisites 85
Removing the Windows-button board 86
Prerequisites...86 Procedure...86
Replacing the Windows-button board 88
Procedure...88 Post-requisites 88
Removing the display cable 89
Prerequisites...89 Procedure...89
Replacing the display cable 93
Procedure...93 Post...
Service Manual - Page 10
....
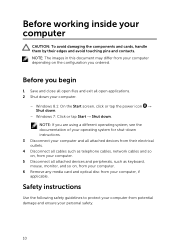
3 Disconnect your computer and all attached devices from their electrical outlets.
4 Disconnect all cables such as telephone cables, network cables and so on, from your computer.
5 Disconnect all attached devices and peripherals, such as keyboard, mouse, monitor, and so on, from your computer.
6 Remove any media card and optical disc from your computer, if applicable.
Safety instructions
Use the...
Service Manual - Page 11
... to avoid bending any connector pins. When connecting cables, make sure that the ports and connectors are correctly oriented and aligned.
CAUTION: To disconnect a network cable, first unplug the cable from your computer and then unplug the cable from the network device.
CAUTION: Press and eject any installed card from the media-card reader.
Recommended tools
The procedures in this document may...
Service Manual - Page 61
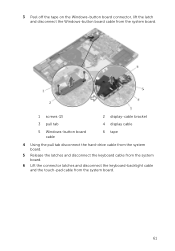
...connector, lift the latch and disconnect the Windows-button board cable from the system board.
1 screws (2)
2 display-cable bracket
3 pull tab
4 display cable
5 Windows-button board cable
6 tape
4 Using the pull tab disconnect the hard-drive cable from the system board.
5 Release the latches and disconnect the keyboard cable from the system board.
6 Lift the connector latches and disconnect...
Service Manual - Page 64

... the BIOS using the BIOS setup program. You must make the desired changes again after you replace the system board.
Procedure
1 Align the screw holes on the system board with the screw holes on the computer base.
2 Replace the screw that secures the system board to the computer base. 3 Connect the power-adapter port cable and the speaker cable to the
system board. 4 Slide...
Service Manual - Page 67
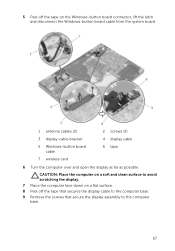
5 Peel off the tape on the Windows-button board connector, lift the latch and disconnect the Windows-button board cable from the system board.
1 antenna cables (2)
3 display-cable bracket
5 Windows-button board cable
2 screws (2) 4 display cable 6 tape
7 wireless card
6 Turn the computer over and open the display as far as possible.
CAUTION: Place the computer on a soft and clean surface to ...
Service Manual - Page 69
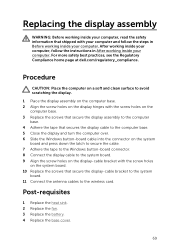
... latch to secure the cable. 7 Adhere the tape to the Windows button-board connector. 8 Connect the display cable to the system board. 9 Align the screw holes on the display-cable bracket with the screw holes on the system board. 10 Replace the screws that secure the display-cable bracket to the system board. 11 Connect the antenna cables to the wireless card.
Post-requisites
1 Replace...
Service Manual - Page 75
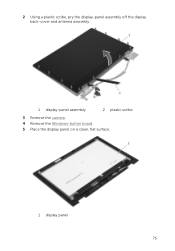
2 Using a plastic scribe, pry the display-panel assembly off the display back-cover and antenna assembly.
1 display-panel assembly
2 plastic scribe
3 Remove the camera. 4 Remove the Windows-button board. 5 Place the display panel on a clean, flat surface.
1 display panel 75
Service Manual - Page 76
.... After working inside your computer, follow the instructions in After working inside your computer. For more safety best practices, see the Regulatory Compliance home page at dell.com/regulatory_compliance.
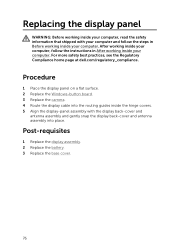
Procedure
1 Place the display panel on a flat surface. 2 Replace the Windows-button board. 3 Replace the camera. 4 Route the display cable into the routing guides inside the hinge covers...
Service Manual - Page 86
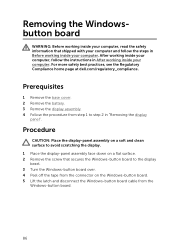
... clean surface to avoid scratching the display. 1 Place the display-panel assembly face down on a flat surface. 2 Remove the screw that secures the Windows-button board to the display bezel. 3 Turn the Windows-button board over. 4 Peel off the tape from the connector on the Windows-button board. 5 Lift the latch and disconnect the Windows-button board cable from the Windows-button board.
86
Service Manual - Page 87
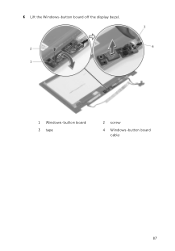
6 Lift the Windows-button board off the display bezel.
1 Windows-button board 3 tape
2 screw
4 Windows-button board cable
87
Service Manual - Page 88
... follow the steps in Before working inside your computer. After working inside your computer, follow the instructions in After working inside your computer. For more safety best practices, see the Regulatory Compliance home page at dell.com/regulatory_compliance.
Procedure
1 Slide the Windows-button board cable into the connector on the Windows-button board and press down the latch to secure...
Service Manual - Page 89
... at dell.com/regulatory_compliance.
Prerequisites
1 Remove the base cover. 2 Remove the battery. 3 Remove the display assembly. 4 Follow the procedure from step 1 to step 2 in "Removing the display
panel". 5 Follow the procedure from step 1 to step 2 in "Removing the camera". 6 Remove the Windows-button board.
Procedure
1 Peel off the tape, lift the latch and disconnect the display cable from...
Service Manual - Page 93
... inside your computer. For more safety best practices, see the Regulatory Compliance home page at dell.com/regulatory_compliance.
Procedure
1 Route the display cable through the routing guides on the display bezel. 2 Adhere the touch-screen board to the display bezel. 3 Connect the touch-screen board cables to the touch-screen board. 4 Adhere the tapes to the touch-screen board cable and the...
Service Manual - Page 94
... to flash (update) the BIOS when an update is available or when you replace the system board. To flash the BIOS: 1 Turn on the computer. 2 Go to dell.com/support. 3 Click Product Support, enter the Service Tag of your laptop and click
Submit. NOTE: If you do not have the Service Tag, use the auto-detect feature or manually browse for your computer model.
4 Click Drivers & downloads. 5 Scroll...
Service Manual - Page 95
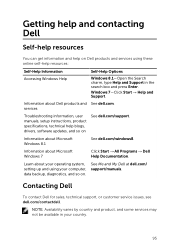
...information, user manuals, setup instructions, product specifications, technical help blogs, drivers, software updates, and so on
See dell.com/support.
Information about Microsoft Windows 8.1
See dell.com/windows8.
Information about Microsoft Windows 7
Click Start → All Programs → Dell Help Documentation.
Learn about your operating system, setting up and using your computer, data...
Quick Start Guide - Page 1
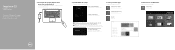
Inspiron 13
7000 Series
Quick Start Guide
Guide d'information rapide
1 Connect the power adapter and press the power button
Connectez l'adaptateur d'alimentation et appuyez sur le bouton d'alimentation
2 Finish Windows setup
Terminez l'installation de Windows Enable security and updates Activez la sécurité et les mises à jour
Connect to your network Connectez-vous à votre r&#...