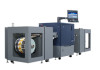
Konica Minolta bizhub PRESS C71cf driver and firmware
Drivers and firmware downloads for this Konica Minolta item
Related Konica Minolta bizhub PRESS C71cf Manual Pages
Download the free PDF manual for Konica Minolta bizhub PRESS C71cf and other Konica Minolta manuals at ManualOwl.com
bizhub PRESS C71cf Safety Information Guide - Page 2
... Configuration and Usage of User's Guides 1-2 Environmental Information...1-3 Legal Restrictions...Main Body 2-2 Power Source Connection ...2-3 Installation...2-4 Using the ...Power Source ...2-32 Operating Environment ...2-32 Clothes for Operating the Machine 2-32 Storage of Printed Materials ...2-32 Ozone Release ...2-32 Direct Sunlight...2-32 Data Stored in This Machine...2-33
bizhub PRESS C71cf...
bizhub PRESS C71cf Safety Information Guide - Page 11
...service representative.
Make sure that the power cord is placed on a site in which no person would step on or trip over it. Stepping on or tripping over the power cord could heat the power cord, resulting in a fire or electric shock.
When the product has been installed... to a lot of vibration and shock. It could drop or fall, causing personal injury or mechanical breakdown.
2-4
bizhub PRESS C71cf
bizhub PRESS C71cf Safety Information Guide - Page 15
... properly.
3 To prevent the machine trouble, do not install the units in the following places:
... oil, or chemical substances may be splashed
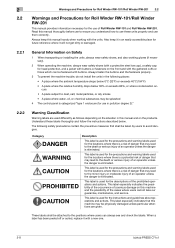
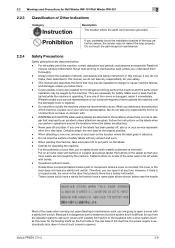
4 The control panel is categorized "type 1 enclosure (for use in... manual and on the products. Understand these labels thoroughly and follow the instructions..., and service.
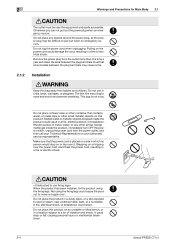
CAUTION
This label is used for the instructions and guidelines...bizhub PRESS C71cf
bizhub PRESS C71cf Safety Information Guide - Page 16
... you from the operation panel to see such covers with a safety limit switch or the locations with a drive system (such as the cover for the feeding shaft) on the front side or the rear side of the machine, the power supply is automatically shut down if one of such covers is opened.
bizhub PRESS C71cf
2-9
bizhub PRESS C71cf Safety Information Guide - Page 17

...instructions described below. - Always stop the machine before feeding or replacing a paper roll with a new one. - Stop the machine before installing...power has... service ...control panel has been closed.
2 Check that the main breaker is [OFF].
3 Check that connectors have been plugged and inserted in the appropriate positions as well as that any wiring breakage is not present.
2-10
bizhub PRESS C71cf
bizhub PRESS C71cf Safety Information Guide - Page 19
... use in the direct field of view at visual display workplaces. To avoid incommoding reflexions at visual display workplaces this device must not be placed in the direct field of view. For U.S.A and Canada Users This product is cTUVus-certified for the Konica Minolta branded model C71cf. Notification for California Customers This product uses a CR Lithium...
bizhub PRESS C71cf Safety Information Guide - Page 39
...machine, observe the precautions described below.
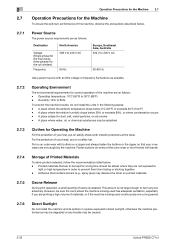
2.7.1
Power Source
The power source requirements are as follows.
Destination
North...tie off wrists with bands.
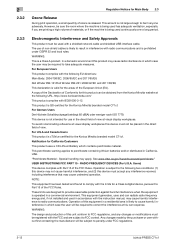
2.7.4
Storage of Printed Materials
To store printed ...install the machine and its options in a place exposed to direct sunlight, otherwise the machine performance may be degraded or any trouble may be caused.
2-32
bizhub PRESS C71cf
bizhub PRESS C71cf Quick Guide - Page 5
bizhub PRESS C71cf
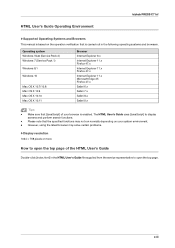
HTML User's Guide Operating Environment
)Supported Operating Systems and Browsers This manual is based on the operation verification that is carried out in the following operating systems and browsers.
Operating system Windows Vista (Service Pack 2) Windows 7 (Service Pack 1)
Windows 8.1
Windows 10
Mac OS X 10.7/10.8 Mac OS X 10.9 Mac OS X 10.10 Mac OS X 10.11
Browser
...
bizhub PRESS C71cf Quick Guide - Page 20
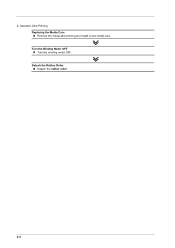
3. Operation After Printing Replacing the Media Core Remove the media after printing and install a new media core. Turn the Winding Motor OFF Turn the winding motor OFF. Detach the Rubber Roller Detach the rubber roller.
2-2
bizhub PRESS C71cf Quick Guide - Page 28
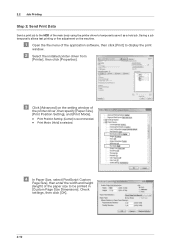
... the machine.
" Open the file menu of the application software, then click [Print] to display the print
window.
# Select the installed printer driver from
[Printer], then click [Properties].
$ Click [Advanced] on the setting window of
the printer driver, then specify [Paper Size], [Print Position Setting], and [Print Mode].
- Print Position Setting: [Center] is recommended. - Print Mode: [Hold] is...
bizhub PRESS C71cf Quick Guide - Page 37

bizhub PRESS C71cf
2.3 Operation After Printing
Step 1: Replace the Media Core
Remove the media after printing and install a new media core. Reference
For details, refer to page 3-20.
Step 2: Idle ...other, detach the rubber rollers on Roll
Winder RW-101/Roll Winder RW-201.
" Press the REWIND MOTOR OFF on the control panel of Roll Winder RW-201.
EMG.RESET
REWIND MOTOR ON
REWIND MOTOR OFF
STOP...
bizhub PRESS C71cf Quick Guide - Page 43
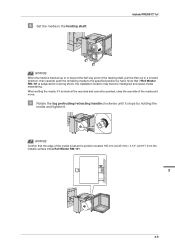
) Set the media in the feeding shaft.
bizhub PRESS C71cf
NOTICE
NOTICE
When the media is inserted up to or beyond the half way point of the feeding ...position by hand. Note that if Roll Winder RW-101 is subjected to a strong shock, the installation location may become misaligned and cause media meandering. When setting the media, if it is stuck at the rear side and cannot be pushed, raise the rear...
bizhub PRESS C71cf Quick Guide - Page 70
4.2 Daily Cleaning
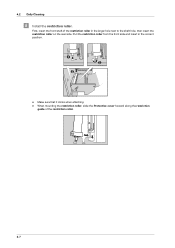
) Install the restriction roller.
First, insert the front shaft of the restriction roller in the larger hole next to the shaft hole, then insert the restriction ... insert in the correct position.
1 3
2
- Make sure that it clicks when attaching. - When mounting the restriction roller, slide the Protective cover forward along the restriction
guide of the restriction roller.
4-7
bizhub PRESS C71cf Quick Guide - Page 71

bizhub PRESS C71cf
*
Install the tension roller 1.
Insert the rear shaft of the tension roller 1 into the hole, align the angle of the media guide to the scratch line of the guide plate in the back side, then insert the front shaft into the hole.
1 2
Make sure that it clicks when attaching.
+ If the position of the...
bizhub PRESS C71cf Quick Guide - Page 88
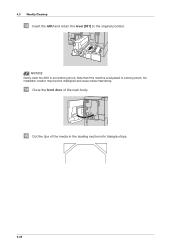
4.3 Weekly Cleaning
. Insert the ADU and return the lever [M1] to the original position.
NOTICE
NOTICE
Gently insert the ADU to avoid strong shock. Note that if the machine is subjected to a strong shock, the installation location may become misaligned and cause media meandering.
/ Close the front door of the main body.
0 Cut the tips of the media in the leading section into triangle strips.
4-25
bizhub PRESS C71cf Quick Guide - Page 108
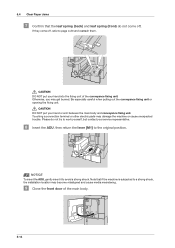
... may damage the machine or cause unexpected trouble. Please do not try to work yourself, but contact your service representative.
) Insert the ADU, then ...return the lever [M1] to the original position.
NOTICE
NOTICE
To insert the ADU, gently insert it to avoid a strong shock. Note that if the machine is subjected to a strong shock, the installation...
bizhub PRESS C71cf Quick Guide - Page 127
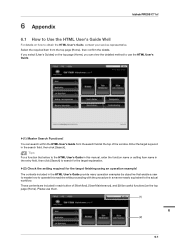
6 Appendix
bizhub PRESS C71cf
6.1 How to Use the HTML User's Guide Well
For details on how to obtain the HTML User's Guide, contact your service representative. Select the required item from the top page (Home), then confirm the details. If you select [User's Guides] on the top page (Home), you can view the detailed method to use the...
bizhub PRESS C71cf Quick Guide - Page 128
...
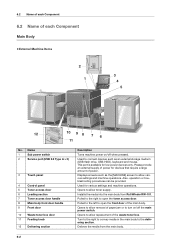
Description
Turns machine power on/off when pressed.
Used to connect devices such as an external storage medium (USB flash drive, USB-HDD), keyboard and mouse. This port is available for low-power devices only. Please provide an external supply of power for devices that require a large amount of power.
Displays screens such as the [MACHINE] screen to allow various settings and machine operations...