Brother International Innov-ís 900D driver and firmware
Drivers and firmware downloads for this Brother International item

Related Brother International Innov-ís 900D Manual Pages
Download the free PDF manual for Brother International Innov-ís 900D and other Brother International manuals at ManualOwl.com
Accessory Catalog - Page 5
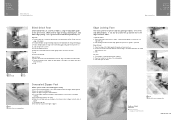
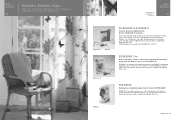
...guide screw, adjust the fabric guide to the edge of the fabric, and lower
the presser foot. 3. Sew.
SA133 ABCDEFJKMN
SA134 GHILOP
SA128 All Brother home-use sewing machines
Concealed Zipper Foot
Allows you to install...at the left side of the center guide. 3. Sew and open the fabric.
SA184 All Brother home-use sewing machines
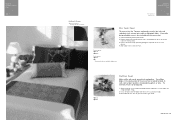
Ring Bearer Pillow & Hankerchief
Innov-is Project Book (See pages 37 ...
Accessory Catalog - Page 7
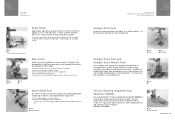
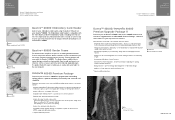
...Brother presser feet. Can be used for stitching heavy fabrics together.
1. Attach the seam guide on the needle plate with the thumbscrew of the seam guide. 2. Adjust the distance and place the right edge of the fabric against the seam guide. 3. Sew.
SA538 AB C:Innov... or small pieces of patchworks. Installing the Straight Stitch Needle Plate automatically sets the needle position to the center...
Accessory Catalog - Page 13
....)
Brother Embellishment
Feet
Pin Tuck Foot
24
Ruffler Foot
Pin Tuck Foot
This presser foot has 7 grooves and produces perfect pin tucks and corded pin tucks using a twin needle on lightweight fabric. A specially designed bobbin cover is also included with this presser foot.
1. Install and manually thread a twin needle. 2. Draw a reference line to guide...
Accessory Catalog - Page 16
... own unique embroidery patterns in the easy steps. Comes with USB card writer, 4M blank memory card and software compatible with Windows 2000 or later. SAVR8.0 Upgrade kit is compatible with PE-DESIGN 5.0, 6.0 & 7.0.
PE-DESIGN® Lite
New to embroidery software? Master basic digitizing and embroidery design work with Brother's easy to use PE-DESIGN® Lite.
PE-DESIGN®...
Accessory Catalog - Page 17
... with QuattroTM 6000D
SABF6000D QuattroTM 6000D
SAVR4000D Innov-is 4000D
QuattroTM 6000D Embroider y Card Reader
Connect your embroidery card reader using the built-in USB port on your QuattroTM 6000D. This Embroidery Card Reader is compatible with the entire library of Brother Embroidery Cards, including licensed content. The simple and easy USB attachment takes seconds to connect and ensures...
Users Manual - English - Page 4

... otherwise, the machine,
power cord or garment being sewn...outdoors.
7 For a longer service life:
• When ...Brother dealer.
Use this machine only for its intended use as described in the manual.
Use accessories recommended by the manufacturer as contained in this manual.
Use only the interface cable (USB cable) included with this machine.
Save these instructions.
The contents of this manual...
Users Manual - English - Page 6
... receiver is
connected. • Consult the dealer or an experienced radio/TV technician for help. • The included interface cable should be used in order to ensure compliance with the limits for a
Class B digital device. • Changes or modifications not expressly approved by Brother Industries, Ltd. could void the user's
authority to operate the equipment...
Users Manual - English - Page 7
...
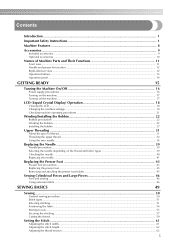
GETTING READY
15
Turning the Machine On/Off 16
Power supply precautions ...16 Turning on the machine ...17 Turning off the machine ...17
LCD (Liquid Crystal Display) Operation 18
Viewing the LCD...18 Changing the machine settings...18 Checking machine operating procedures ...21
Winding/Installing the Bobbin 22
Bobbin precautions ...22 Winding the bobbin...
Users Manual - English - Page 9
... ...166
Using the Memory Function 168
Embroidery data precautions ...168 Saving patterns...169 Retrieving embroidery patterns from the computer 170
APPENDIX
173
Care and Maintenance ...174
Cleaning the machine surface ...174 Cleaning the race ...174
Troubleshooting ...176
Error messages ...181 Adjusting the LCD ...185 Operation beep...185
Upgrading Your Machine's Software 186
Index ...187...
Users Manual - English - Page 14
....
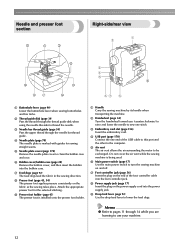
i Presser foot holder (page 45) The presser foot is installed onto the presser foot holder.
a Handle Carry the sewing machine ...card.
d USB port (page 170) Connect the one end of the USB cable to this port and the other to the computer.
e Air vent The air vent allows the air surrounding the motor to be exchanged. Do not cover the air vent while the sewing machine is being used.
f Main power...
Users Manual - English - Page 17
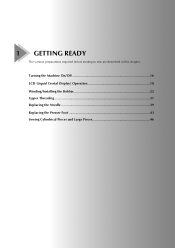
1 GETTING READY
The various preparations required before starting to sew are described in this chapter.
Turning the Machine On/Off 16 LCD (Liquid Crystal Display) Operation 18 Winding/Installing the Bobbin 22 Upper Threading ...31 Replacing the Needle 39 Replacing the Presser Foot 43 Sewing Cylindrical Pieces and Large Pieces 46
Users Manual - English - Page 19
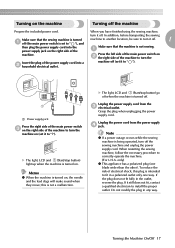
... to another location, be sure to turn it off.
1
a off (the main power switch is set to " "), and
then plug the power supply cord into the power supply jack on the right side of the
Make sure that the machine is not sewing... reverse the plug. If it still does not fit, contact a qualified electrician to install the proper outlet. Do not modify the plug in any way.
Turning the Machine On/Off 17
Users Manual - English - Page 22
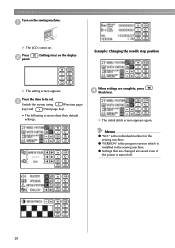
...).
• The following screens show their default settings.
When settings are complete, press d (Back key).
X The initial stitch screen appears again.
Memo
z "NO." is the individual number for the
sewing machine. z "VERSION" is the program version which is
installed in the sewing machine. z Settings that are changed are saved even if
the power is turned off.
20
Users Manual - English - Page 23
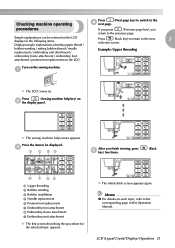
... installation d Needle replacement e Presser foot replacement f Embroidery foot attachment g Embroidery frame attachment h Embroidery unit attachment
X The first screen describing the procedure for the selected topic appears.
X The initial stitch screen appears again.
Memo
z For details on each topic, refer to the corresponding page in this Operation Manual.
LCD (Liquid Crystal Display) Operation...
Users Manual - English - Page 24
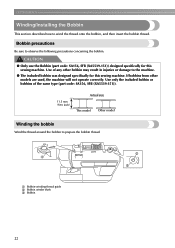
GETTING READY
Winding/Installing the Bobbin
This section describes how to wind the thread onto the bobbin, and then insert the bobbin thread.
Bobbin precautions
Be sure to observe ... (7/16 inch)
Actual size This model Other model
Winding the bobbin
Wind the thread around the bobbin to prepare the bobbin thread.
b a
c
a Bobbin-winding thread guide b Bobbin winder shaft c Bobbin
22
Users Manual - English - Page 170
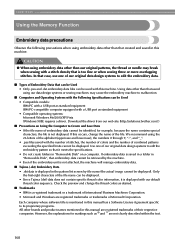
... • Compatible models: IBM PC with a USB port as standard equipment IBM PC-compatible computer equipped with a USB port as standard equipment • Compatible operating systems: Microsoft Windows Me/2000/XP/Vista (Windows 98SE requires a driver. Download the driver from our web site (http://solutions.brother.com).)
■ Precautions on Using the Computer to Create and Save Data • If...
Users Manual - English - Page 175
5 APPENDIX
The various maintenance and troubleshooting procedures are described in this chapter.
Care and Maintenance 174 Troubleshooting ...176 Upgrading Your Machine's Software 186 Index ...187
Users Manual - English - Page 188
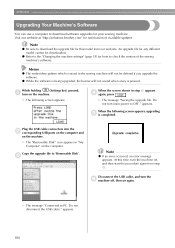
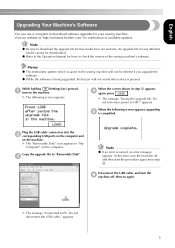
... file. Do not turn main power to OFF." appears.
When the following screen appears, upgrading e is completed.
Plug the USB cable connectors into the b corresponding USB ports on the computer and
on the machine. X The "Removable Disk" icon appears in "My
Computer" on the computer.
Copy the upgrade file to "Removable Disk".
c
Note
z If an error occurred, an error message appears. At this time...
USB USER GUIDE - Multi - Page 4
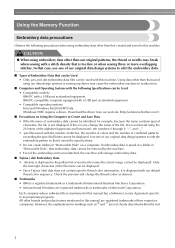
... • Compatible models: IBM PC with a USB port as standard equipment IBM PC-compatible computer equipped with a USB port as standard equipment • Compatible operating systems: Microsoft Windows Me/2000/XP/Vista (Windows 98SE requires a driver. Download the driver from our web site (http://solutions.brother.com).)
■ Precautions on Using the Computer to Create and Save Data • If...
USB USER GUIDE - Multi - Page 7
... file. Do not turn main power to OFF." appears.
When the following screen appears, upgrading e is completed.
Plug the USB cable connectors into the b corresponding USB ports on the computer and
on the machine. X The "Removable Disk" icon appears in "My
Computer" on the computer.
Copy the upgrade file to "Removable Disk".
c
Note
z If an error occurred, an error message appears. At this time...