Dell 810 driver and firmware
Related Dell 810 Manual Pages
Download the free PDF manual for Dell 810 and other Dell manuals at ManualOwl.com
Owners Manual - Page 13
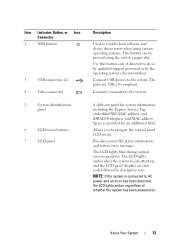
... USB devices to the system. The ports are USB 2.0-compliant.
Connects a monitor to the system.
A slide-out panel for system information including the Express Service Tag, embedded NIC MAC address, and iDRAC6 Enterprise card MAC address. Space is provided for an additional label.
Allows you to navigate the control panel LCD menu.
Provides system ID, status information, and system error messages...
Owners Manual - Page 20
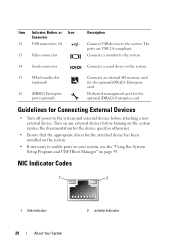
...are USB 2.0-compliant. Connects a monitor to the system.
14 Serial connector
Connects a serial device to the system.
15 VFlash media slot (optional)
16 iDRAC6 Enterprise port (optional)
Connects an external SD memory card for the optional iDRAC6 Enterprise card.
Dedicated management port for the optional iDRAC6 Enterprise card.
Guidelines for Connecting External Devices
• Turn off power...
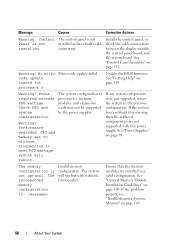
Owners Manual - Page 41
... PSU and system configuration.
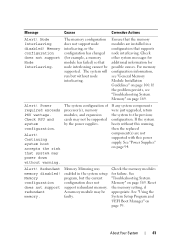
Alert! Continuing system boot accepts the risk that system may power down without warning.
The system configuration of processor(s), memory modules, and expansion cards may not be supported by the power supplies.
If any system components were just upgraded, return the system to the previous configuration. If the system boots without this warning...
Owners Manual - Page 42
... installed on system board
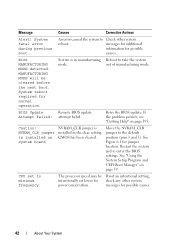
NVRAM_CLR jumper is installed in the clear setting. CMOS has been cleared.
Move the NVRAM_CLR jumper to the default position (pins 3 and 5). See Figure 6-1 for jumper location. Restart the system and re-enter the BIOS settings. See "Using the System Setup Program and UEFI Boot Manager" on page 59.
CPU set to minimum frequency.
The processor...
Owners Manual - Page 43
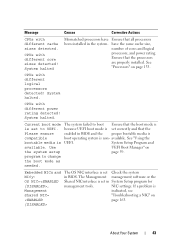
... processors are properly installed. See "Processors" on page 133.
CPUs with different logical processors detected! System halted.
CPUs with different power rating detected! System halted.
Current boot mode The system failed to boot Ensure that the boot mode is
is set to UEFI. because UEFI boot mode is set correctly and that the
Please ensure
enabled in BIOS...
Owners Manual - Page 55
... in the system
latest software to restore full
firmware or has been lost due functionality. See the
to system board replacement. Lifecycle Controller user
documentation for more
information.
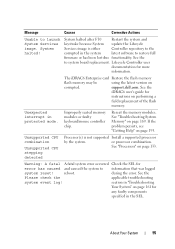
The iDRAC6 Enterprise card Restore the flash memory
flash memory may be
using the latest version on
corrupted.
support.dell.com. See the
iDRAC6 user's guide for
instructions on performing a
field...
Owners Manual - Page 56
... the display module,
the control panel board, and
the system board. See
"Control Panel Assembly" on
page 152.
Warning! No micro Micro code update failed. code update loaded for processor n
Update the BIOS firmware. See "Getting Help" on page 195.
Warning! Power required exceeds PSU wattage. Check PSU and system configuration.
Warning! Performance degraded. CPU and memory set to minimum...
Owners Manual - Page 58
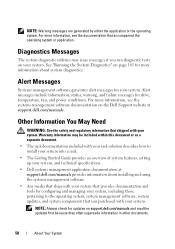
... your system into a rack.
• The Getting Started Guide provides an overview of system features, setting up your system, and technical specifications.
• Dell systems management application documentation at support.dell.com/manuals provides information about installing and using the systems management software.
• Any media that ships with your system that provides documentation...
Owners Manual - Page 59
... hardware configuration
• Enable or disable integrated devices
• Set performance and power management thresholds
• Manage system security
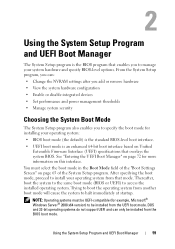
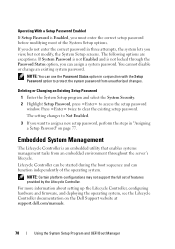
Choosing the System Boot Mode
The System Setup program also enables you to specify the boot mode for installing your operating system:
• BIOS boot mode (the default) is the standard BIOS-level boot interface.
• UEFI boot...
Owners Manual - Page 60
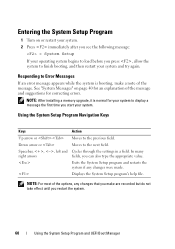
... "System Messages" on page 40 for an explanation of the message and suggestions for correcting errors.
NOTE: After installing a memory upgrade, it is normal for your system to display a message the first time you start your system.
Using the System Setup Program Navigation Keys
Keys
Action
Up arrow or Moves to the previous field.
Down arrow...
Owners Manual - Page 64
..., memory interleaving is supported if a symmetric memory configuration is installed. If Disabled, the system supports Non-Uniform Memory architecture (NUMA) (asymmetric) memory configurations.
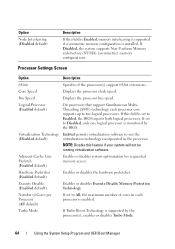
Processor Settings Screen
Option
Description
64-bit
Specifies if the processor(s) support 64-bit extensions.
Core Speed
Displays the processor clock speed.
Bus Speed
Displays the processor bus speed...
Owners Manual - Page 65
... available power states.
Displays the family and model number of each processor. A submenu displays the core speed, the amount of cache memory, and the number of cores of the processor(s).
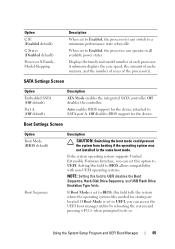
SATA Settings Screen
Option
Embedded SATA (Off default)
Port A (Off default)
Description
ATA Mode enables the integrated SATA controller. Off disables the controller.
Auto enables BIOS support for the device...
Owners Manual - Page 66
... type for a USB flash drive. If Boot Mode is set to UEFI, this field is disabled.
If this field is enabled and the system has failed to boot, the system reattempts to boot after 30 seconds.
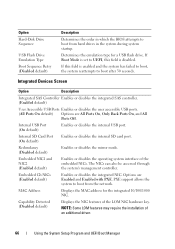
Integrated Devices Screen
Option
Description
Integrated SAS Controller Enables or disables the integrated SAS controller. (Enabled default)
User Accessible USB Ports Enables or...
Owners Manual - Page 72
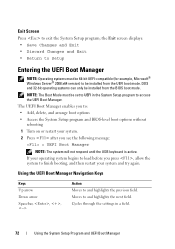
... 64-bit UEFI-compatible (for example, Microsoft® Windows Server® 2008 x64 version) to be installed from the UEFI boot mode. DOS and 32-bit operating systems can only be installed from the BIOS boot mode.
NOTE: The Boot Mode must be set to UEFI in the System Setup program to access the UEFI Boot Manager.
The...
Owners Manual - Page 78
... platform configurations may not support the full set of features provided by the Lifecycle Controller.
For more information about setting up the Lifecycle Controller, configuring hardware and firmware, and deploying the operating system, see the Lifecycle Controller documentation on the Dell Support website at support.dell.com/manuals.
78
Using the System Setup Program and UEFI Boot Manager
Owners Manual - Page 81
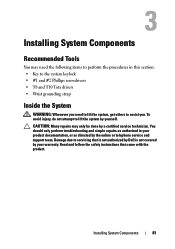
... should only perform troubleshooting and simple repairs as authorized in your product documentation, or as directed by the online or telephone service and support team. Damage due to servicing that is not authorized by Dell is not covered by your warranty. Read and follow the safety instructions that came with the product.
Installing System Components
81
Owners Manual - Page 87
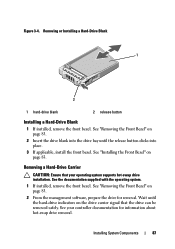
... operating system supports hot-swap drive installation. See the documentation supplied with the operating system.
1 If installed, remove the front bezel. See "Removing the Front Bezel" on page 83.
2 From the management software, prepare the drive for removal. Wait until the hard-drive indicators on the drive carrier signal that the drive can be removed safely. See your controller documentation...
Owners Manual - Page 108

... peripherals to their power sources, and turn
them on.
Cooling Fans
Your system contains six hot-swappable fans mounted in a cooling fan assembly and provides cooling for the processors, expansion cards, and memory modules.
NOTE: In the event of a problem with a particular fan, the fan number is referenced by the system's management software, allowing you...
Owners Manual - Page 134
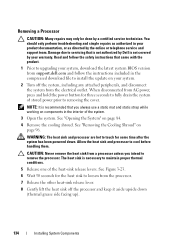
... online or telephone service and support team. Damage due to servicing that is not authorized by Dell is not covered by your warranty. Read and follow the safety instructions that came with the product.
1 Prior to upgrading your system, download the latest system BIOS version from support.dell.com and follow the instructions included in the compressed download file to install the update on your...
Owners Manual - Page 174
...cartridge.
3 Ensure that the device drivers for the tape drive are installed and are configured correctly. See your tape drive documentation for more information about device drivers.
4 Ensure that the tape drive's interface cable is fully connected to the external port on the controller card.
5 For SCSI tape drives, verify that the tape drive is configured for a unique SCSI ID number and that the...