Epson C130001 - LX 300 B/W Dot-matrix Printer driver and firmware
Drivers and firmware downloads for this Epson item

Related Epson C130001 Manual Pages
Download the free PDF manual for Epson C130001 and other Epson manuals at ManualOwl.com
Technical Brief (Impact Printers) - Page 4
...51/4.0, Windows 95 and Windows 98 drivers guarantees ease of use right out of the box.
L
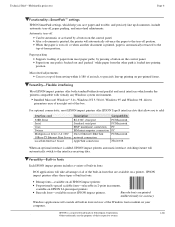
For optional connectivity, most EPSON impact printers offer EPSON Type B interface slots that allow you to add:
Interface card
32KB Serial Serial Coax Twinax Multiprotocol Series 2 & 100/ 10Base-TX Ethernet Print Server LocalTalk Interface board
Description
RS-232C serial port Standard serial port IBM®...
Technical Brief (Impact Printers) - Page 5
Technical Brief-Multimedia projectors
Page 5
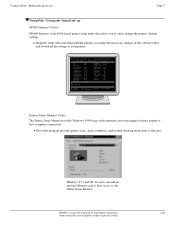
Versatility-Computer-based set-up
EPSON Remote! Utility
EPSON Remote! is the DOS-based printer setup utility that allows you to easily change the printer's default settings.
Simplifies setup when installing multiple printers-just make the necessary changes in the software utility, and download the settings to each printer
L
EPSON Remote! Start UP ...
Product Information Guide - Page 5
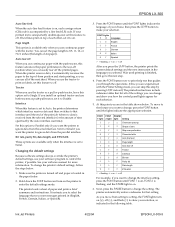
...only when the interface is set to Serial.
Changing the default settings
Because software settings always override the printer's default settings, use your software program to control the printer, if possible. See your software manual for more information. To change the printer's default settings, follow the steps below:
1. Make sure the printer is turned off and paper is loaded in the paper feeder...
Product Information Guide - Page 8
... installation or setup menu that presents a list of printers.
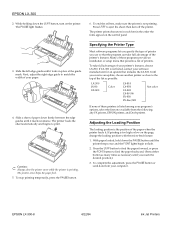
To take full advantage of your printer's features, choose LX-300. If LX-300 is not listed, contact your software manufacturer for an update that includes the LX-300. Until you receive an update, choose another printer as close to the top of the list as possible.
LX-300 JX-80 EX-800
Color
LX-810 LX-850 LX-800 LX...
Product Information Guide - Page 11
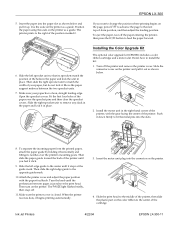
...ý8SJUDGHý.LWý
The optional color upgrade kit (C832081) includes a color ribbon cartridge and a motor unit. Here's how to install the kit: 1. Turn off the printer and remove the printer cover. Slide the
connector cover on the printer and pull it out as shown below.
2. Install the motor unit in the right hand corner...
User Manual - Page 8
...1-4 Attaching the paper supports 1-5 Installing the ribbon cartridge 1-5 Plugging in the printer 1-9
Running the Self Test 1-10 Connecting the Printer to Your Computer 1-13
Using the parallel interface 1-13 Using the serial interface 1-15 Setting Up Your Software 1-16 Microsoft ® Windows ™ 3.1 and all Windows programs . . . . 1-17 Using non-Windows software 1-18
Chapter 2 Using...
User Manual - Page 9
...Printer Settings Printer setting ...Installing and Using Options Cut-sheet feeder Pull Tractor unit Roll paper holder Color upgrade kit
2-7 2-7 2-11 2-11 2-15 2-16 2-17 2-17 2-18 2-19 2-22 2-22 2-22 2-22 2-23 2-23 2-23 2-23 2-23 2-24 2-24 2-24 2-24 2-28 2-29 2-31
Chapter 3 Troubleshooting
Problems and Solutions 3-2 Power Supply 3-2
Power is not being supplied 3-2 Printing 3-3
The printer...
User Manual - Page 10
...properly 3-10 With color upgrade kit installed, printer doesn't operate properly 3-10
Appendix
Printer Specifications A-2 Printing A-2 Paper A-3 Mechanical A-6 Electrical A-6 Environmental A-7 Safety approvals A-7
Interface Specifications A-7 Parallel interface specifications A-7 Serial interface specifications A-8 Serial pin assignments A-8
Printer Settings A-9 Command Summary A-10...
User Manual - Page 16
... the paper-feed knob 1-4 Attaching the paper supports 1-5 Installing the ribbon cartridge 1-5 Plugging in the printer 1-9
Running the Self Test 1-10 Connecting the Printer to Your Computer 1-13
Using the parallel interface 1-13 Using the serial interface 1-15 Setting Up Your Software 1-16 Microsoft Windows 3.1 and all Windows programs 1-17 Using non-Windows software 1-18
Setting Up the...
User Manual - Page 31
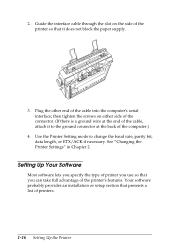
... the computer.)
4. Use the Printer Setting mode to change the baud rate, parity bit, data length, or ETX/ACK if necessary. See "Changing the Printer Settings" in Chapter 2.
Setting Up Your Software
Most software lets you specify the type of printer you use so that you can take full advantage of the printer's features. Your software probably provides an installation or setup section...
User Manual - Page 32
... or Epson LX-810, LX-850, or LX-800 if you do not plan to use color.
5. Choose the Install button. A dialog box may instruct you to insert a diskette.
6. If necessary, insert the diskette required.
7. Choose the Setup button.
8. Select the appropriate resolution.
9. Choose the OK button.
10. Highlight Epson LX-300 (or the printer you added) and click the button labeled Set...
User Manual - Page 33
... color, you must choose either LX-300, JX-80, or EX-800. The other printers cannot use color.
LX-810/850 LX-800 LX-80/86 FX-850 FX-86e/800
JX-80 EX-800 Any FX printer Epson printer Draft printer
If your software does not list the LX-300, you may want to contact the software manufacturer for an update.
1-18 Setting Up the...
User Manual - Page 34
Chapter 2
Using the Printer
Using the Control Panel 2-2 Lights and buttons 2-2 Selecting fonts 2-4
Printing on Single Sheets 2-5
Loading single sheets 2-5
Getting the results you expect...forms 2-17 Labels 2-17 Envelopes 2-18
Changing the Printer Settings 2-19 Printer setting descriptions 2-22
Installing and Using Options 2-24 Cut-sheet feeder 2-24 Pull Tractor unit 2-28 Roll paper...
User Manual - Page 39
... right results. Simply change some of the settings in your software program as described below.
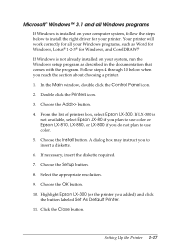
1. When you install a software program, it normally asks you what printer you are using. Make sure you choose the correct printer. See Chapter 1 for instructions.
2. Many programs have an option that you can use to set the maximum lines-per-page. If you...
User Manual - Page 64
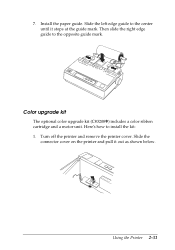
7. Install the paper guide. Slide the left edge guide to the center until it stops at the guide mark. Then slide the right edge guide to the opposite guide mark.
Color upgrade kit
The optional color upgrade kit (C83208V) includes a color ribbon cartridge and a motor unit. Here's how to install the kit: 1. Turn off the printer and remove the printer cover. Slide...
User Manual - Page 67
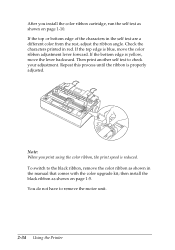
After you install the color ribbon cartridge, run the self test as shown on page 1-10. If the top or bottom edge of the characters ... color ribbon, the print speed is reduced. To switch to the black ribbon, remove the color ribbon as shown in the manual that comes with the color upgrade kit; then install the black ribbon as shown on page 1-5. You do not have to remove the motor unit.
2-34 Using the...
User Manual - Page 68
Chapter 3
Troubleshooting
Problems and Solutions 3-2
Power Supply 3-2 Power is not being supplied 3-2
Printing 3-3 The printer does not print 3-3 The print is faint or uneven 3-4 Dots are missing in printed characters or graphics 3-4 Printed characters are...
paper does not feed properly 3-10
With color upgrade kit installed, printer doesn't operate
properly 3-10
Troubleshooting 3-1
User Manual - Page 70
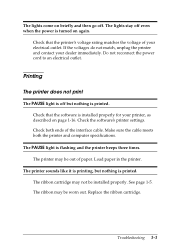
.... Check that the software is installed properly for your printer, as described on page 1-16. Check the software's printer settings. Check both ends of the interface cable. Make sure the cable meets both the printer and computer specifications.
The PAUSE light is flashing and the printer beeps three times. The printer may be out of paper. Load paper in the printer.
The printer sounds like it...
User Manual - Page 77
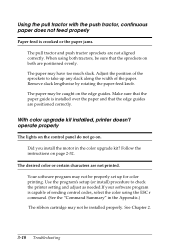
... in the color upgrade kit? Follow the instructions on page 2-32.
The desired color or certain characters are not printed.
Your software program may not be properly set up for color printing. Use the program's setup (or install) procedure to check the printer setting and adjust as needed.If your software program is capable of sending control codes, select the...
User Manual - Page 95
..., 3-2 Pull tractor, 2-11-15 Push tractor, 2-7-11
R
Ribbon installing, 1-5-8 replacing, 1-8
Roll paper holder, 2-29-31 Running self test, 1-10-12
S
Safety information, v-vi, 3-4 Selecting fonts, 2-4 Self test, 1-10-12 Sending printer commands, A-10 Serial interface, 1-15-16 Setting up
the printer, 1-2-16 your software, 1-16-18 Settings, changing printer, 2-19-24 Shape of zero, 2-22 Single sheets...