Brother International Duetta 4500D driver and firmware
Drivers and firmware downloads for this Brother International item


Related Brother International Duetta 4500D Manual Pages
Download the free PDF manual for Brother International Duetta 4500D and other Brother International manuals at ManualOwl.com
Accessory Catalog - Page 16
... own unique embroidery patterns in the easy steps. Comes with USB card writer, 4M blank memory card and software compatible with Windows 2000 or later. SAVR8.0 Upgrade kit is compatible with PE-DESIGN 5.0, 6.0 & 7.0.
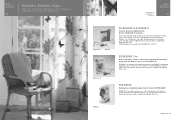
PE-DESIGN® Lite
New to embroidery software? Master basic digitizing and embroidery design work with Brother's easy to use PE-DESIGN® Lite.
PE-DESIGN®...
Accessory Catalog - Page 17
... QuattroTM 6000D
SAVR4000D Innov-is 4000D
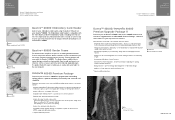
QuattroTM 6000D Embroider y Card Reader
Connect your embroidery card reader using the built-in USB port on your QuattroTM 6000D. This Embroidery Card Reader is compatible with the entire library of Brother Embroidery Cards, including licensed content. The simple and easy USB attachment takes seconds to connect and ensures your treasured collection...
Software Users Manual/4.0 Operation Manual - English - Page 3
...
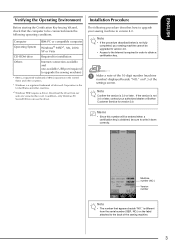
It is important to perform the upgrade according to the procedure described in the Installation Guide. The machine can then be used as described in the Operation Manual. New machine features and benefits are described in this guide.
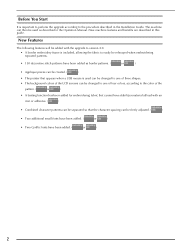
New Features
The following features will be added with the upgrade to version 4.0.
• A border embroidery frame is included...
4.0 Installation Manual - English - Page 4
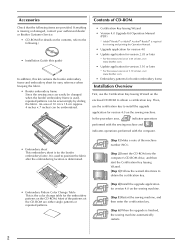
... of CD-ROM
• Certification Key Issuing Wizard
• Version 4.0 Upgrade Kit Operation Manual (PDF)
* Adobe® Reader® or Adobe® Acrobat® Reader® is required for viewing and printing the Opreation Manual.
• Upgrade application for version 4.0
• Update application for version 2.03 or later
* For the newest version of 2.03 or later, visit www.brother.com...
4.0 Installation Manual - English - Page 5
... for installation
Internet connection available and one available USB port (required to upgrade the sewing machine)
* IBM is a registered trademark of IBM Corporation in the United States and other countries.
* Windows is a registered trademark of Microsoft Corporation in the United States and other countries.
*1 Windows 98SE requires a driver. Download the driver from our web site (www.brother...
4.0 Installation Manual - English - Page 6

....
e
Read the information that appears, and then click Next.
c Open drive D (when drive D is the CD-ROM drive) of My Computer, double-click , and then start the Certification Key Issuing Wizard.
Memo
•... 15-digit CD key found on the label attached to the CD case of the upgrade kit, and
then click Next.
d
Select the desired language, and then click OK.
→ Version 4.0 Certification...
4.0 Installation Manual - English - Page 8
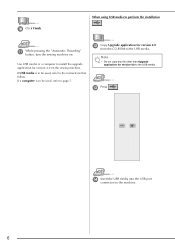
... USB media or a computer to install the upgrade application for version 4.0 on the sewing machine.
If USB media is to be used, refer to the instructions that follow. If a computer is to be used, refer to page 7.
l
Copy Upgrade application for version 4.0 from the CD-ROM to the USB media.
Note
• Do not copy any file other than Upgrade application for version 4.0 to the USB media...
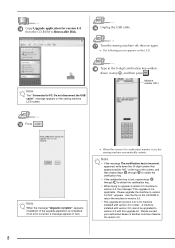
4.0 Installation Manual - English - Page 9

...perform the installation
l Press
.
Note
When the message "Upgrade complete". appears, installation of the upgrade application is completed. (If an error occurred, a message appears in red.)
p Remove the USB media. Continue with step q on page 8.
m
Plug the USB cable connectors into the corresponding USB port connectors for the
computer and for the machine.
→ Removable Disk appears in...
4.0 Installation Manual - English - Page 10
n
Copy Upgrade application for version 4.0 from the CD-ROM to Removable Disk.
p Unplug the USB cable.
q Turn the sewing machine off, then on again.
→ The following screen appears on the LCD.
Note
The "Connected to PC. Do not disconnect the USB cable". message appears on the sewing machine LCD screen.
r Type in the 8-digit certification key written down in step...
Users Manual - English - Page 6
... correct installation. 5. Use only the interface cable (USB cable) included with this machine.
For repair or adjustment In the event a malfunction occurs or adjustment is required, first follow the troubleshooting table in the back of the operation manual to inspect and adjust the machine yourself. If the problem persists, please consult your local authorized Brother dealer...
Users Manual - English - Page 11
... Mirror Image 183
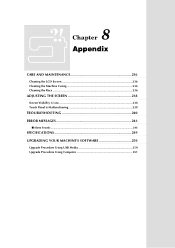
SPECIFICATIONS 249 UPGRADING YOUR MACHINE'S SOFTWARE. 250
4
Upgrade Procedure Using USB Media 250 Upgrade Procedure Using Computer 251
STITCH SETTING CHART 253 Index 260
5
Changing the Density (Alphabet Character and Frame
Patterns Only 183
Changing the Colors of Alphabet Character Patterns............184
USING THE MEMORY FUNCTION 185
Embroidery Data Precautions...
Users Manual - English - Page 29
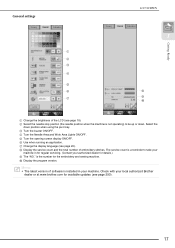
General settings
a b c d e f g
LCD SCREEN
1
h i j
Getting Ready
a Change the ...servicing. (Contact your authorized dealer for details.) i The "NO." is the number for the embroidery and sewing machine. j Display the program version.
Memo
• The latest version of software is installed in your machine. Check with your local authorized Brother dealer or at www.brother.com for available updates...
Users Manual - English - Page 146
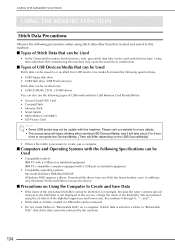
...USB Devices/Media that can be Used
Stitch data can be saved to or recalled from USB media. Use media that meets the following specifications. • USB Floppy disk drive • USB Flash drive (USB Flash memory) Stitch data can be recalled only. • USB CD-ROM, CD-R, CD-RW drives You can also use the following types of USB media with the USB Memory Card Reader/Writer. • Secure Digital...
Users Manual - English - Page 147
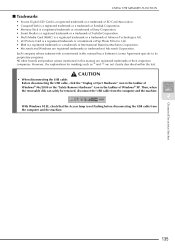
... the taskbar of Windows® Me/2000 or the "Safely Remove Hardware" icon in the taskbar of Windows® XP. Then, when the removable disk can safely be removed, disconnect the USB cable from the computer and the machine.
4
With Windows 98 SE, check that the Access lamp is not flashing before disconnecting the USB cable from the computer and the...
Users Manual - English - Page 198
... MEMORY FUNCTION
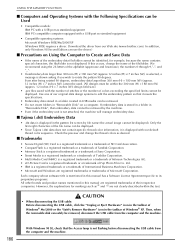
I Computers and Operating Systems with the Following Specifications can be Used
• Compatible models: IBM PC with a USB port as standard equipment IBM PC-compatible computer equipped with a USB port as standard equipment
• Compatible operating systems: Microsoft Windows 98SE/Me/2000/XP (Windows 98SE requires a driver. Download the driver from our Web site (www.brother...
Users Manual - English - Page 247
... Cleaning the Machine Casing 236 Cleaning the Race 236
ADJUSTING THE SCREEN 238
Screen Visibility is Low 238 Touch Panel is Malfunctioning 238
TROUBLESHOOTING 240 ERROR MESSAGES 243
I Alarm Sounds ...248
SPECIFICATIONS 249 UPGRADING YOUR MACHINE'S SOFTWARE 250
Upgrade Procedure Using USB Media 250 Upgrade Procedure Using Computer 251
Users Manual - English - Page 262
... YOUR MACHINE'S SOFTWARE
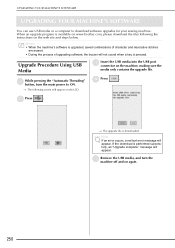
UPGRADING YOUR MACHINE'S SOFTWARE
You can use USB media or a computer to download software upgrades for your sewing machine. When an upgrade program is available on www.brother.com, please download the files following the instructions on the web site and steps below.
Memo
• When the machine's software is upgraded, saved combinations of character and decorative...
Users Manual - English - Page 263
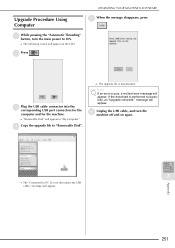
..." button, turn the main power to ON.
→ The following screen will appear on the LCD.
b Press
.
c
Plug the USB cable connector into the corresponding USB port connectors for
the
computer and for the machine.
→ "Removable Disk" will appear in "My Computer".
d Copy the upgrade file to "Removable Disk".
→ The upgrade file is downloaded.
Note
If an error occurs, a red text...
Users Manual - English - Page 264

UPGRADING YOUR MACHINE'S SOFTWARE
252
Users Manual - English - Page 274
.../decorative stitches 136
computer 139, 190
embroidery patterns 187
machine's memory 136, 187
MY CUSTOM STITCH designs 233 stitch settings 60
USB media 138, 189
utility stitches 60 Scallop stitches 92 Set key 229 Settings
automatic reinforcement stitching 51
automatic thread cutting 52, 175
display language 20 embroidery settings 18 general settings 17
machine setting mode key 16...